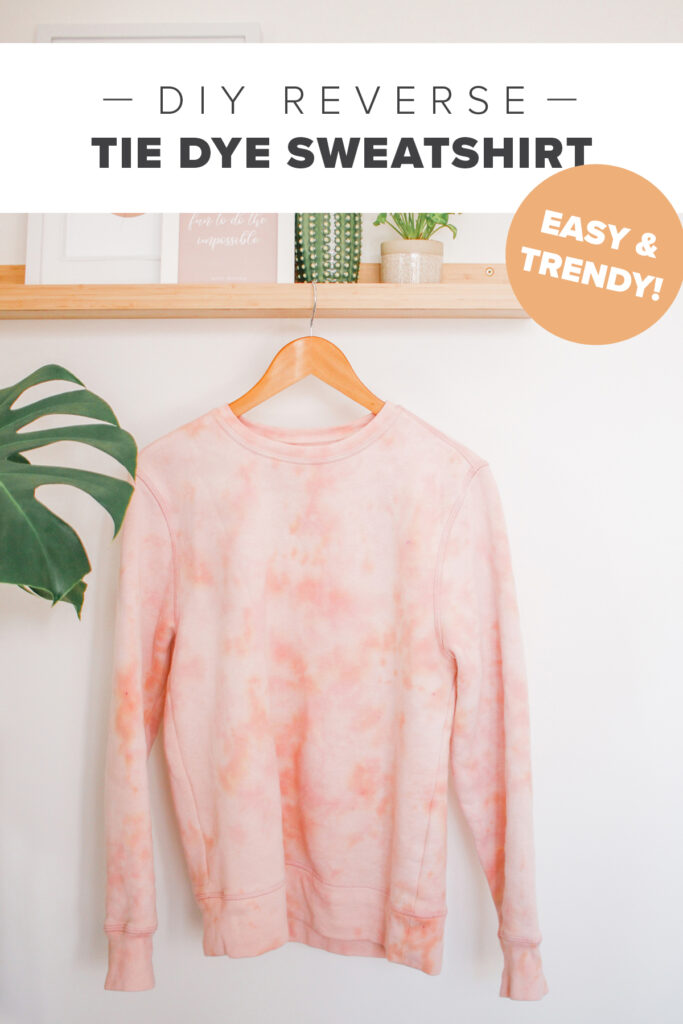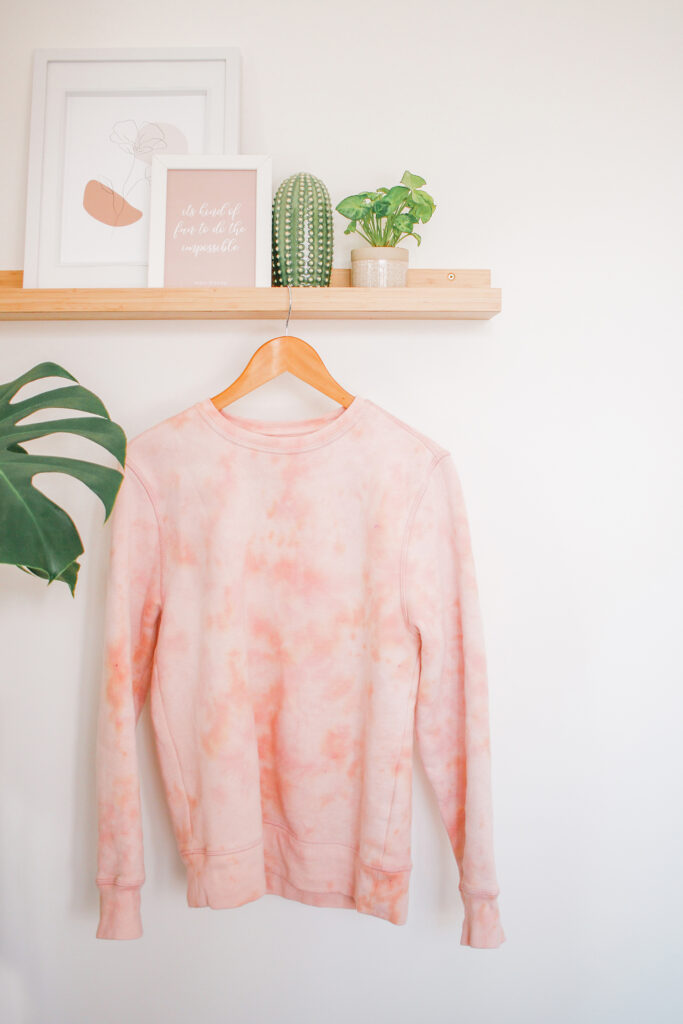
DIY Reverse Tie Dye Sweatshirt
Hey there! 2020 and 2021 have seriously been the years of tie dye! You’ve most likely tie dyed or bought something that was tie dyed… I mean, I own an embarrassing number of tie-dyed items – ha! So, if you still love tie dye but want more of a different and trendier look then you neeeed to try reverse tie dye combined with regular tie dye!! It is so easy but looks amazing!

If you’re not familiar with what reverse tie dye is, it is tie dyeing something with bleach, so you are taking away color instead of adding color. You’ll see this a lot on black clothing, but I did mine on pink and I just love the unique look of it!
PS. I have done a TON of tie dye DIYs: Throw Pillows, Plant Napkins, Men’s Tie Dye, A Dress, A Lounge Set, and Another One, A Wall Hanging, and a Cropped Hoodie…but probably lots more – told you I’m addicted 😉
But I didn’t just stop at reverse dyeing it – after I did that, I added regular tie dye on top of my bleached sweater which made it look so fun and different! It gave it a store-bought vibe!
Anyways, I used my fave – Tulip’s Tie Dye Kits to bring it to life! I started with their reverse tie dye kit (which is so easy to use) and then used their pretty ombre kit after that! I LOVE the colors in the ombre kit – pastel dreams!
Even though the result is pretty unique, it’s simple to make, just has a couple more steps than regular tie dye, so let’s get started!!
SUPPLIES
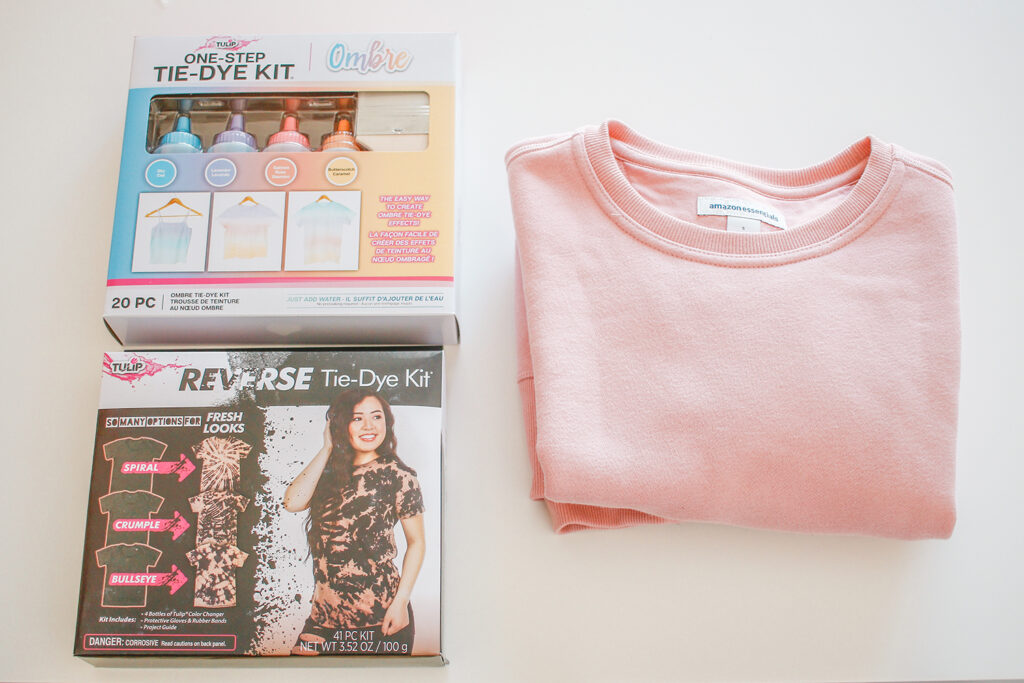
100% Cotton Colored Sweatshirt
This one (Will work better with the bleach) or This one
Garbage Bag or Drop Cloth
Spray Bottle
DIRECTIONS
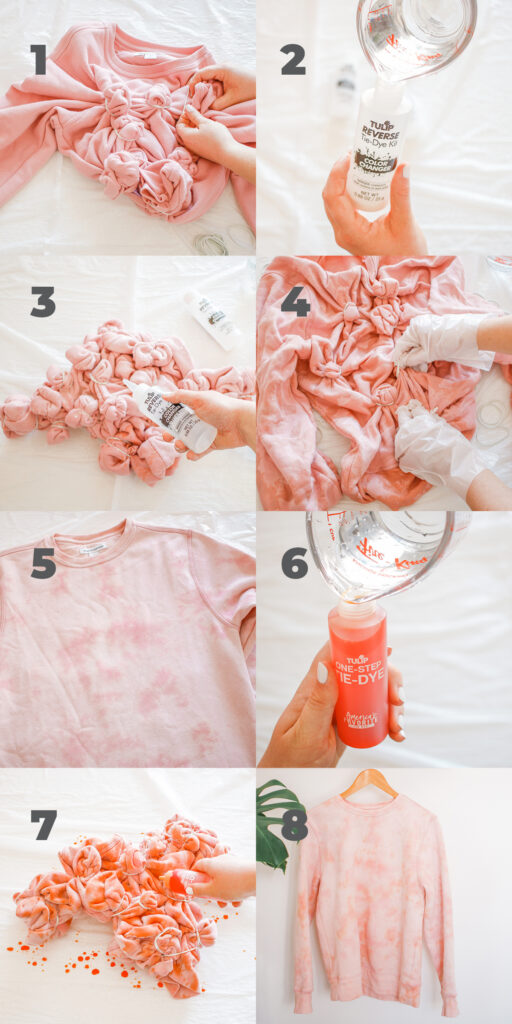
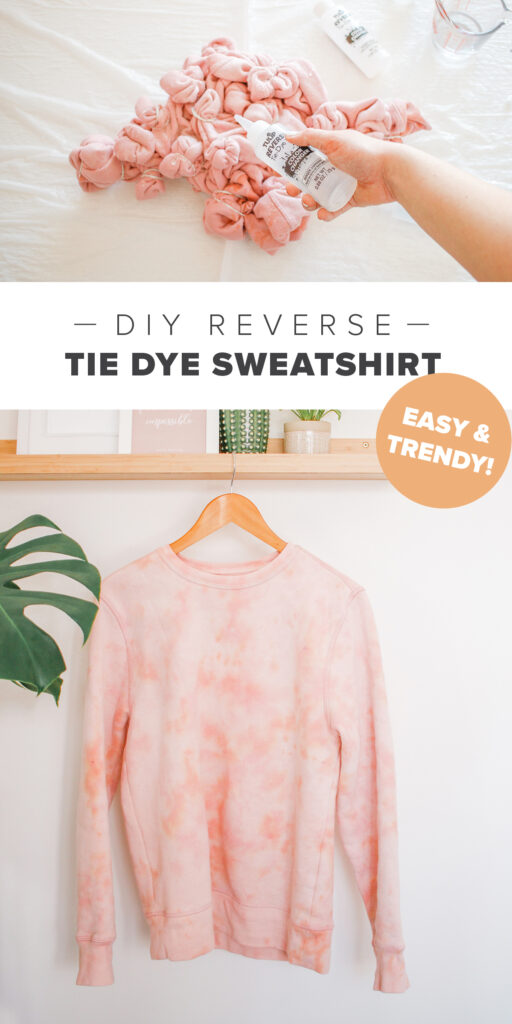
- Bunch up your sweater and use your elastics to secure in place. I would grab small sections of the sweater and wrap an elastic around it so that it formed little balls. I started on the front of the sweatshirt, and then flipped it over and added elastics to the other side. Make sure not to overthink it – tie dye is very forgiving!
- Add warm water to your bleach bottles from your Tulip Reverse Tie Dye Kit. Then shake them up until the powder is dissolved.
- Add the bleach to the front and back of your sweater. Be sure to wear gloves (I also covered my workspace in a garbage bag).
- Remove the elastic bands, then wash and dry your sweater.
- Once it’s dry, bunch it up again using the same technique as last time (front and back). I also sprayed it with some water to get it a little damp so that it absorbs the dye better.
- Choose your tie dye colors – I used the ‘Butterscotch’ color. Then add water to your tie dye bottle and shake until the powder is dissolved.
- Add the dye to the front and back of your sweater, then remove the elastics. My FAVE tie dye tip is that instead of waiting 6 to 8 hours for the dye to set you can microwave it for 2 minutes *mind blown*! After that you can wash and dry it.
- YAY, YAY! You’re done! Enjoy your new sweatshirt!

Ah! I’m so happy with how it turned out! Dyeing a colored sweater really gives such a different look then just tie-dyeing white clothing like usual!! Anyways, if you make your own reverse tie dye project be sure to tag or DM me @mikylacreates on Instagram so that I can see! And check out ALLLL of Tulip Color’s amazing tie dye kits – I’ve used them a TON and love them every time!! I won’t use any other tie dye! Okay, see yah next week!
This post “DIY Reverse Tie Dye Sweatshirt” was created in partnership with Tulip Color. All content and opinions are my own! Thank you for supporting the sponsors that help keep Mikyla Creates going!!