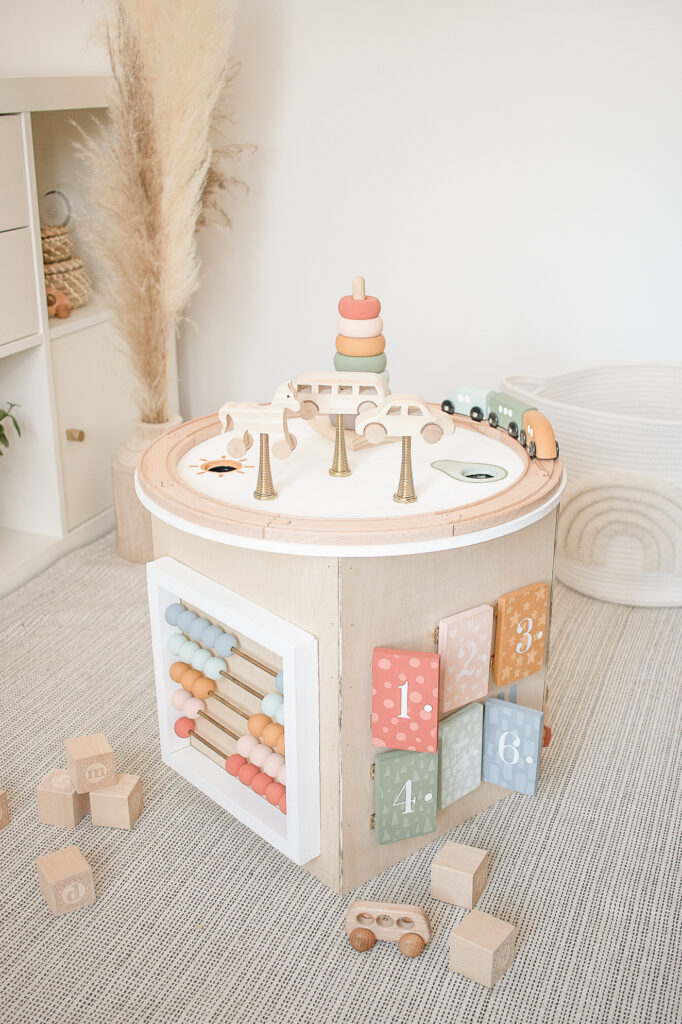
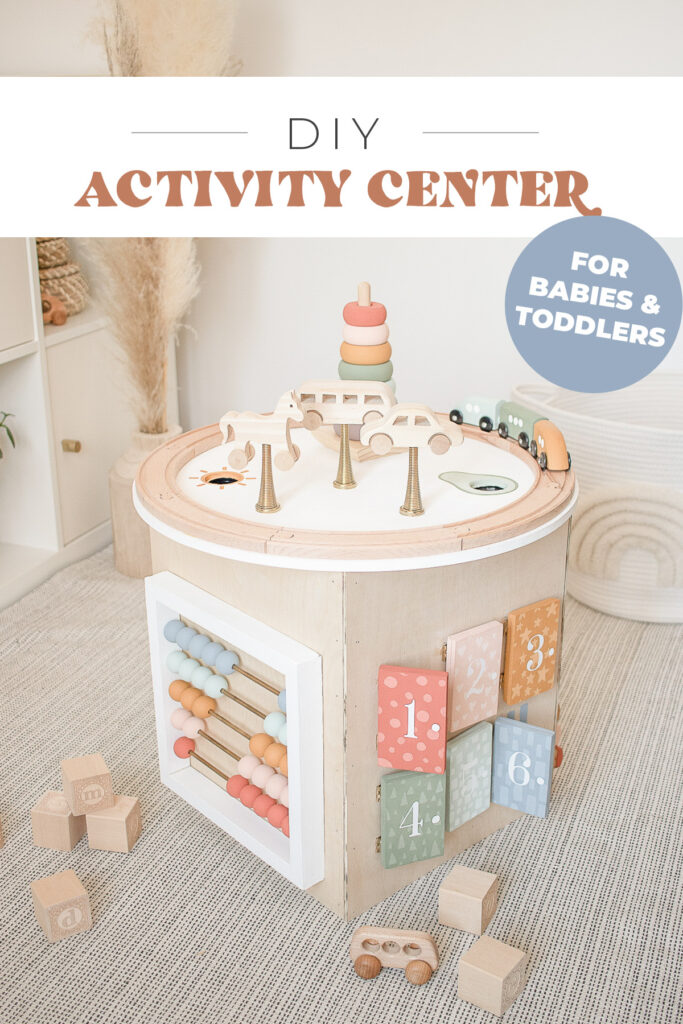
DIY Activity Cube Center for Babies and Toddlers
Wow, wow, wow, I can’t believe I finally get to post this! It’ been a long time coming, and is probably (read: definitely) the most intense DIY on the blog! It was a true labour of love, but I am SO, SO happy with how it turned out!!
PS. Check out these DIY Pacifiers Clips, this Neutral Baby Nursery, this Baby Gift Guide, and this Newborn Essentials List
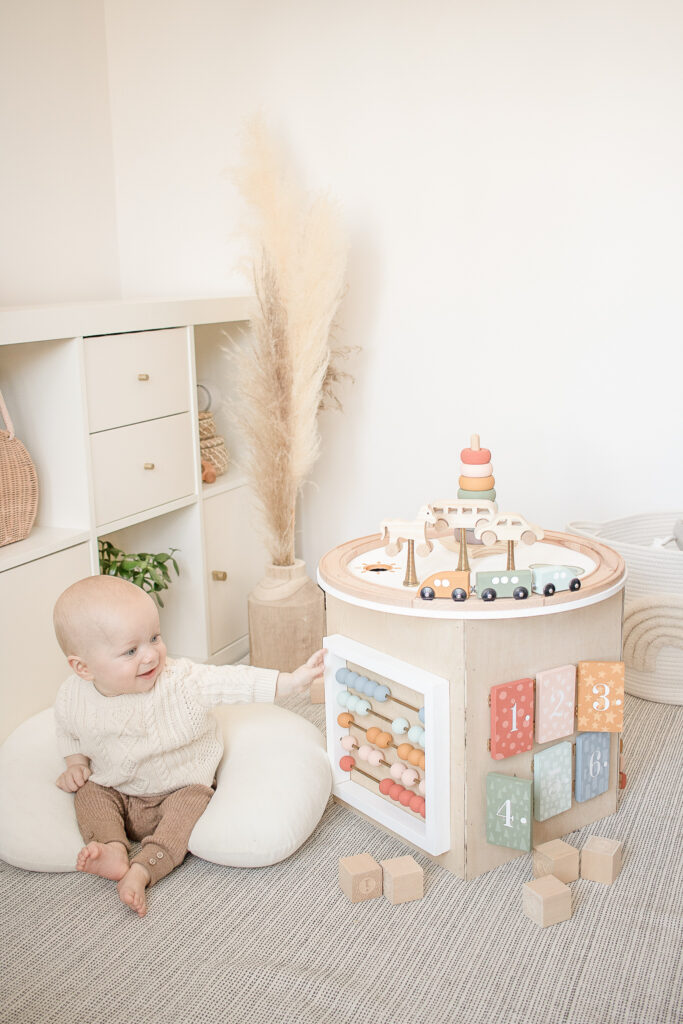
If you follow me on Instagram you may already know that this is our Christmas gift to our seven month old this year! He’s still a little young for it, but hoping he’ll grow into it and use it for years to come!
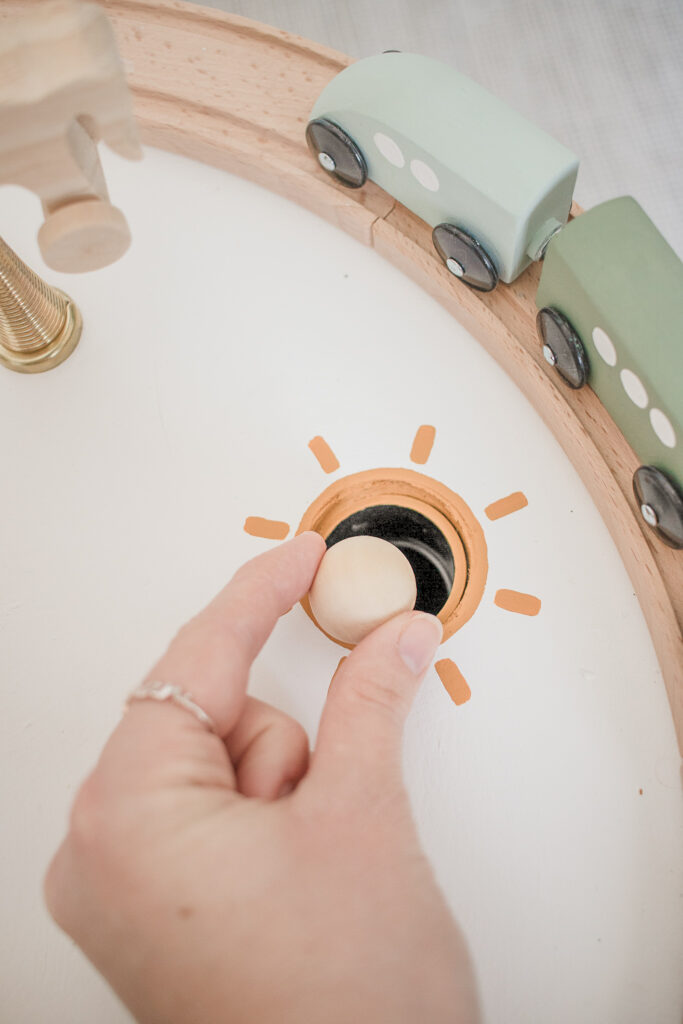
My husband and I had a lot of fun coming up with fun ideas for this activity center, and my favorite one was his idea! You can see that there are some holes in the top and sides. of the cube – we connected tubes to those holes so that you can drop a ball in the top and it’ll shoot out the side! Then I made the holes look like a sun, an avocado and a flower – haha!
You can of course just buy an activity cube – like this one here, but since it’s something that will sit out, I wanted to make something that I actually want to look at, plus we could customize it to make anything we want and make it way cooler than any you could buy! Plus, like my husband pointed out, it’ll be so rewarding watching him play with it knowing we made it!
Okay, I am obviously VERY excited about this DIY, and I could talk about it forever, but let’s just get started on how to make it!! Oh, also: fair warning that it IS very pricey and time consuming to make, but I don’t regret it and I love having such a special toy!!
SUPPLIES:
Paint:
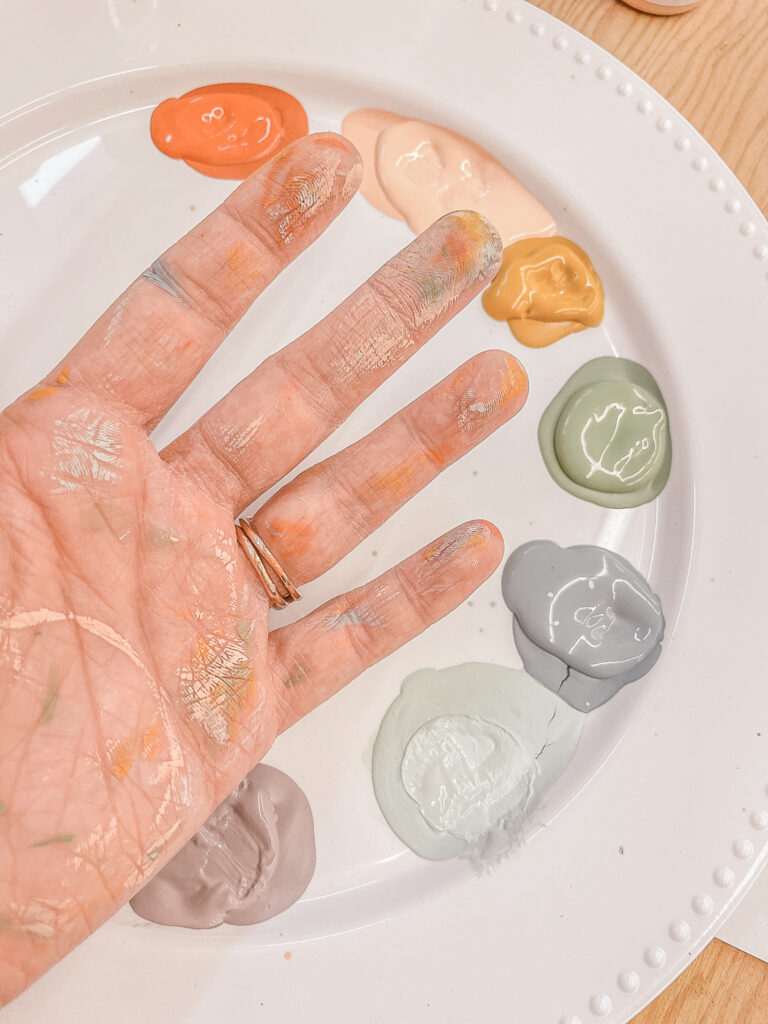
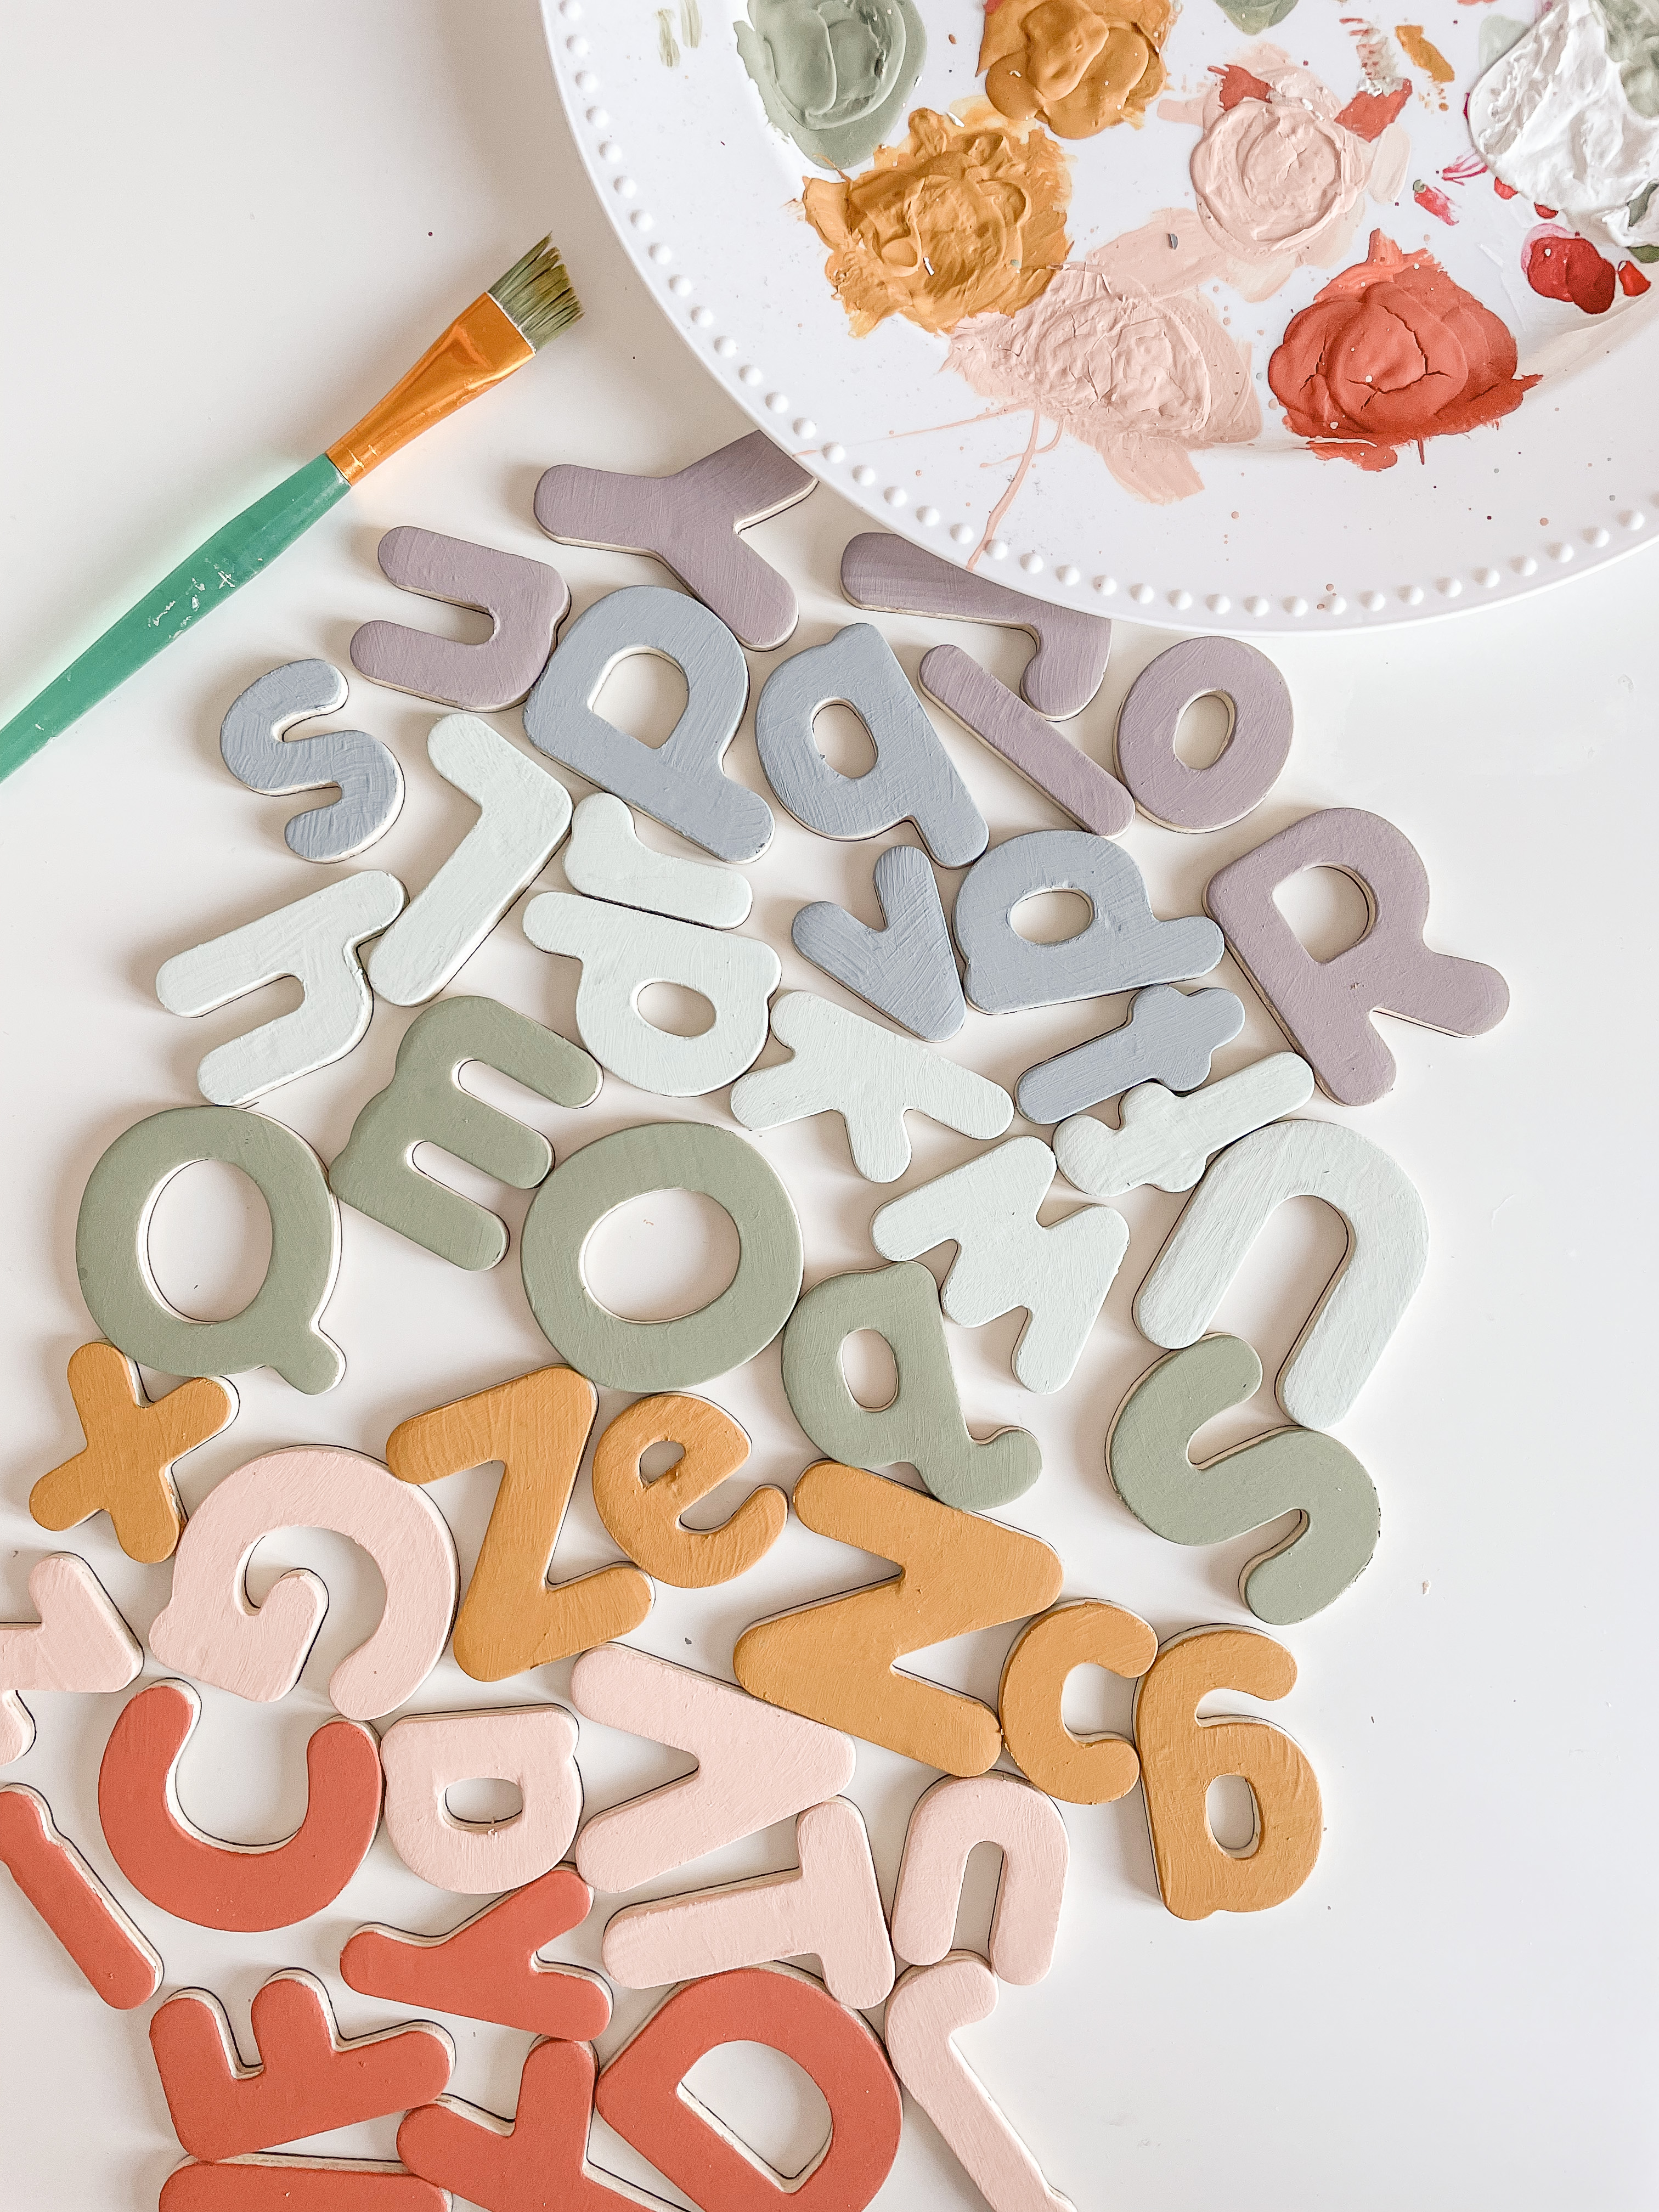
I chose a color palette of 7 colors plus white. I used one of Bekam’s Toys as inspo (these stacking cups) then tried to find colors to match. I just picked bottles of non-toxic acrylic paint out at Michaels. Then I used only those colors for the whole project! I used the brands ‘Craft Smart‘ and ‘Folk Art‘ which are both non toxic.
For the Cube:
Four 15″x12″ Pieces of Wood (Ours are from Home Depot)
18″ Circle Piece of Wood (Ours is From Michaels)
Wood Glue
Nail Gun
Eight 13″ Long, 2″ Thick Strips of Wood for Support
For the Abacus Side:
Thirty 1″ Wooden Beads
Five 9″ Brass Rods -3/16″ Thickness
Four 10″ long, 1.24″ Wide Pieces of Wood
Drill
For the Door Side:
Twelve 1″ Hinges (Ours Came With Nails)
Drill
Six 2.5″x4″ Wooden Rectangles
(Our Wood was too thin for the nails, so we doubled up the wood, so that it was 1/4″ thick)
White Vinyl (Optional)
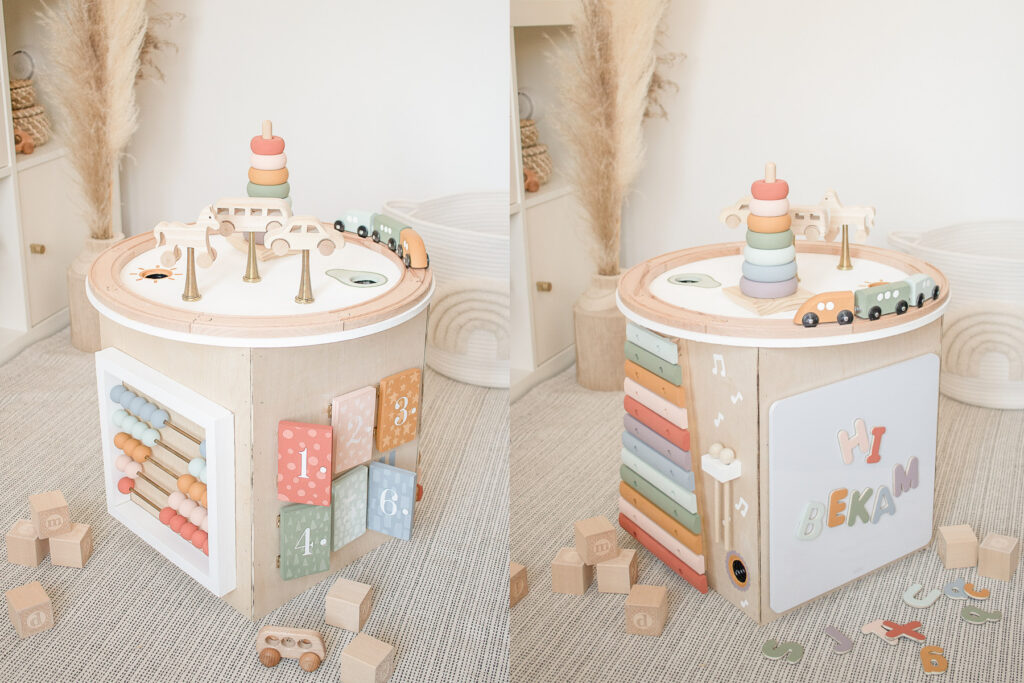
For the Letter Magnet Board Side:
12″x12″ Magnetic Board
Pack of Wooden Magnetic Letters
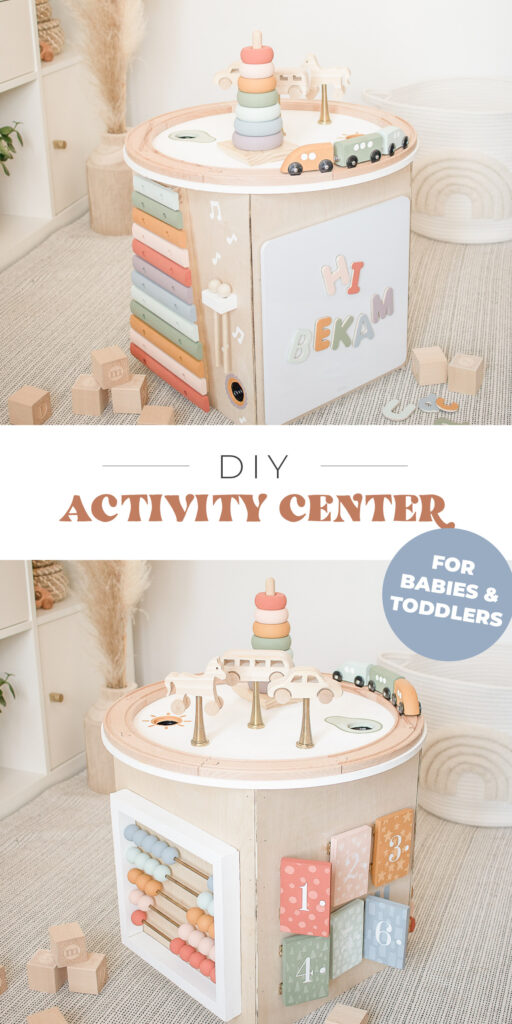
For the Xylophone Side:
13″ Wooden Xylophone
2″x1″ Wooden Block (Optional – To Hold Mallets)
Drill
For the Top:
IKEA Train Track
Wooden Stacker Toy
Three Wooden Figures (Mine are From Michaels Dollar Section)
Three Brass Door Stops
For the Ball Tubes:
1.5″ Wide Vacuum Tubes
Hot Glue
Wood Glue
Drill
1-3/8 Hole Saw Attachment to Drill
(Don’t Use Wood Spade Bit)
Wooden Ball
DIRECTIONS:
For the Cube:
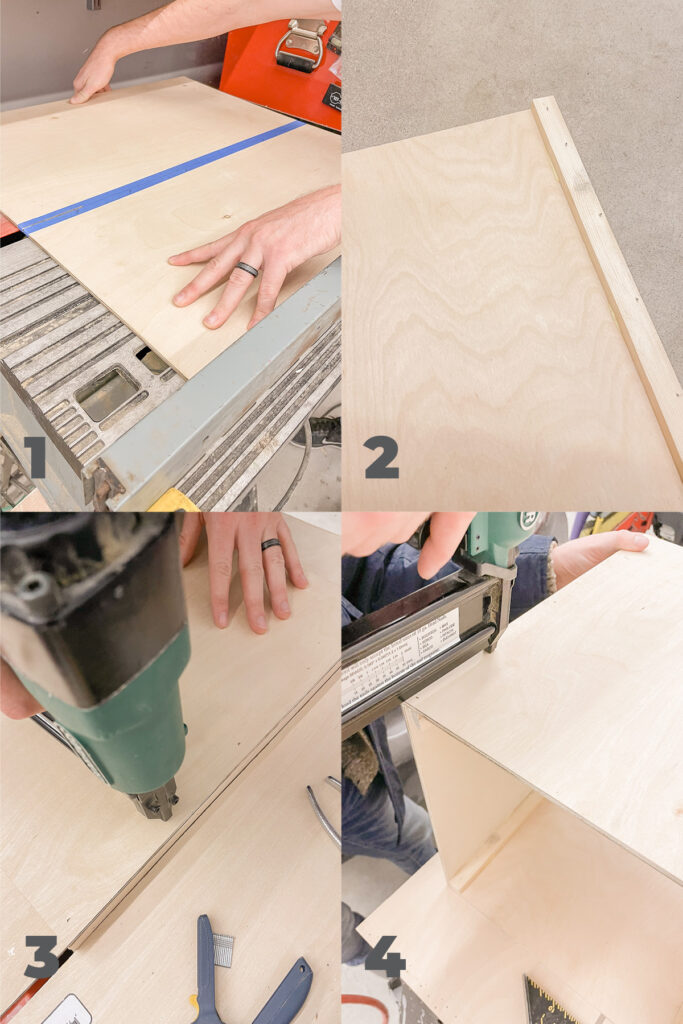
- Measure and cut your 15″x12″ pieces of wood paneling. (you can also ask them to do this at the hardware store) We added painting tape over where we were cutting so that the wood doesn’t splinter. Then we practiced putting the cube together to make sure the measurements were right.
- For support cut 2″x13″ pieces of wood, using wood glue and a nail gun to attach it to the long edge of each of your wood panels (so each panel has a support wood strip).
- Use a nail gun to attach the boards together, nailing the board into the wood strip on the adjacent board.
- Repeat this for all 4 sides. We also added four 2″ wood pieces to the top of the cube in order to attach the top circle. Don’t attach the top circle until the end. We attached it when we added the tubes (see below in the Tube section).
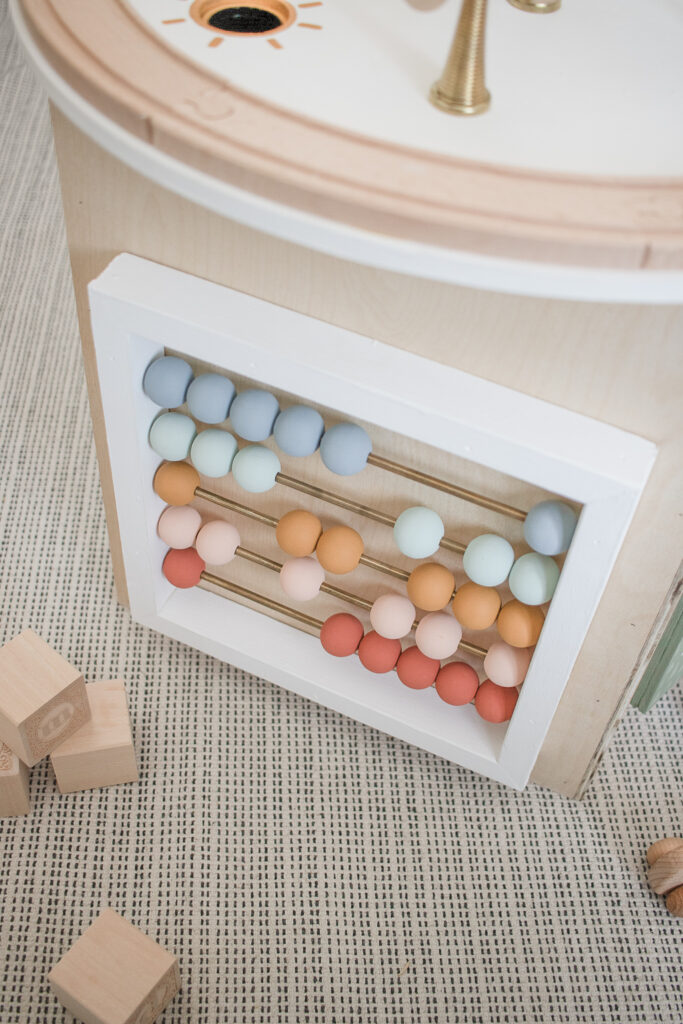
For the Abacus Side:
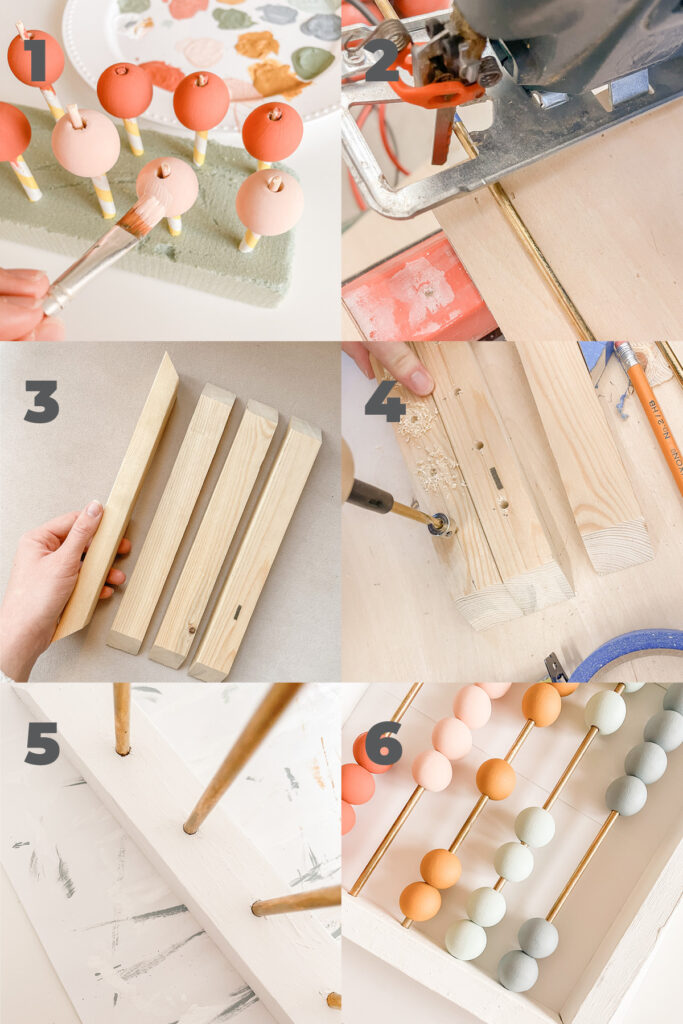
- Paint your wooden beads by sticking straws into floral foam and putting the beads on the straws, then painting them.
- Cut your metal dowels to 9″ long using a jig saw with a metal blade.
- Cut four 10″ long, 1.24″ wide pieces of wood, then cut each and at a 45 degree angle.
- Drill 5 holes on the inner side of two of the pieces of wood for the metal rods to go into. Make sure to space them out evenly and wide enough for the beads to not touch. Use a 3/16 drill bit.
- Paint the pieces of wood white, then put the metal rods in the holes, add the beads, then attach the frame together. Use wood glue and a nail gun to attach it together.
- Use wood glue and a nail gun to attach the abacus to the cube.
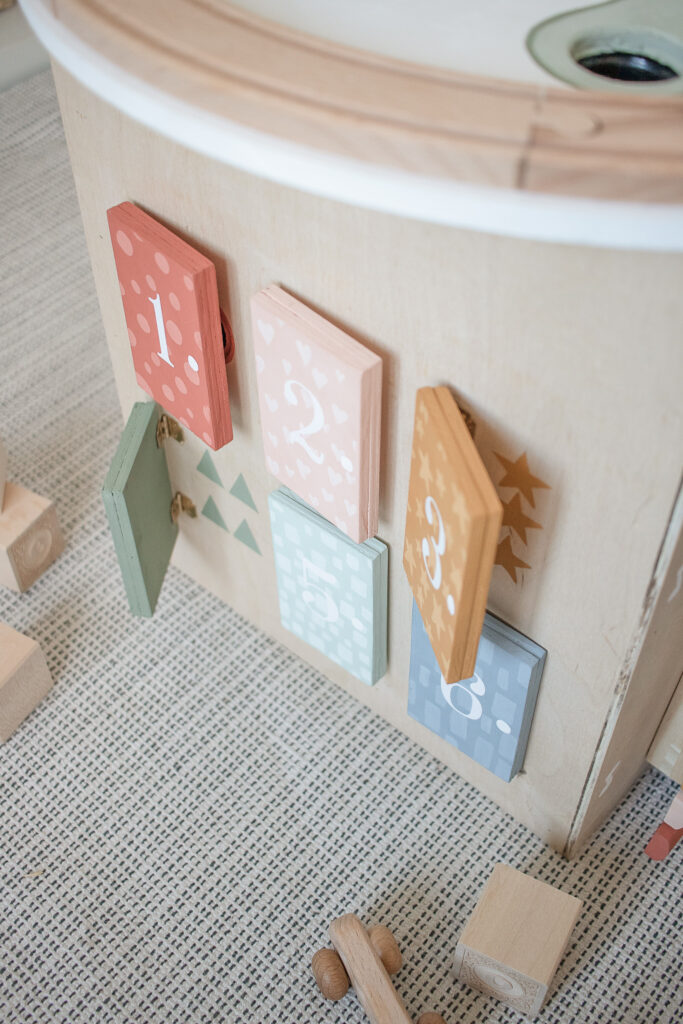
For the Door Side:

- Cut and paint six 2.5″x4″ pieces of wood.
- Add a little white to each color and paint a bunch of little designs on the front of each door. I painted shapes of whatever shape was going to be behind that door.
- I used a Cricut machine to cut out a number for each door, but you could also just paint it on. The number is how many shapes are behind that door.
- Double up your wood, and use wood glue to add another piece of wood to make your door thicker. I did this because the nails were too long for the wood thickness I was using.
- Measure out where your doors and hinges will be attached on your cube so that they are evenly spaced.
- Use a hammer to attach the hinges to the doors, and then to the cube. We also drilled a tiny hole in the cube so that it would be easier to hammer the nails in.
- Paint your shapes behind each door. I printed out the shapes, cut them out and traced them, then painted. But, you could also just freehand.
- Repeat for each door, and then you’re done! Yay!
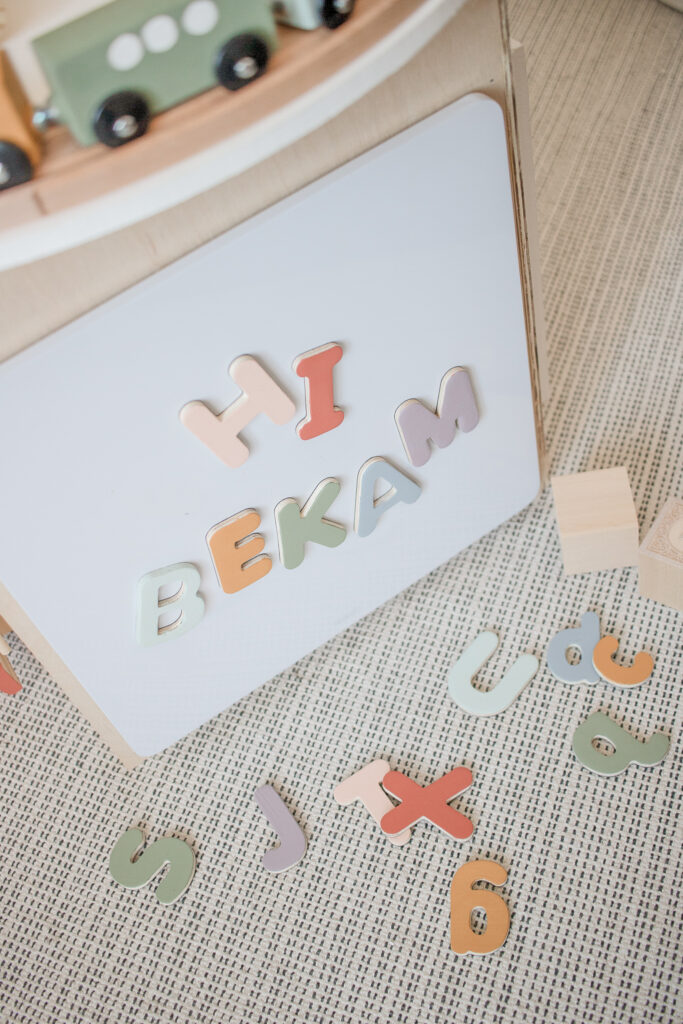
For the Letter Magnet Board Side:
- The magnet board I bought (and that I linked in the Supplies list) came with sticky adhesive on the back, so I just stuck it onto the cube!
- Then I sanded and did a few coats of paint of the magnet letters I bought (also linked above) in my color palette.
- Throw some magnet letters on your board and that’s it!
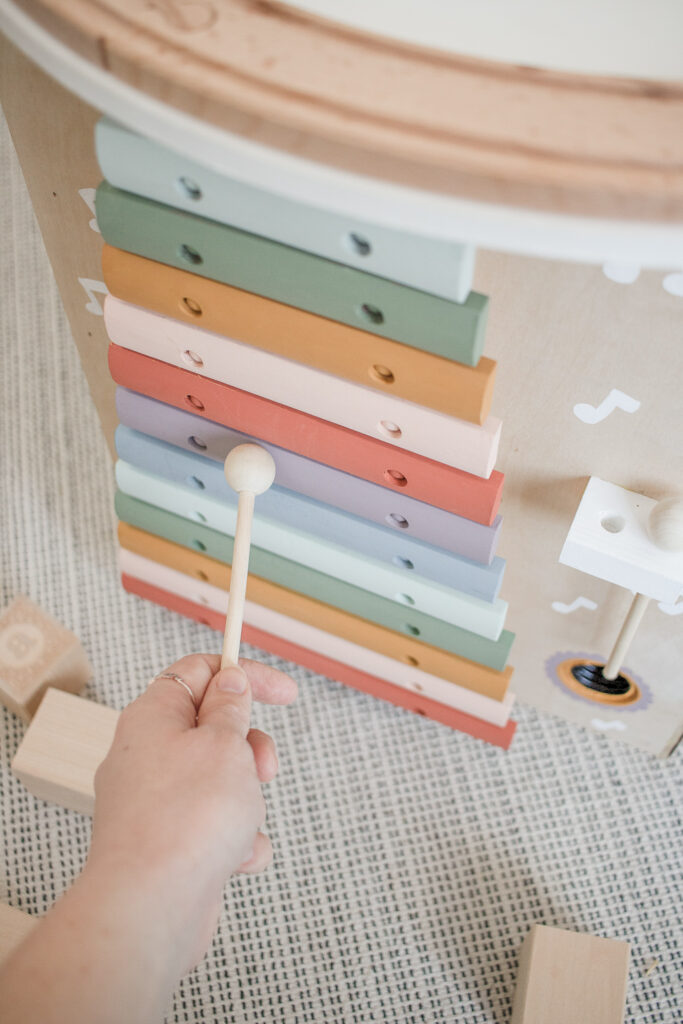
For the Xylophone Side:
- Find a pre-made Xylophone (I linked the one I used in the supplies list)
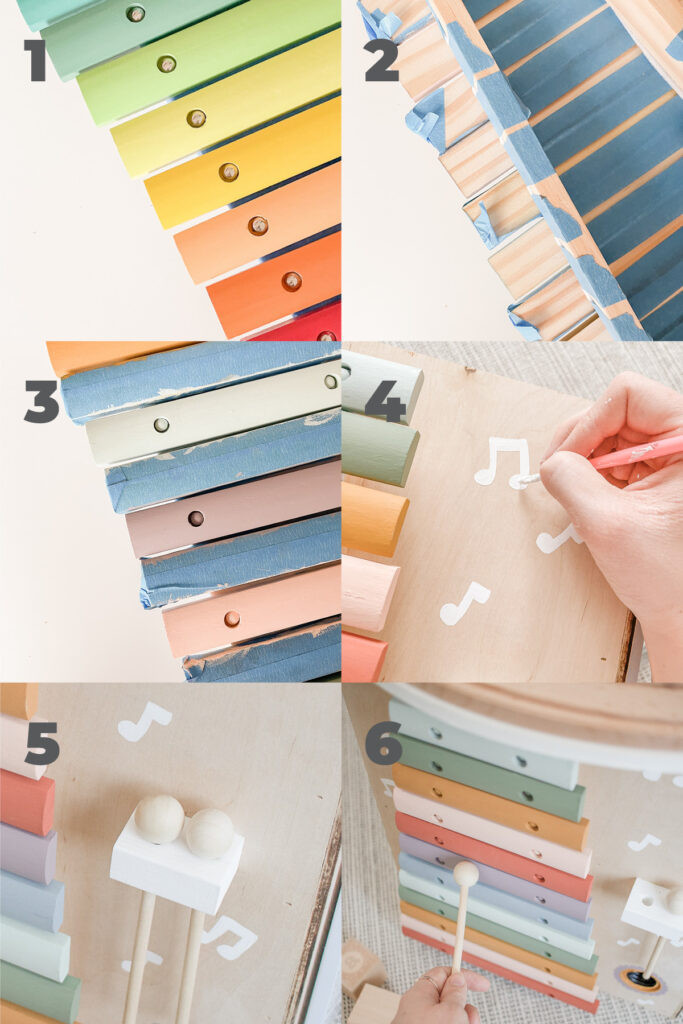
- Since I couldn’t take it apart, I tapes the back of the Xylophone so paint wouldn’t get on the base.
- Tape every other piece and paint the exposed ones. Let them dry, then tape over the ones you just painted and then paint the remaining pieces.
- We used wood glue and a nail gun to attach the Xylophone to the cube. Then I freehand painted little white music notes around the Xylophone.
- We took a little scrap of wood and drilled two holes in it, painted it white and attached it to the cube to hold the mallets.
- Enjoy playing your Xylophone!!
For the Top:
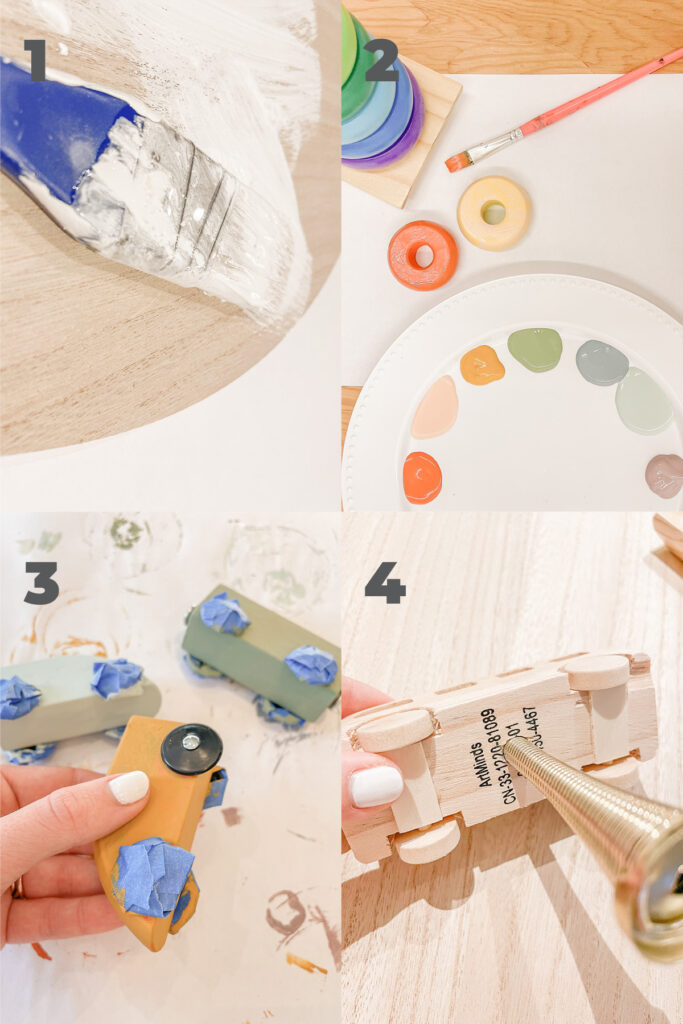
- Paint your wooden circle white with non-toxic acrylic paint.
- Paint your stacker toy in your color palette, using wood glue and a nail gun (optional) to attach the toy base.
- Paint your IKEA train cars in your desired colors after taping off the wheels. Then make your track into a circle and use wood glue to attach it to the edge of your wooden circle.
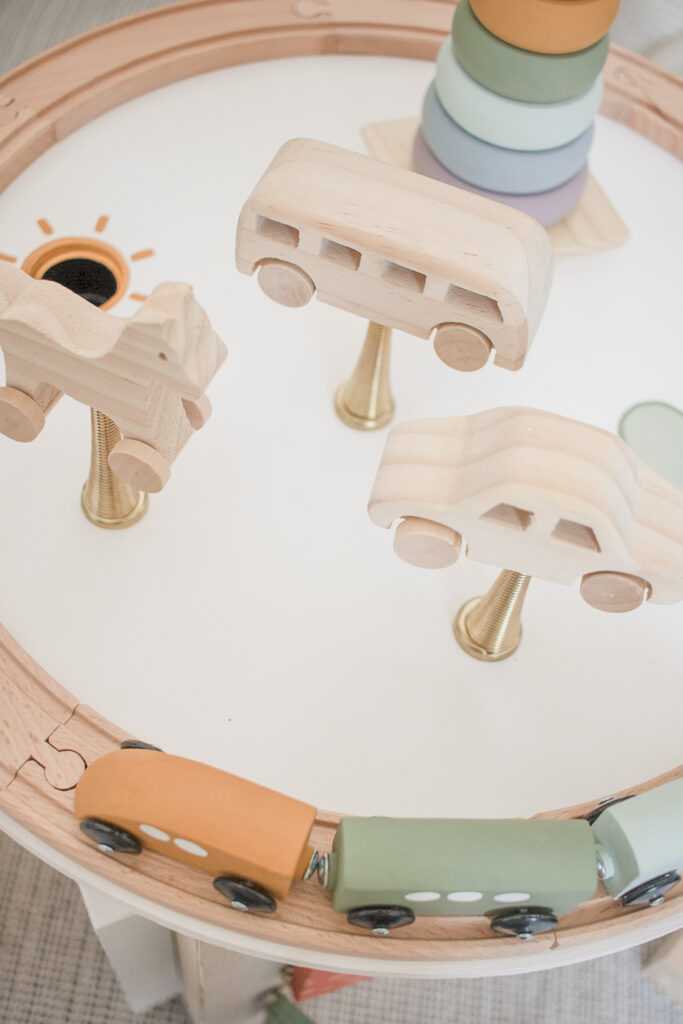
- Take your wooden toys and drill a hole in the bottom center with a 21/64 drill bit which is between 1/4 and 3/8 size (if you buy different door stops be sure your drill bit size will make it fit snugly). Once you have your hole drilled, twist in the door stopper (remove the rubber top). Then screw it onto your wooden circle.
For the Ball Tubes:
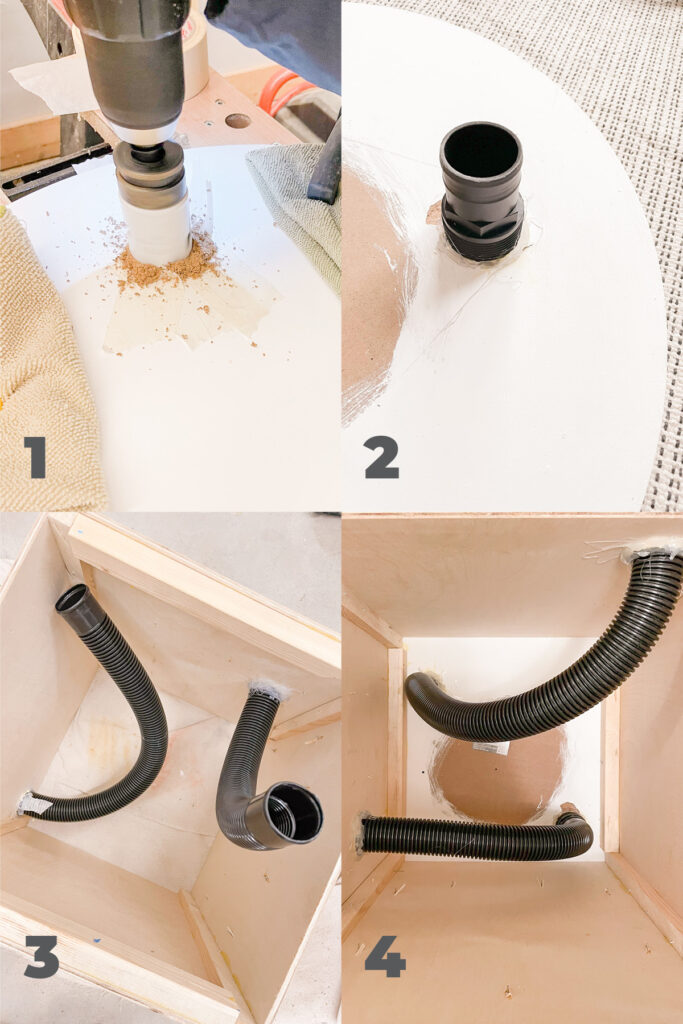
- Use 1-3/8″ Hole Saw drill attachment to make your 4 holes for the tubes. We did two holes on the top, one on the bottom right of the Xylophone side, and one behind the red door.
- Attach the tube holder (our pack came with one) to one of the top holes, then secure it using hot glue.
- Attach the two tubes to the inside of the cube using a combo of wood glue and then hot glue.
- Attach the top circle to your cube using a wood glue and a nail gun. Then, attach the tubes to the holes using wood glue then hot glue.
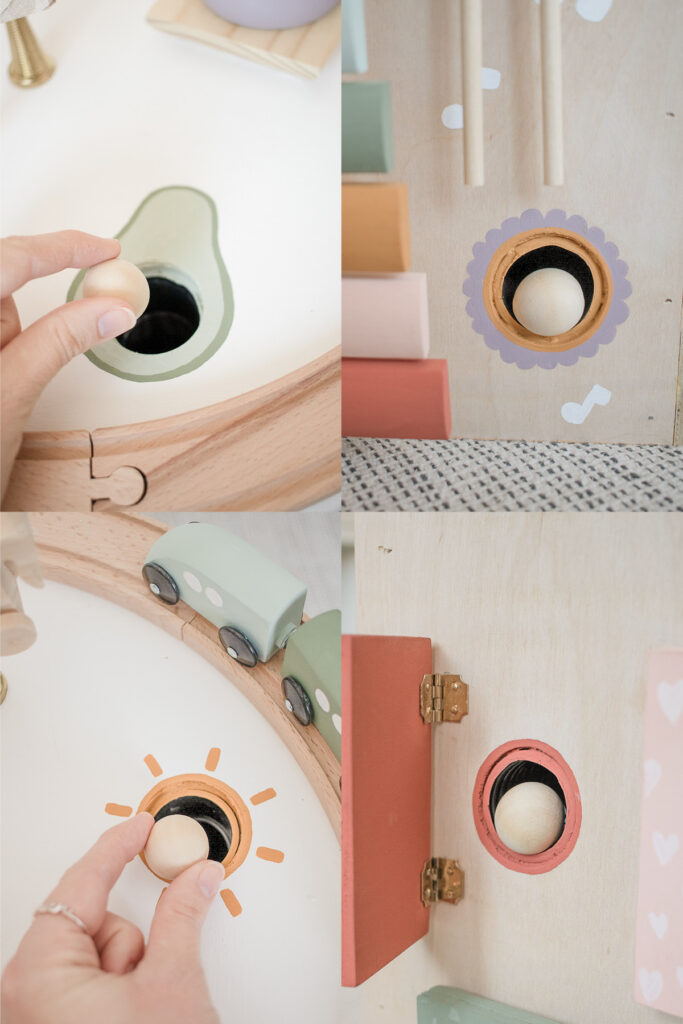
Once the tubes were dry I painted the holes to be fun different objects! Here are all 4!
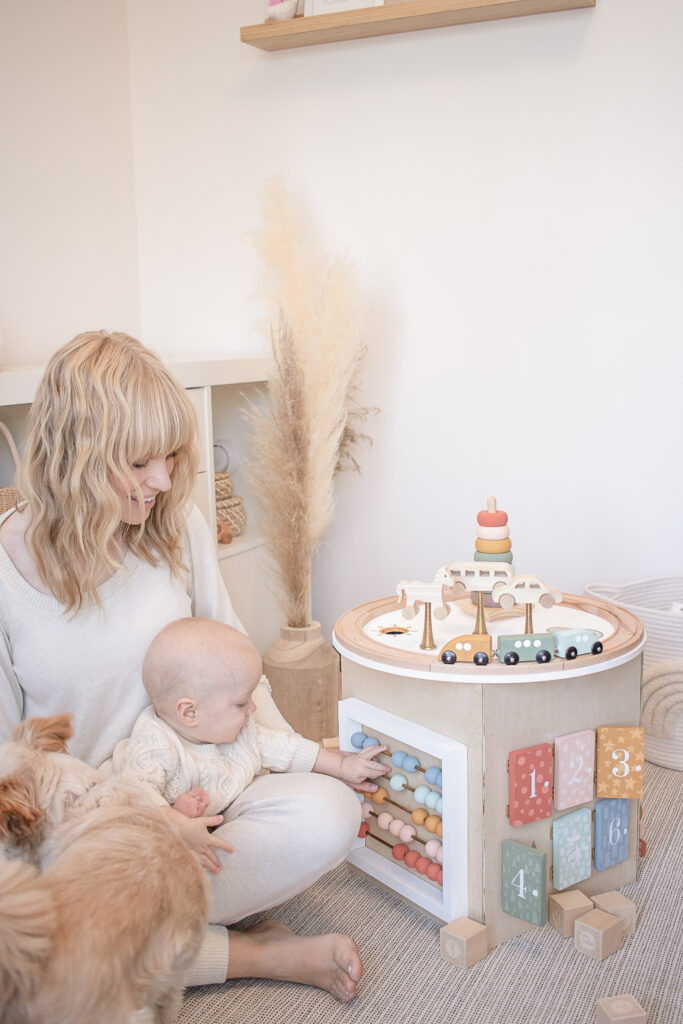
Oh my gosh! That was such a long post, because, let’s be honest it was a long project – but worth it!! Such a special toy that I LOVE seeing him play with already! I can’t wait to see him play with it for years to come! PS. I posted a reel with the activity cube in action on my Instagram so be sure to check that out!
I’ve been SO excited to share this DIY Activity Cube Center for Babies and Toddlers with you, so I hope you love it as much as I do!! Also, if you don’t want to make the whole thing, I think it would still be fun to make parts of it, like the abacus, or just the top with the train track and boingy toys!
That’s all for now! Bye!
You need to sell these! 😍
thanks so much 🙂
Prettiest activity center I’ve ever seen!! Awesome 🙌
Wow if you sold these I would so buy one!!!
How much would you say it cost you all together? Thanks!
It was not cheap, haha, about $200. But 1 year later he still plays with it everyday!