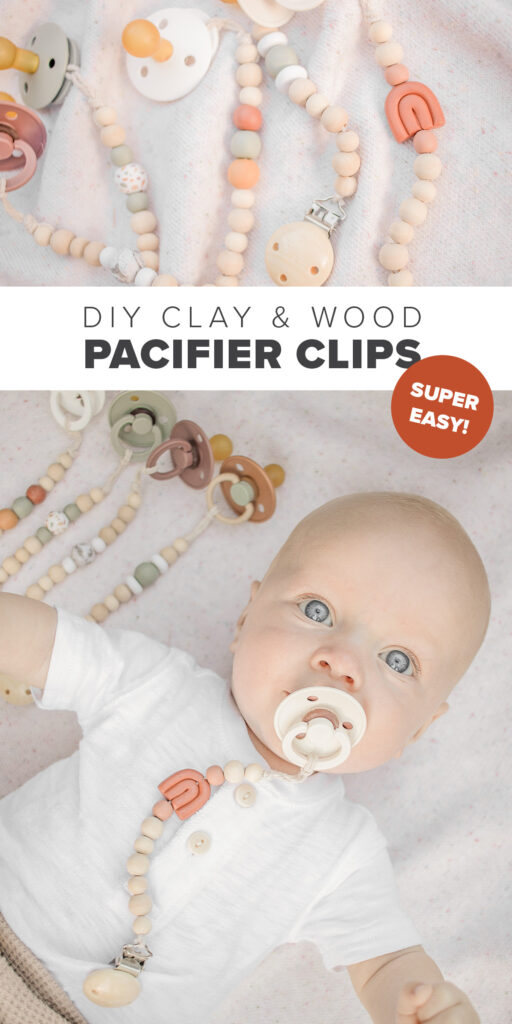
DIY Clay & Wooden Pacifier Clips
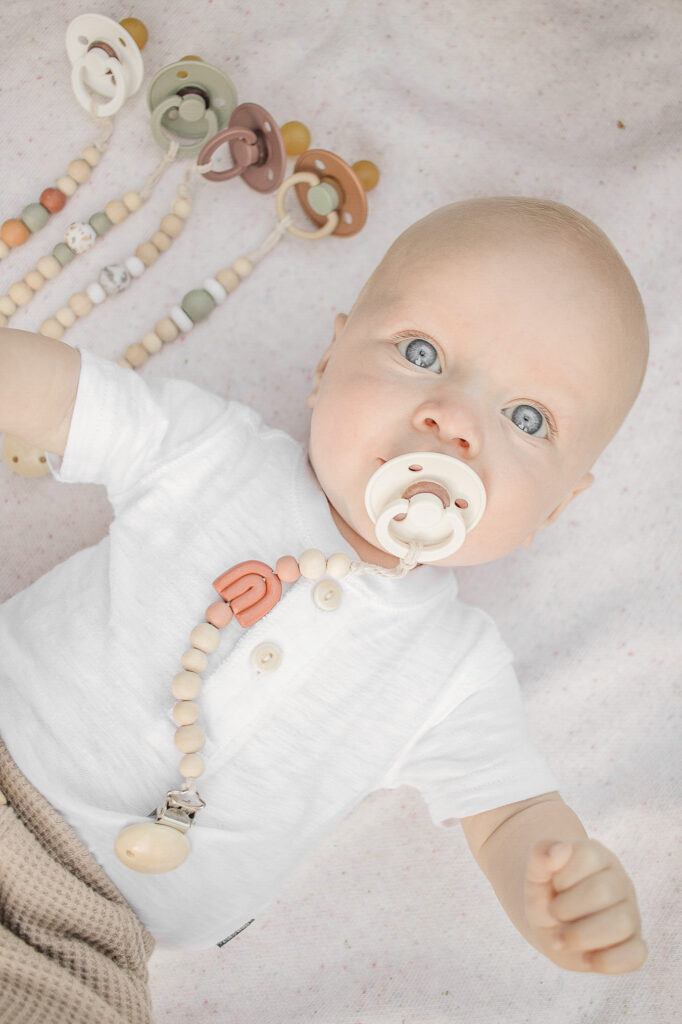
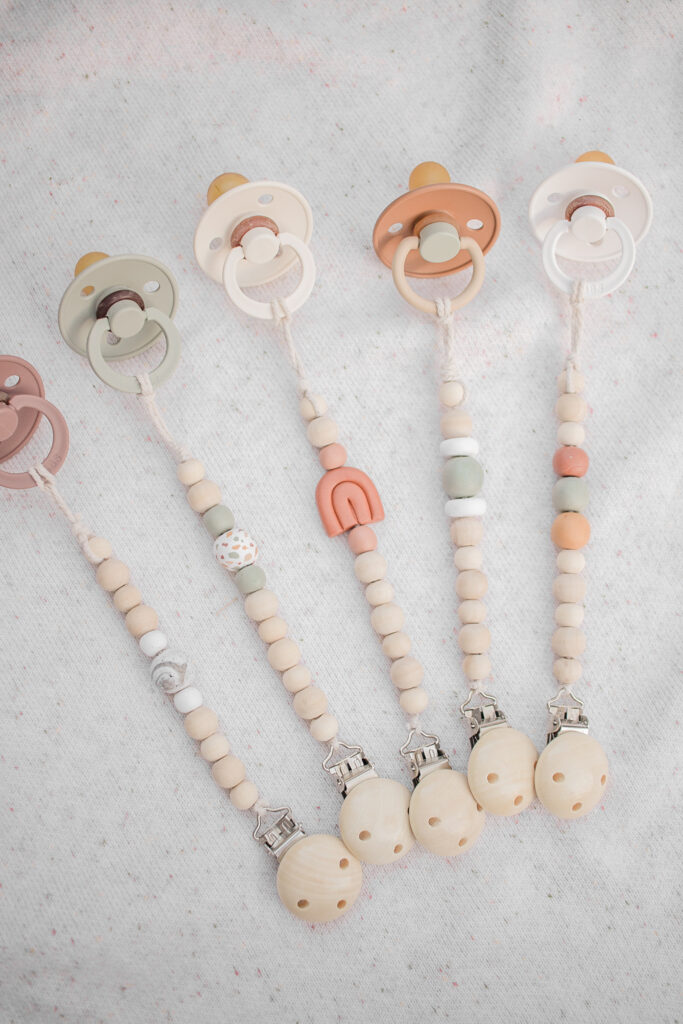
Guys, I have been itching to make this DIY and it was even better than I expected! Now, since becoming a mom I have learnt that there are a lottt of baby supplies that are very overpriced. Well, pacifier clips are one of those things! I have a few purchased wooden pacifier clips and they cost about $15-$20 each… for a string of beads?! Well, I’ve got news for you – you can make a bunch for wayyy less than that! PLUS you can personalize them and match them to your pacifiers! A personalized pacifier clip with a matching pacifier makes the best gift, I’ve already given a few as gifts!
I’ve made a ton of DIYs with Sculpey – they’re some of my faves! Find them all HERE!
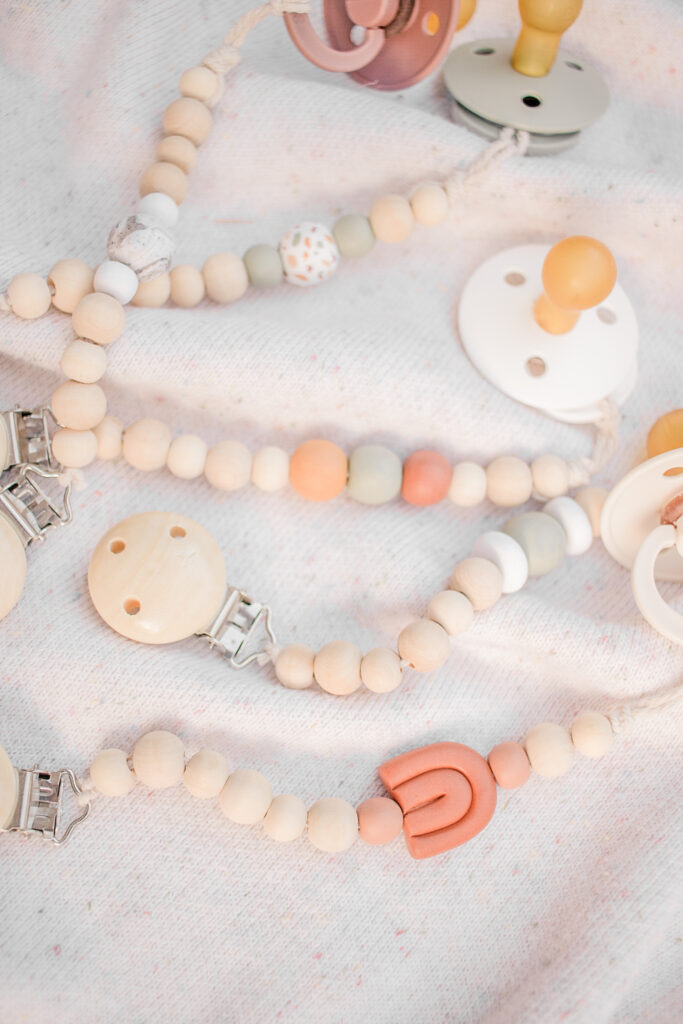
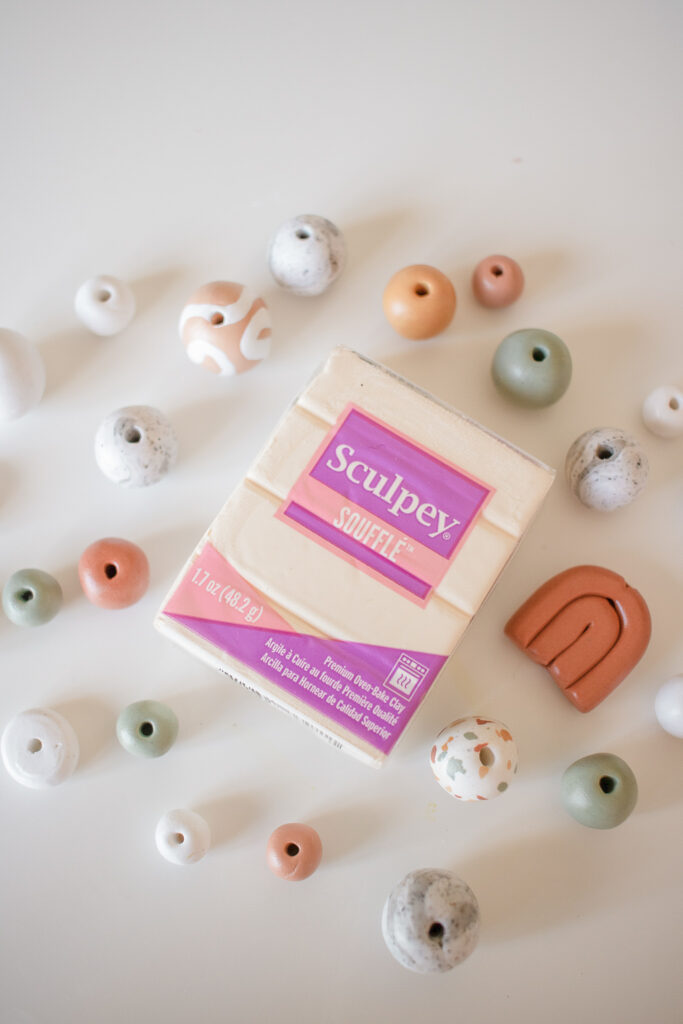
I used Sculpey to make the colored beads that you see, which is how I can customize the colors perfectly! You can also make the beads any shape you want – like the rainbow one which is my fave!! Sculpey comes in sooo many colors, plus you can mix colors which just makes the options endless! Sculpey is also non-toxic, so you don’t have to worry about your babies chewing on the beads. It’s so much better than painting the beads because it’s safer and the color won’t chip off!
Once I started making these I just couldn’t stop, and I made a bunch, but I am going to show you detailed steps of the three more complicated styles that I made – the rainbow, terrazzo and marble ones! OKAY, let’s get started!
SUPPLIES
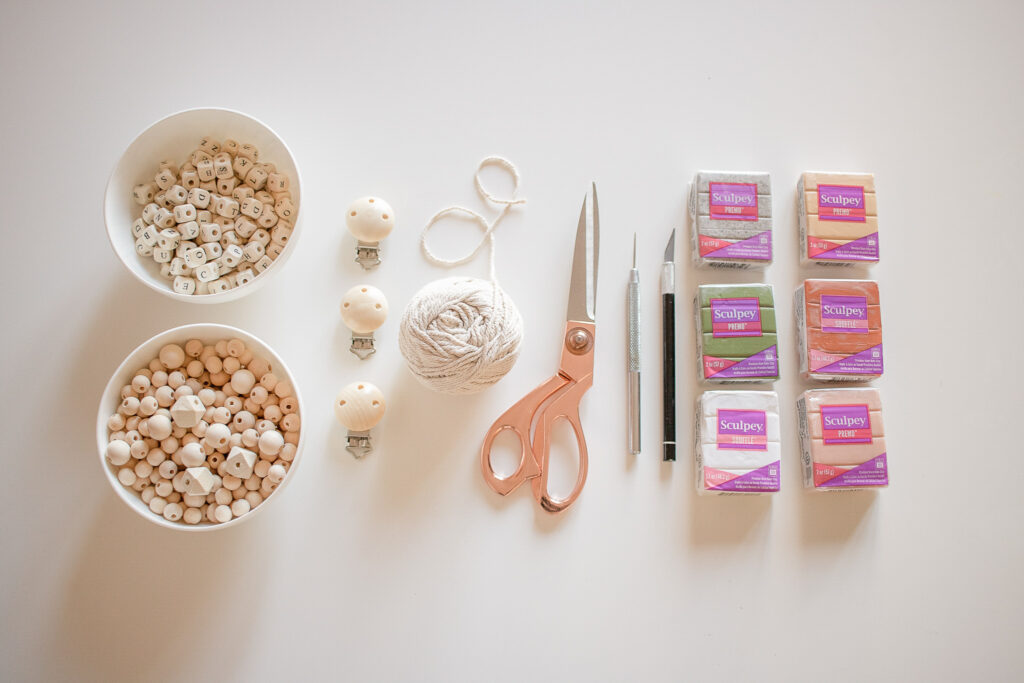
Sculpey in various colors
(I used both Souffle and Premo Sculpey)
Granite Premo Sculpey
Ecru Premo Sculpey
Spanish Olive Premo Sculpey
Cinnamon Souffle Sculpey
Igloo Souffle Sculpey
Beige Premo Sculpey
Exacto Knife
Needle
DIRECTIONS
FOR ALL THE PACIFIERS
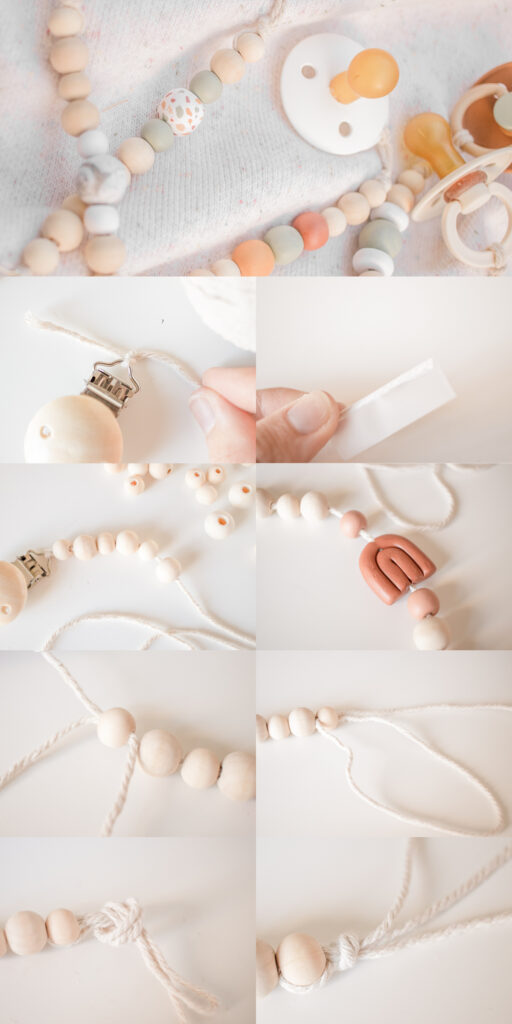
- Start by tying your string in a double knot to the end of your suspender clip, then trim the extra string.
- Add tape to the end of your string because this will help to get the beads on more easily.
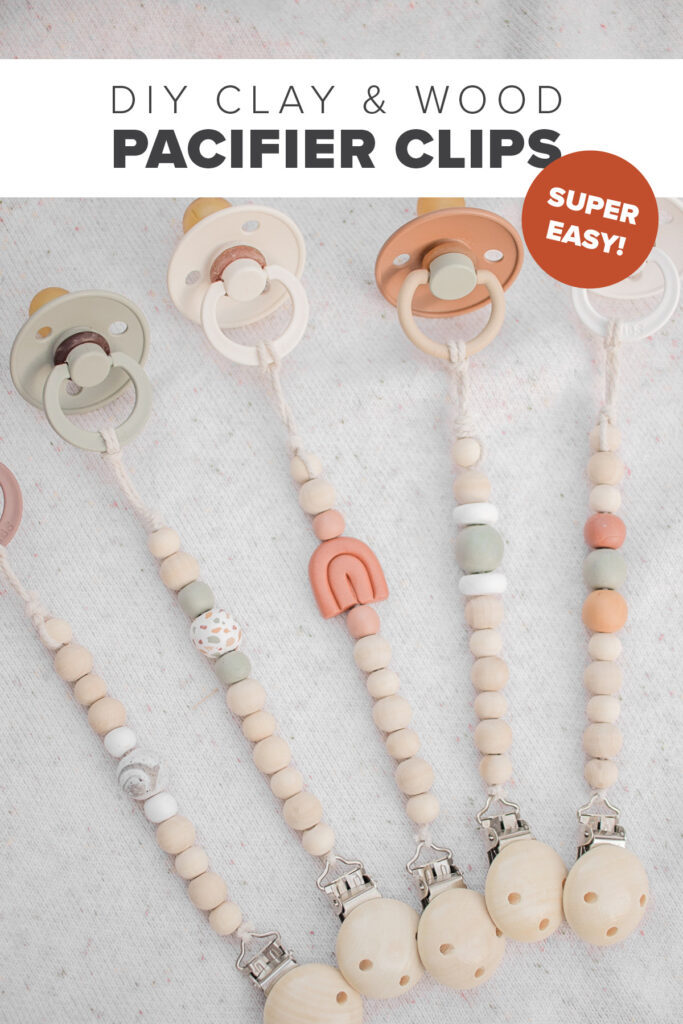
- Add wooden beads to your string. I used two sizes of beads and rotated them.
- I added six wooden beads and then added my custom clay beads, and then added two more wooden beads.
- Loop your string around and feed the string through the opposite end of the last bead – so that the string is going through the last bead twice from opposite ends.
- Make sure the loop at the end is the size you want. It has to be big enough to attach the pacifier.
- Take all the string and tie it around itself in a really tight knot.
- Make sure that the knot is as close and as tight to the last bead as possible. Now all you’ve got to do is add your pacifier!
FOR THE RAINBOW BEAD PACIFIER
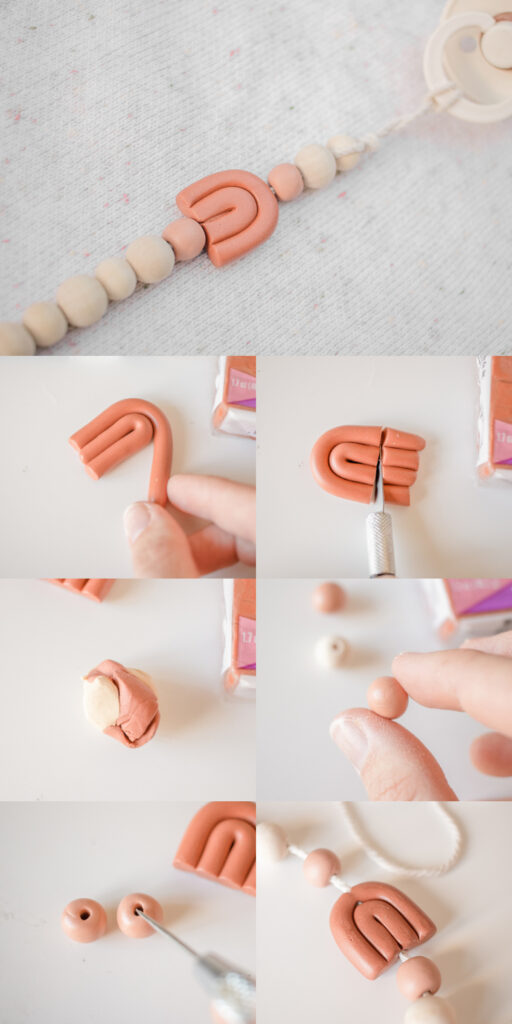
- Roll out your clay into a thin snake and then fold it in half. Now take another piece of rolled clay and place it over top of the first one to form a simple rainbow.
- Trim your rainbow with your exacto knife.
- Mix the Cinnamon Souffle Sculpey and tan colors together to make a new color for the beads on either side of the rainbow.
- Roll your new color into a sphere using your fingers.
- Take your needle and poke a hole through each side of the beads making sure the hole is large enough to fit the string.
- Bake it according to package directions and add it to your pacifier clip!
FOR THE TERAZZO BEAD PACIFIER
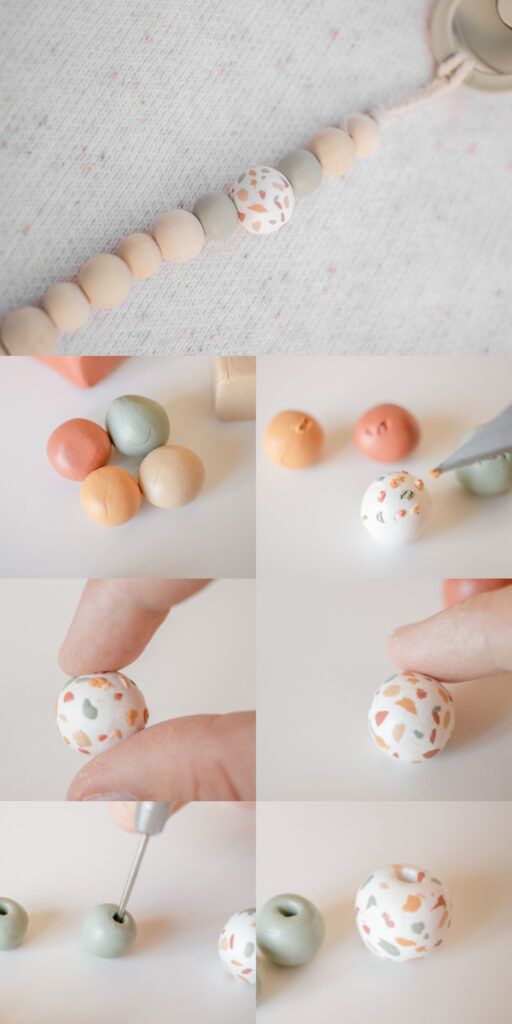
- Choose four colors to add to your terrazzo bead.
- Use your exacto knife to cut off teeny tiny pieces from the colored clay and add it to your white clay bead (I used Igloo in Souffle Sculpey).
- Keep adding the colored clay until the whole bead is covered.
- Roll the bead in your hands to smooth it out.
- Make two beads to go on either side of your terrazzo bead in a complimenting color. The use your needle to add holes.
- Bake them according to package directions and add them to your pacifier clip!
FOR THE MARBLE BEAD PACIFIER
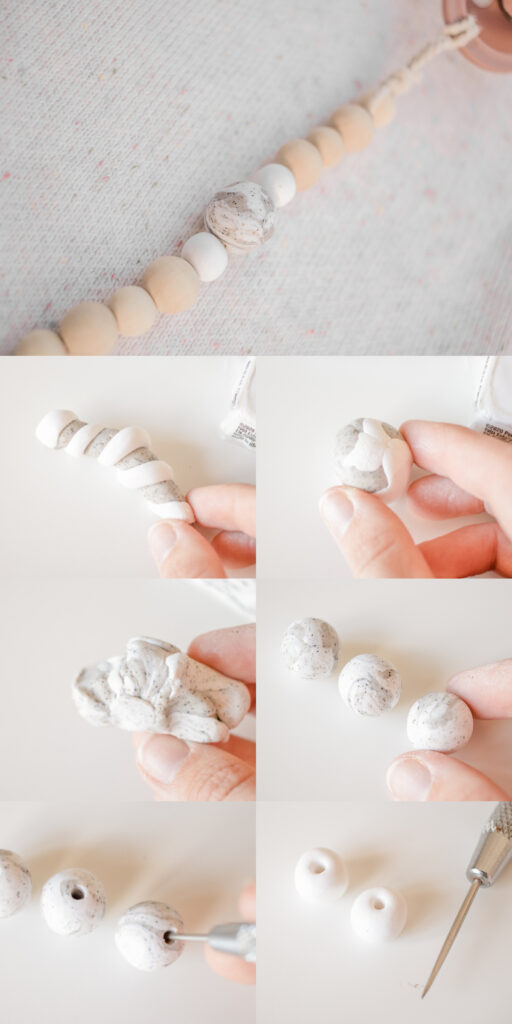
- Take granite and white Sculpey and twist them together.
- Roll the twisted Sculpey into a ball.
- Keep mixing it together until you have your desired marbled look.
- Roll the marbled Sculpey into a ball.
- Add holes to the beads.
- Make two smaller white beads to add onto either side of your marble bead.
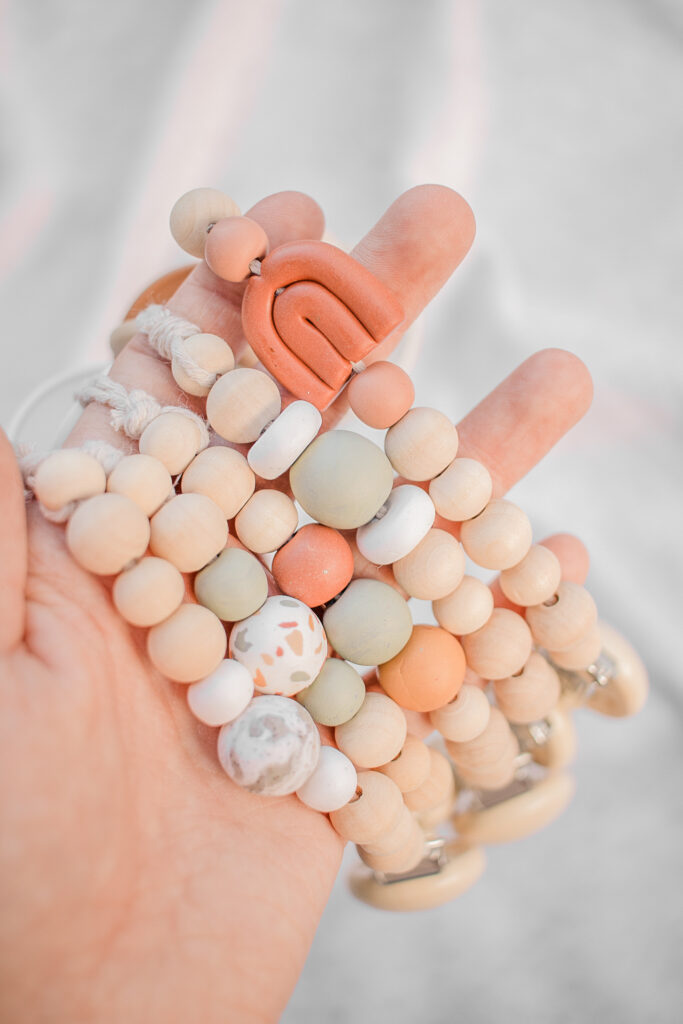
I also made some more styles as you can see, but those ones use the same techniques as the ones detailed above, so get creative with it! I had so much fun making these, and my baby, Bekam is using one (the rainbow one) right now as I type this! Make sure to check out alllll of Sculpeys amazing oven bake clay and their other amazing products (like LIQUID Sculpey that I made dog tags with – find those here). Also, pretty please tag or DM me on Instagram @mikylacreates if you make these DIY clay & wooden pacifier clips!! See you next time!
1 comment on “DIY Clay & Wooden Pacifier Clips”