How To Paint Cabinets The Right Way
So, I’ve shared that we wanted to redo our kitchen on a budget since we’re not planning on being here for too long, and painting our 90s style oak cabinets was at the top of my list! I had never painted cabinets before, so I enlisted the advice of a friend who has painted cabinets many times. I wanted them to LAST and not look painted or get chipped easily. I’m happy to report that after nearly three months there is NOT ONE chip on any cabinet and I have not been careful – ha!
PS. Head HERE to check out my DIY paint and Epoxy Marble Countertops – also in this kitchen!
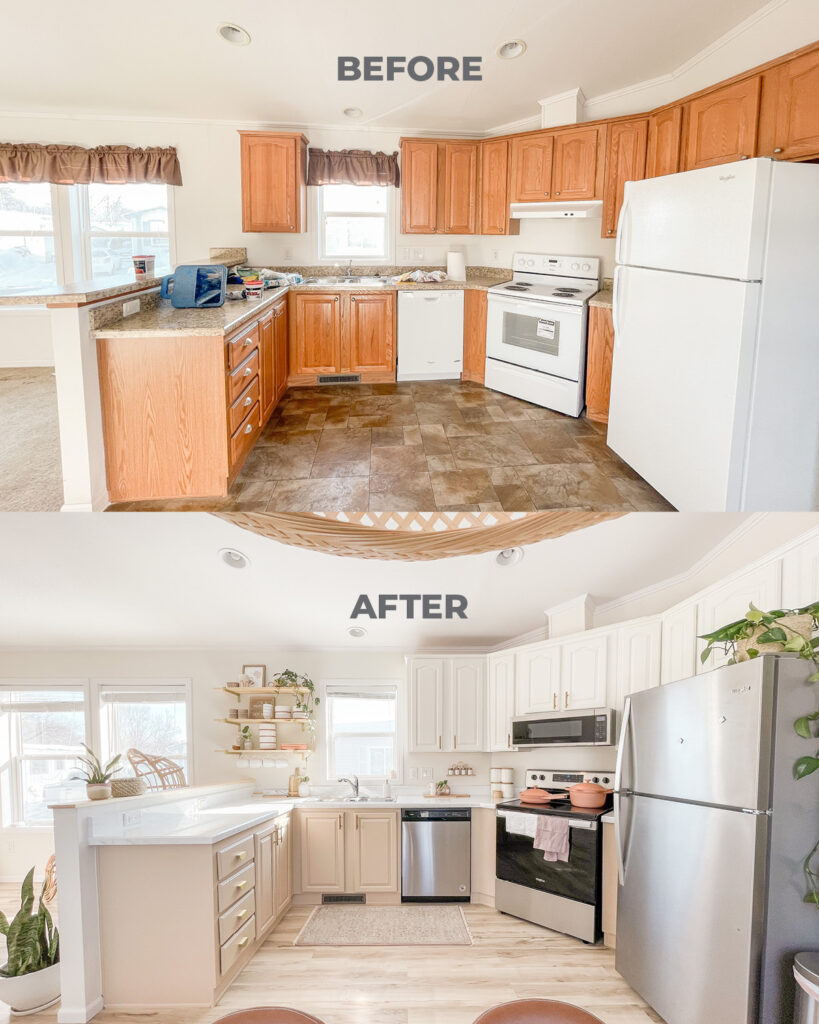
So, I thought I’d share my knowledge since I LOVE, LOVE how they turned out! You can see the before and after below… I mean, painting the cabinets made the BIGGEST difference and for a low cost!
Before & After:
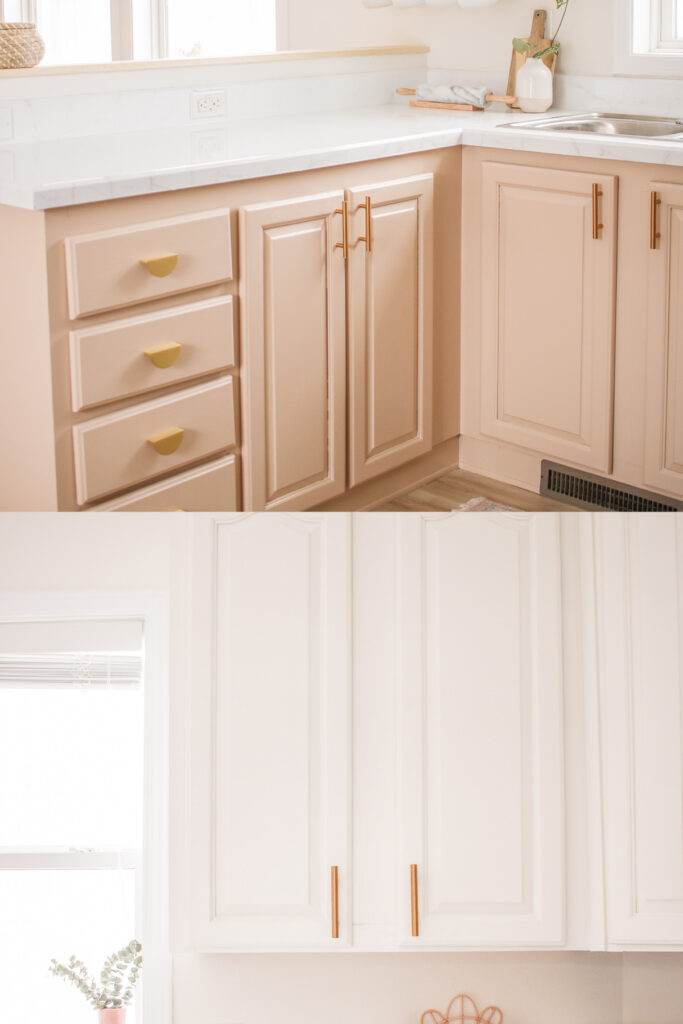
Okay, let’s get started! BUT first shout out to my lower cabinets – I AM OBSESSED with the color we chose, and it’s now a joke that I just want to paint everything that color, so I’m here to tell you that it’s ‘Ash Blonde’ by Behr!!
SUPPLIES:
Benjamin Moore Fresh Start Oil Primer
We used only one can for our entire kitchen and both bathrooms
Benjamin Moore Advance Interior Paint – Semi Gloss
I used Benjamin Moore Paint, but with Behr colors, you can just ask them to mix it for you.
Top Cabinets: Behr Palais White
Bottom Cabinets: Behr Ash Blonde
Tip for white cabinets:
If you are wanting white cabinets, and your walls are white you should paint your cabinets the same color as the wall – which is what we did with Palais White. We just used different types of paint, but the same color.
Shelf Brackets (For open shelving – we removed a cabinet)
DIRECTIONS:
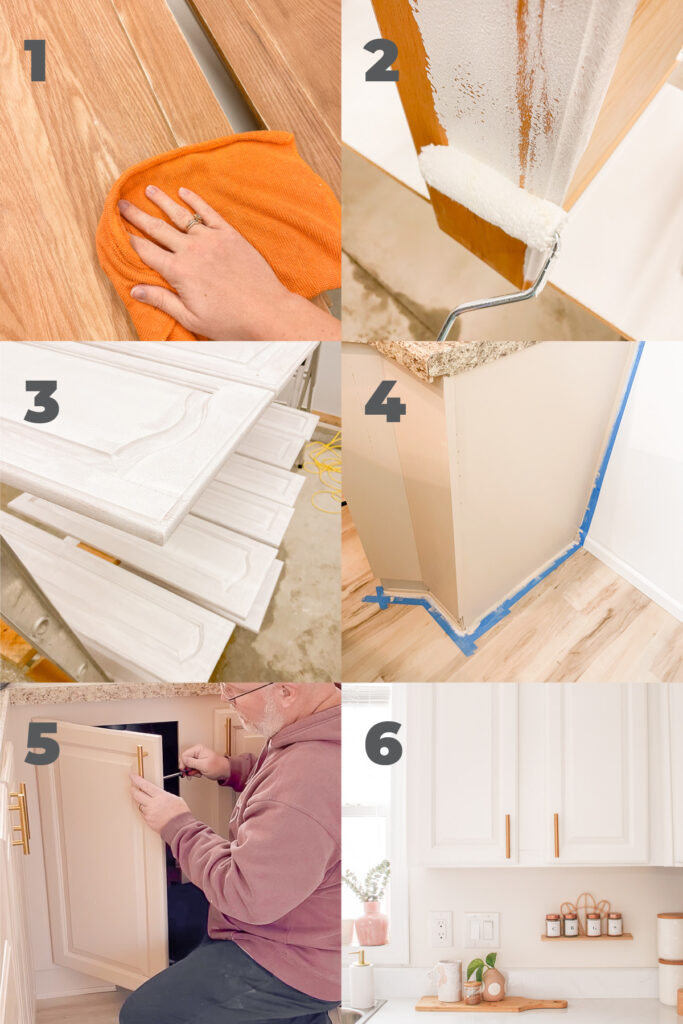
- Remove your cabinet doors. Do a scuff sanding by hand with sandpaper or a sanding block. The take a damp cloth and wipe down the doors so that there is no dust left when you go to paint.
- Paint one coat with primer. We used a roller to paint the flat areas and then a brush to get into the crevices. It takes about 6 hours to dry so definitely wait the full time. The flip your cabinet doors and prime the other side, then wait again to start on the actual paint.
- We painted our upper cabinets a different color than our lowers, if you are doing this make sure to label them so that you don’t get them mixed up. We started with a brush to paint the crevices of the cabinet doors, then ended with a roller so that we had as little brush strokes as possible. We had to paint more coats than I anticipated, I think it was 3 or 4. There is also a long drying time between each coat before you can flip and paint the other side of the door. So, it is very time consuming, BUT worth it!
- Repeat these steps with the actual cabinets that the doors go on in the kitchen. This was much less work than painting the doors!
- Attach the finished and dried cabinet doors and add new hardware if you desire (I linked what we used in the supplies list).
- Yay!! It’s done AND looks beautiful!! I cannot express how well these have held up – but make sure to use the products I linked and NEVER regular wall paint – that’s where you’ll get tacky and chipping doors.
It’s really a very simple process, but just time consuming due to the long drying times of the cabinet paint. For many days my dad and I would go out in the garage first thing in the morning and do a coat of paint on the cabinet doors – ha! Again, so worth it!
If you have any questions or do this project yourself PLEASE DM me @mikylacreates on Instagram, or you can follow me for more house projects! Yay! Talk to you soon!
1 comment on “How To Paint Cabinets The Right Way”