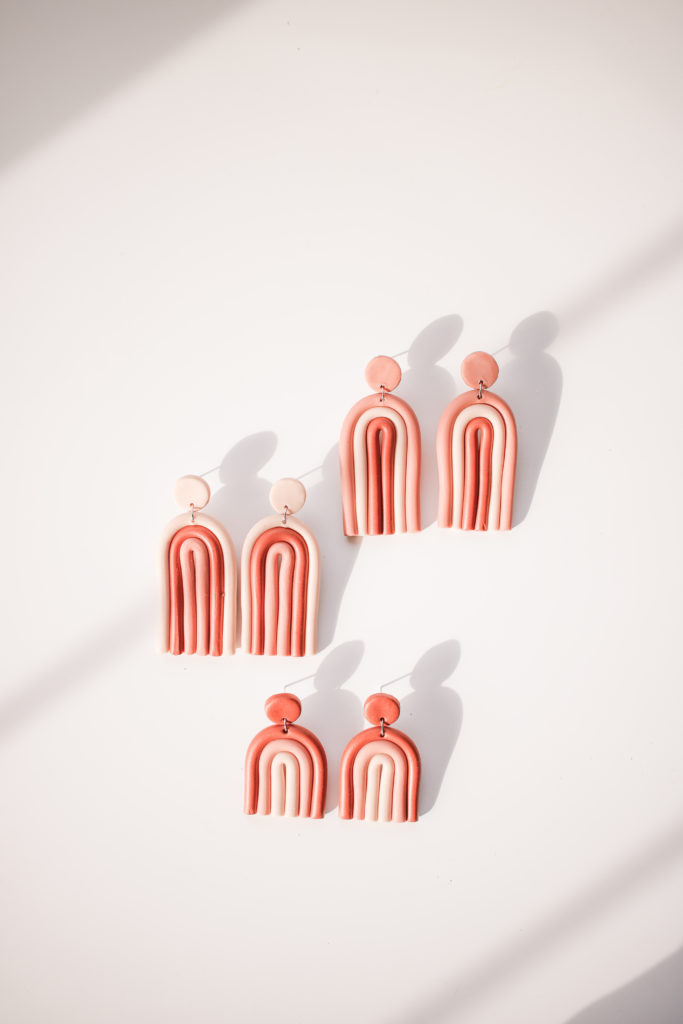
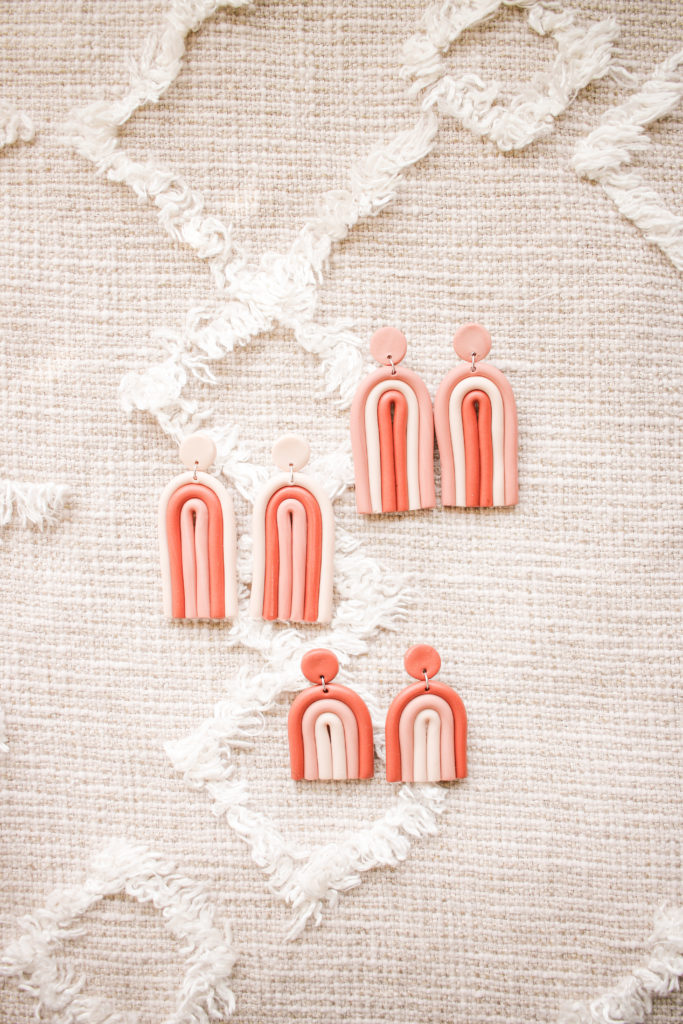
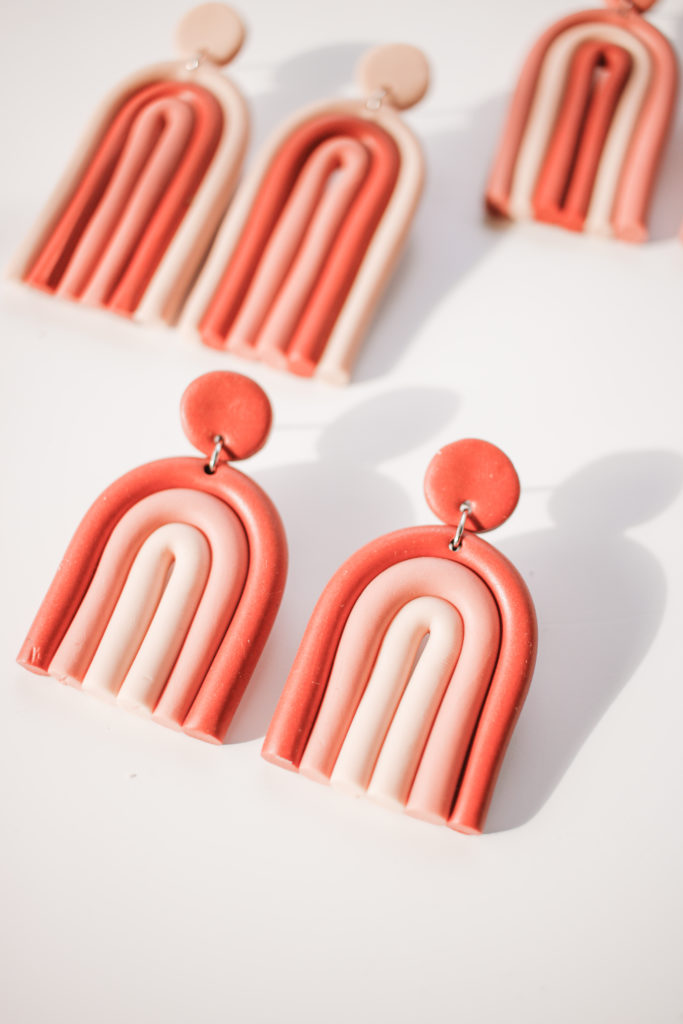
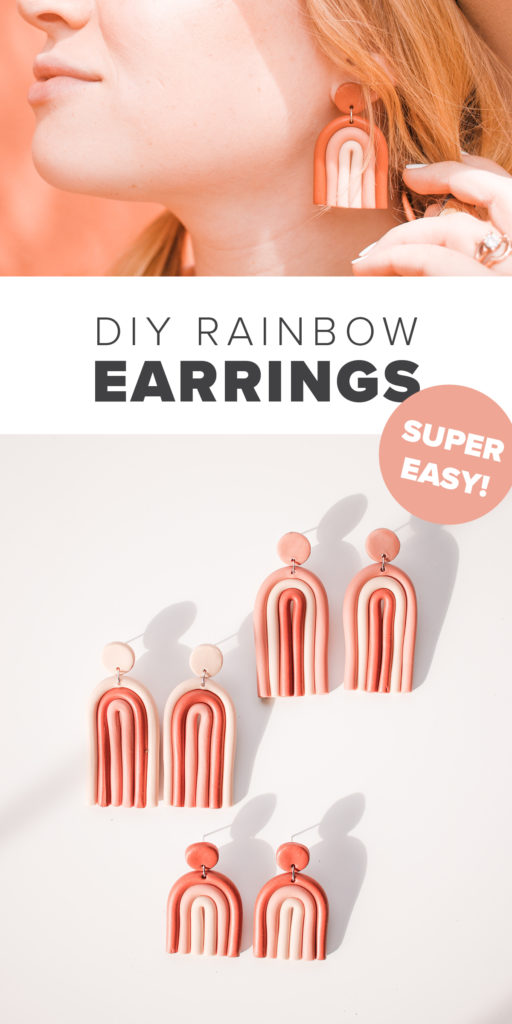
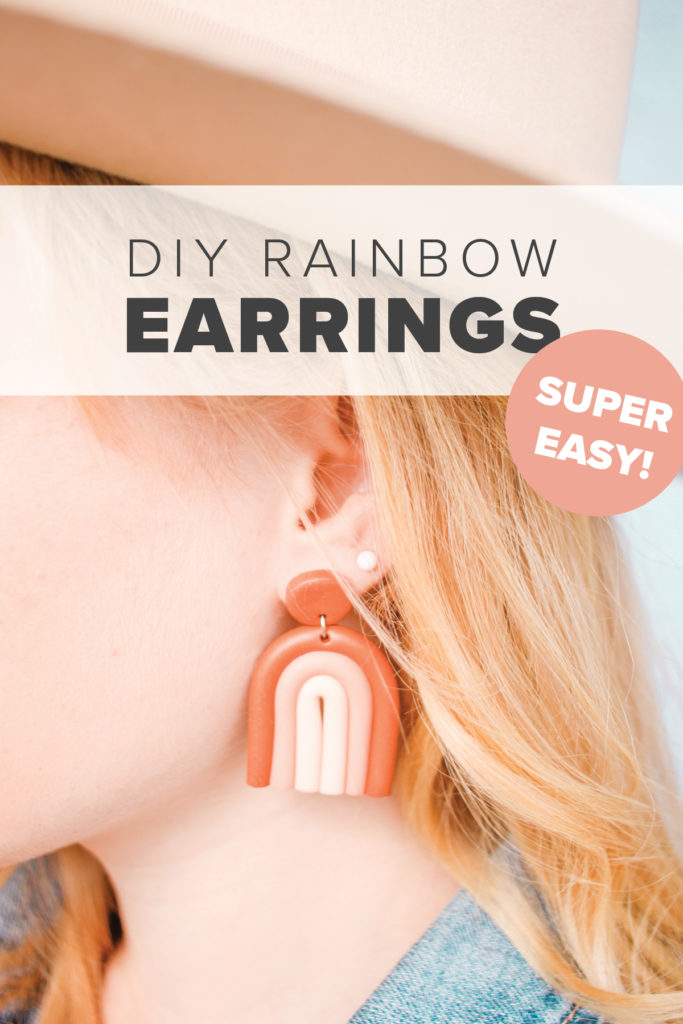
I thought it would be fun to make something to wear on St. Patrick’s day, but that could also be worn anytime of year, and that’s how these DIY clay rainbow earrings were born! Just pair them with a green shirt, and BAM you’re ready to go! Also! These would make the perfect gift for any of your gal pals!
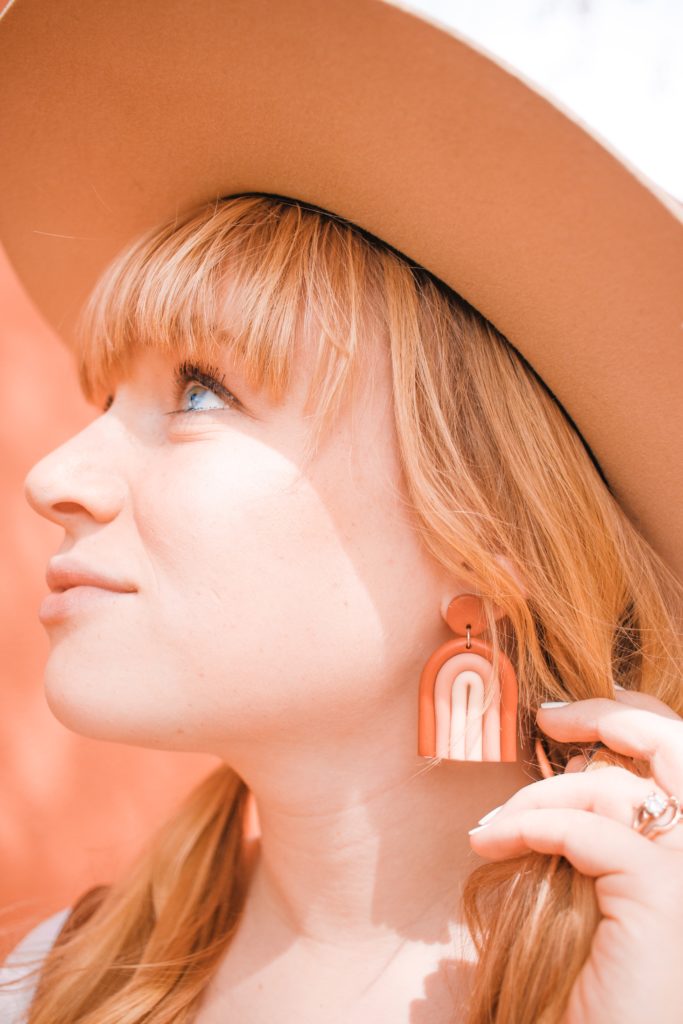
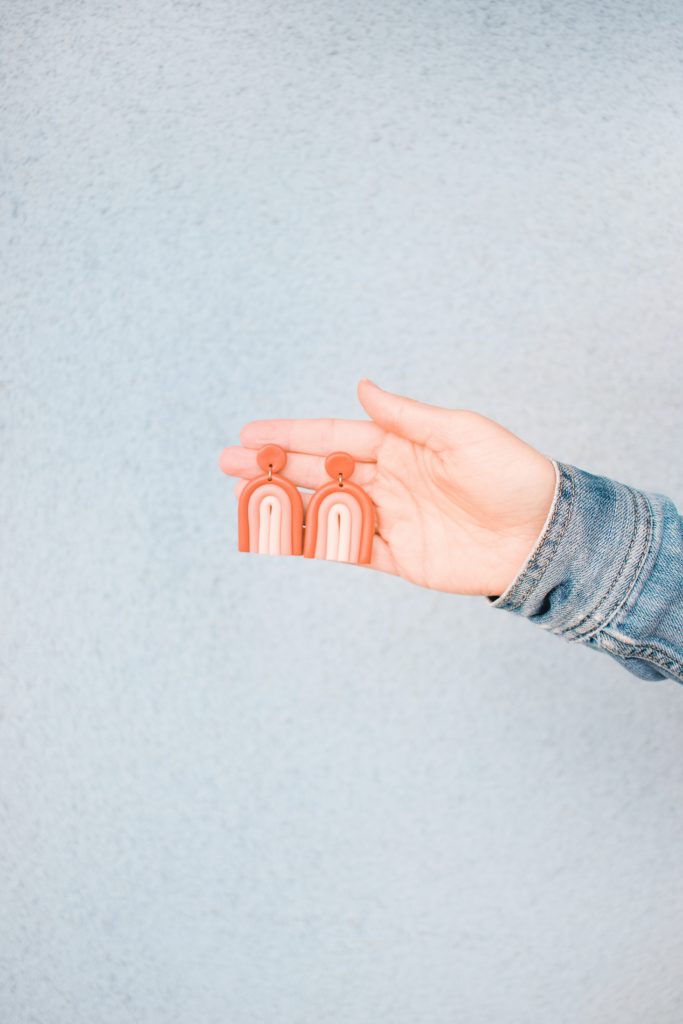
I’ll admit that I’ve been wearing these rainbow earrings on REPEAT ever since I made them, they look expensive, even though they are totally NOT! They are also so, so easy to make, and you need literally no artistic skill to make ’em #winning.


They babies are made out of Sculpey (polymer clay), and it makes me laugh because as a kid I was OBSESSED with sculpey, for real it was my #1 hobby for awhile. Making this project really makes me feel like my life has come full circle, and also that I’m still a kid lol.
The tutorial for these earrings are pretty simple, so let’s just get to it!
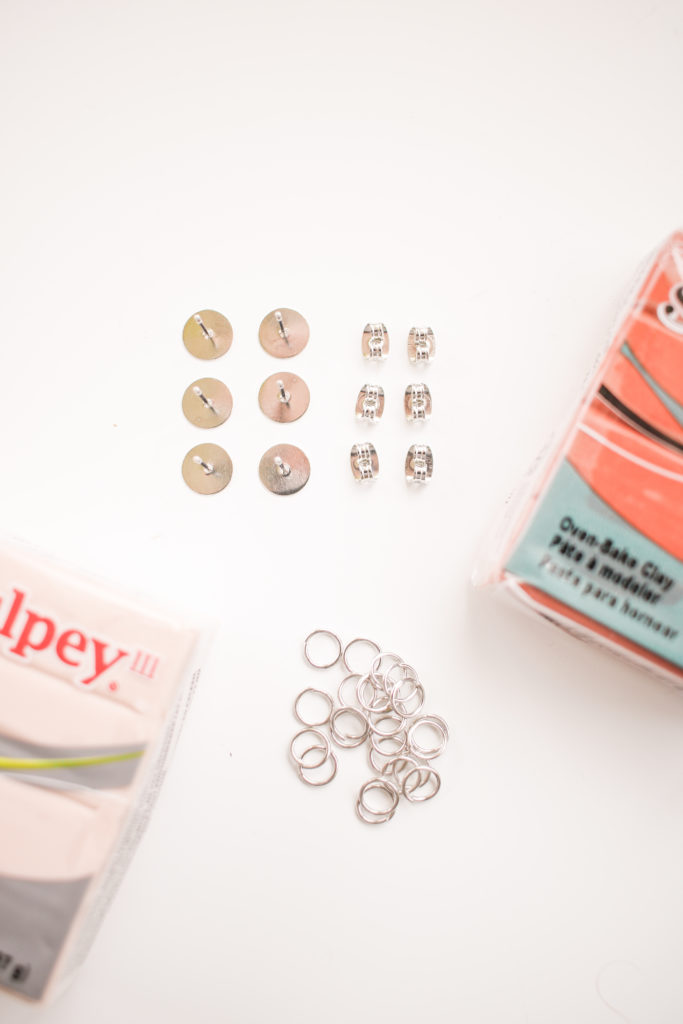
SUPPLIES
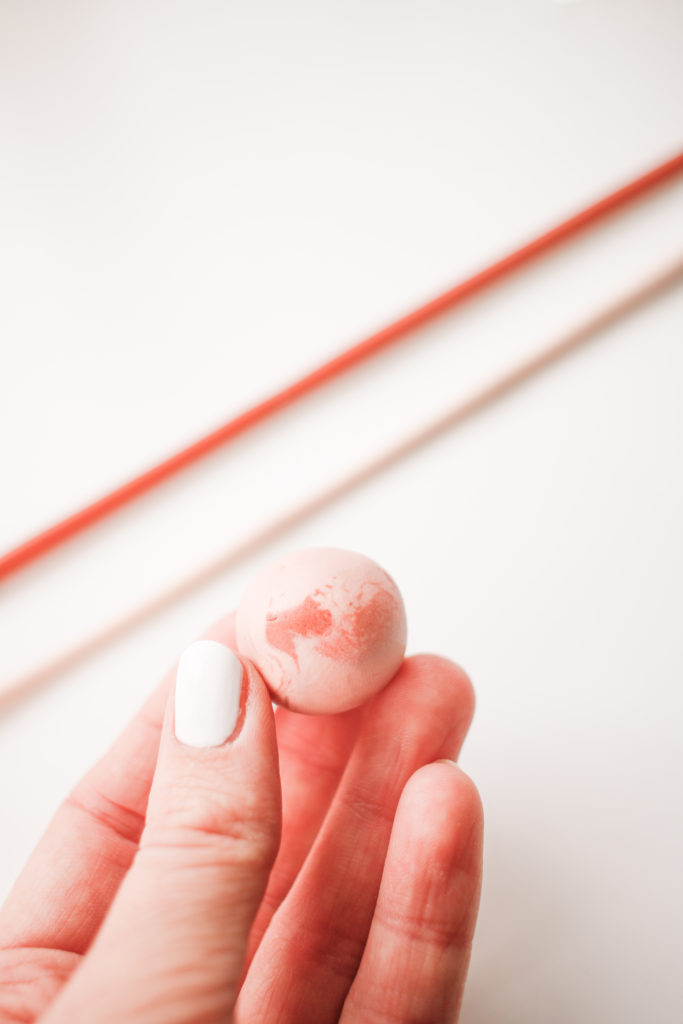
Sculpey (polymer clay) – I used 2 colours, orange and very light pink, then mixed the two together for the third colour.
Marker lid (to cut out circles)
8mm earring post & clutch (mine came in a pack)
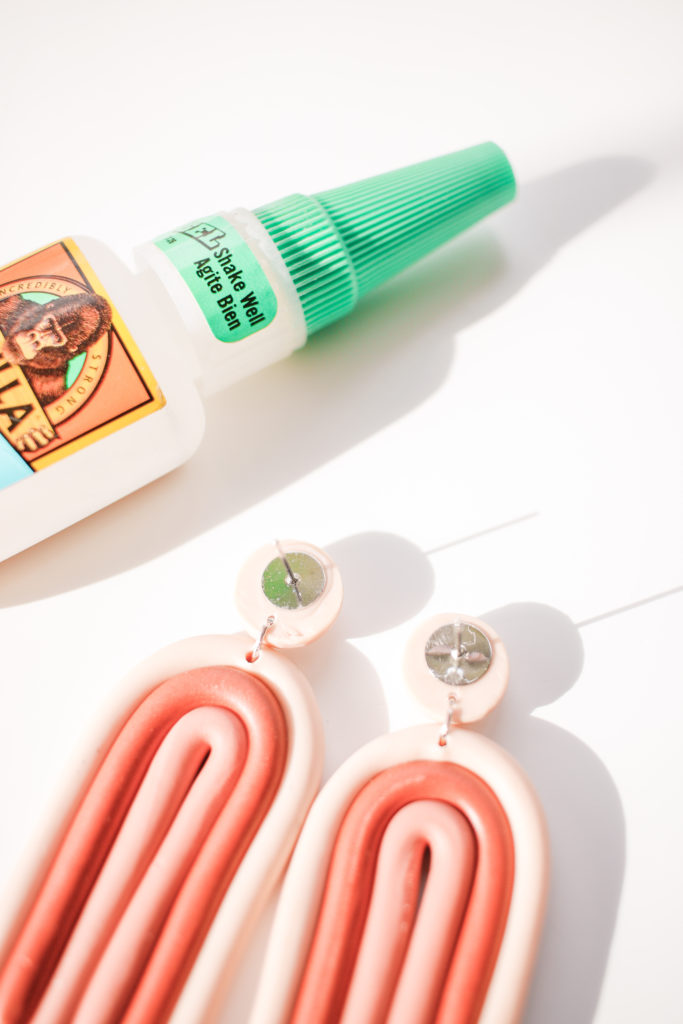
Super Glue
Pliers
Ruler
Needle
DIRECTIONS
- Get your three colours together. I used two colours of polymer clay, then mixed them together to make my third colour because I wanted that gradient effect.
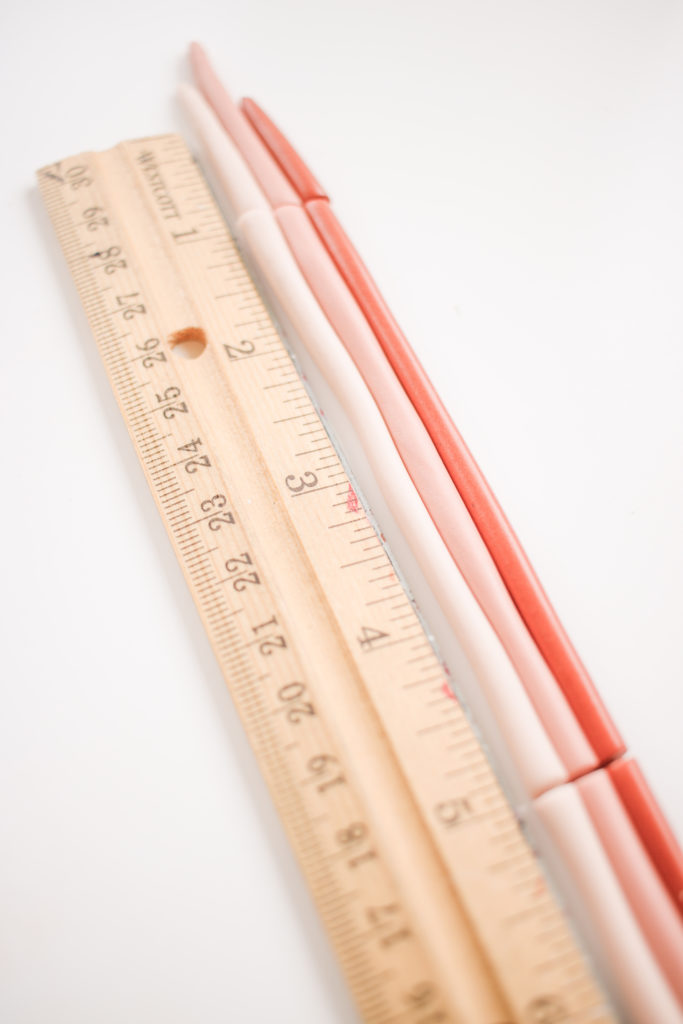
- Roll out long snakes of clay in each colour.
- Cut your clay snakes to be 5 inches long each.
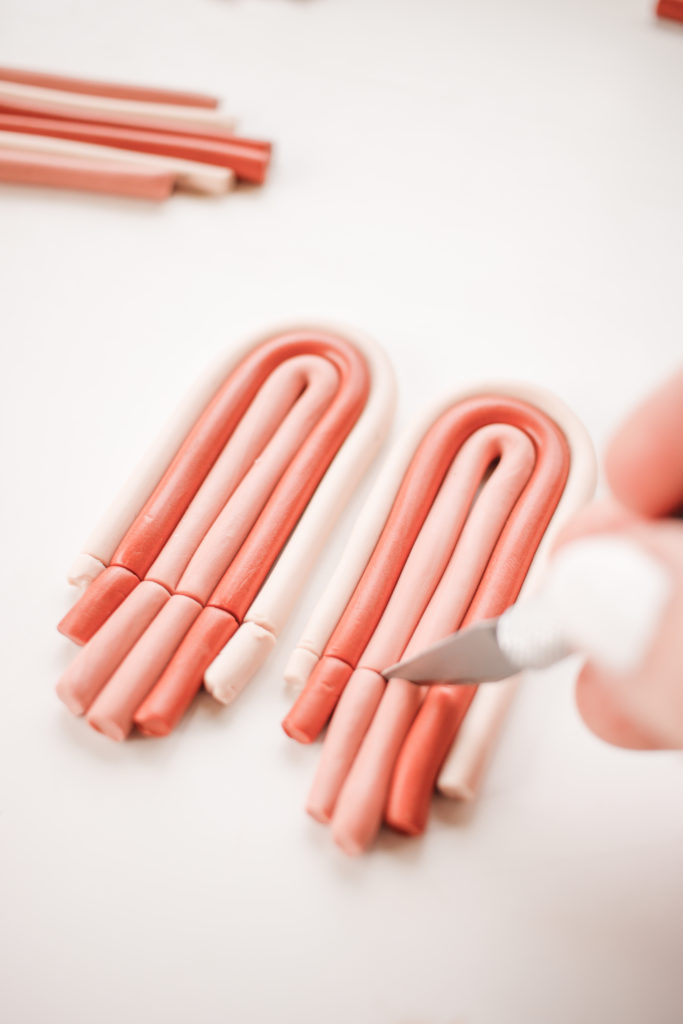
- Take your bottom clay snakes and fold it in half, then fold your other two pieces on top of it.
- Repeat for your other earring.
- Using your exacto knife trim your rainbow so that it’s even. Then use that earring as a measurement to trim your other rainbow.
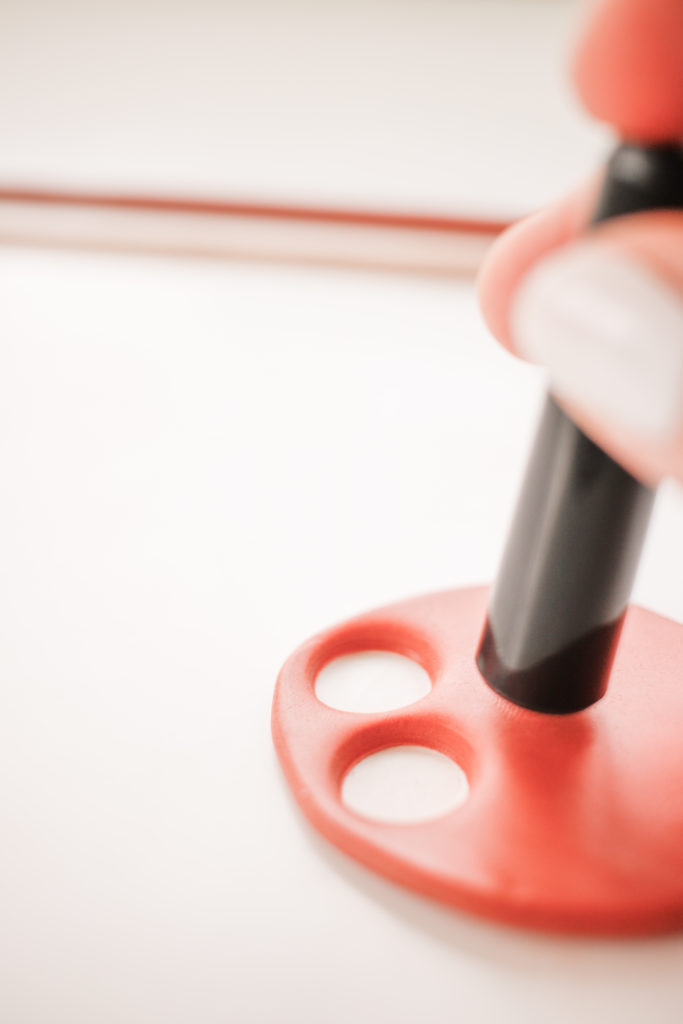
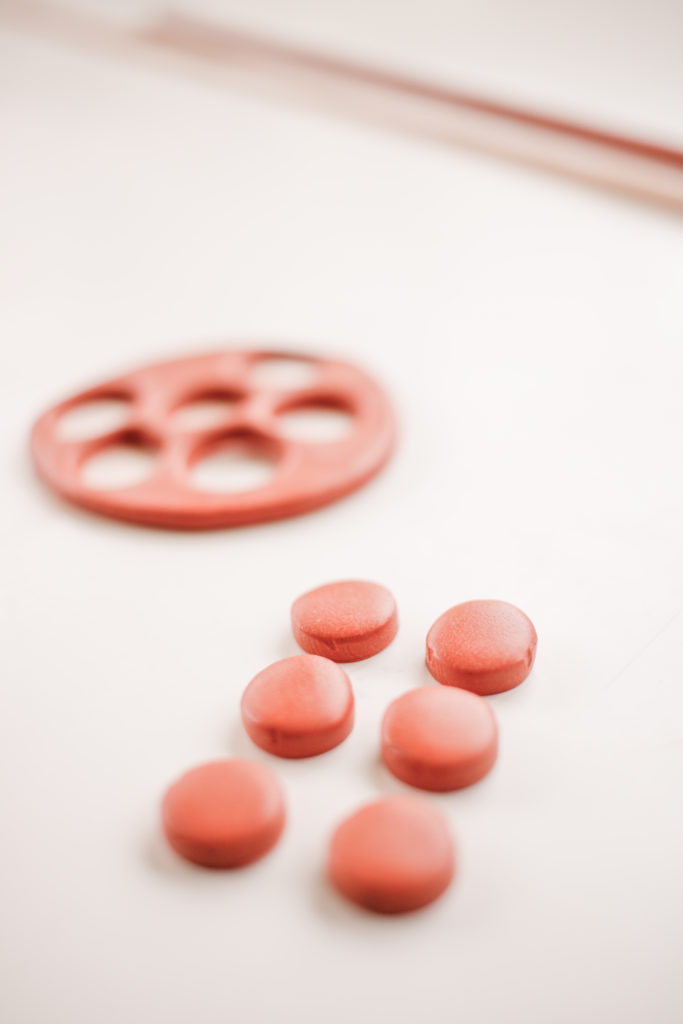
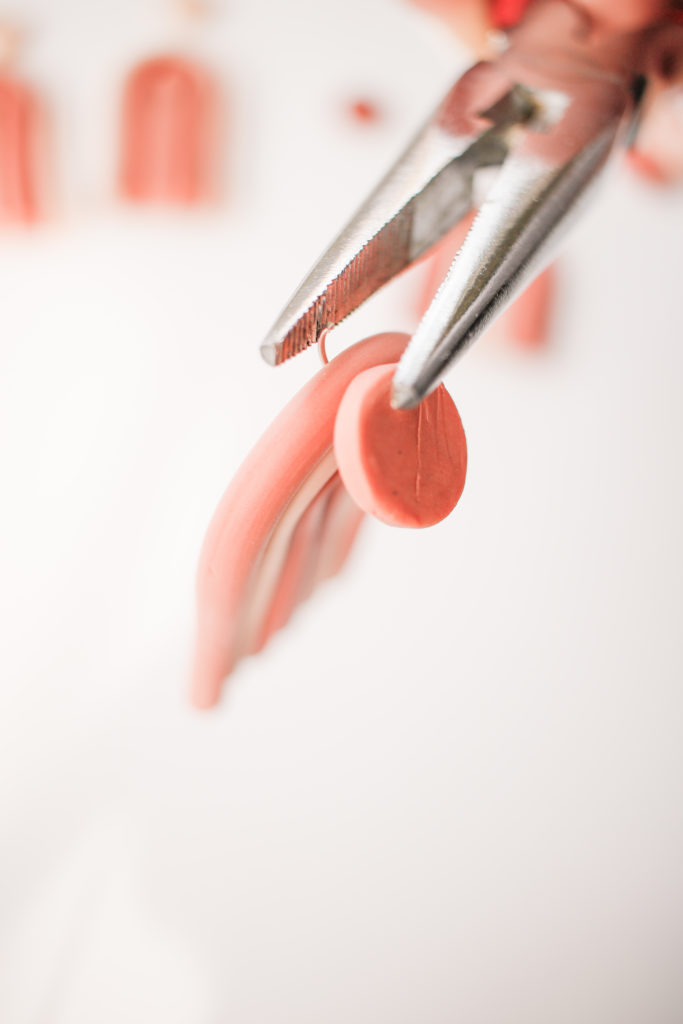
- Roll out clay in the colour of the top of your rainbow, use a marker lid to cut out two circles.
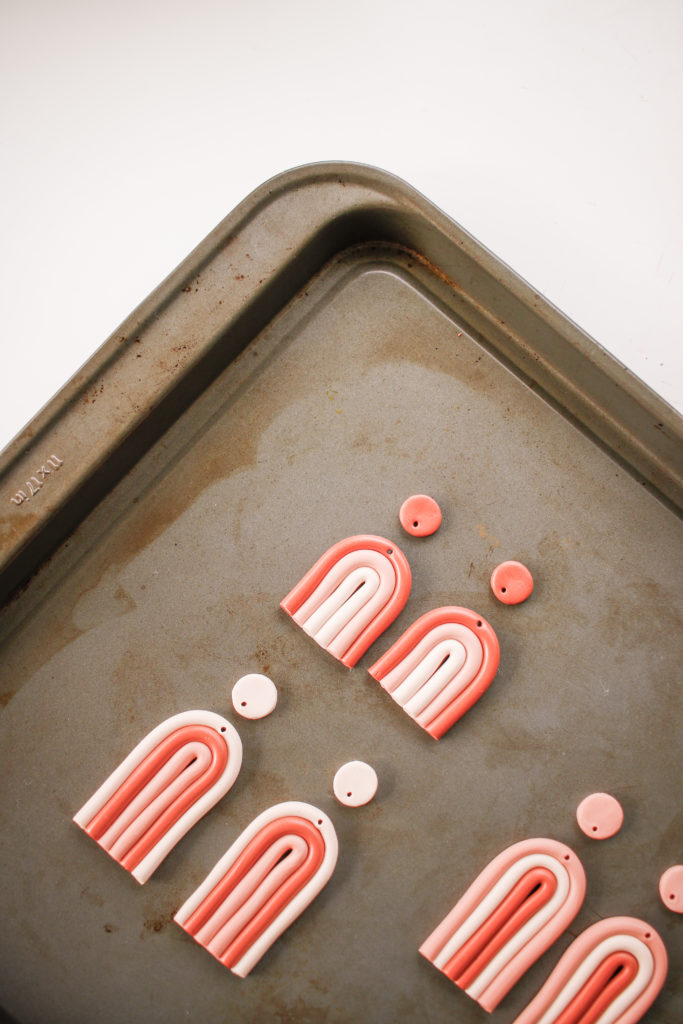
- Use a needle to poke a hole in the top of each rainbow and bottom on each circle.
- Bake your earrings according to package instructions.
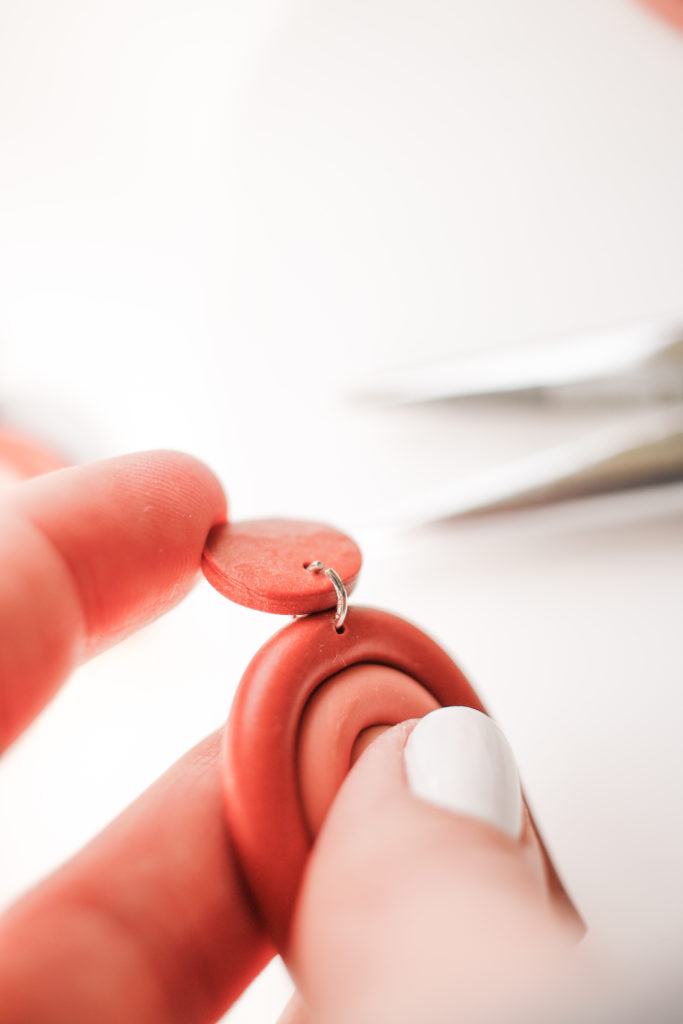
- One cooled use super glue to glue earring back onto your clay circles.
- Attach jump ring to the circle and rainbow with pliers, repeat for other earring.
- You’ve got yourself a brand new pair of earrings!!!


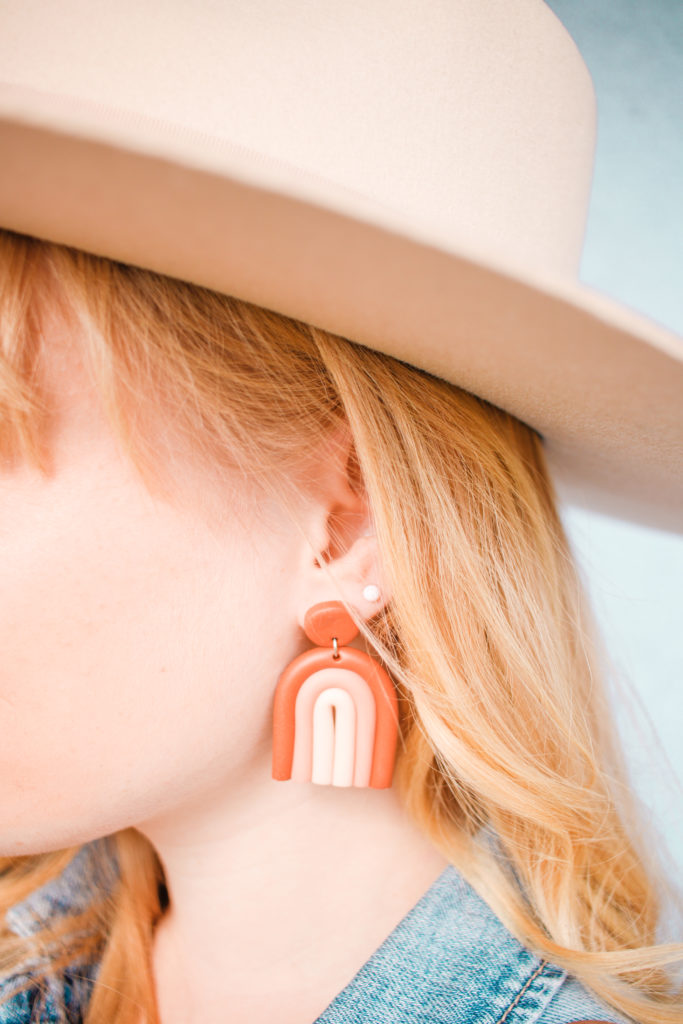
Ahhh! I just love how these turned out so much!! They’re the perfect balance of crazy, classy and trendy! They also make me feel like Miss Frizzle from the Magic School Bus when I wear them which is obviously a plus 😉
Ps. Check out my DIY earring holder to store your new rainbow earrings! Plus, these crazy plant earrings I made for a costume last year!
That’s it! Hope you love these DIY clay rainbow earrings as much as I do! Oh, and happy St. Patrick’s Day!!

Tips for making the “snakes” of each color even size and even throughout?
Hey very nice blog!