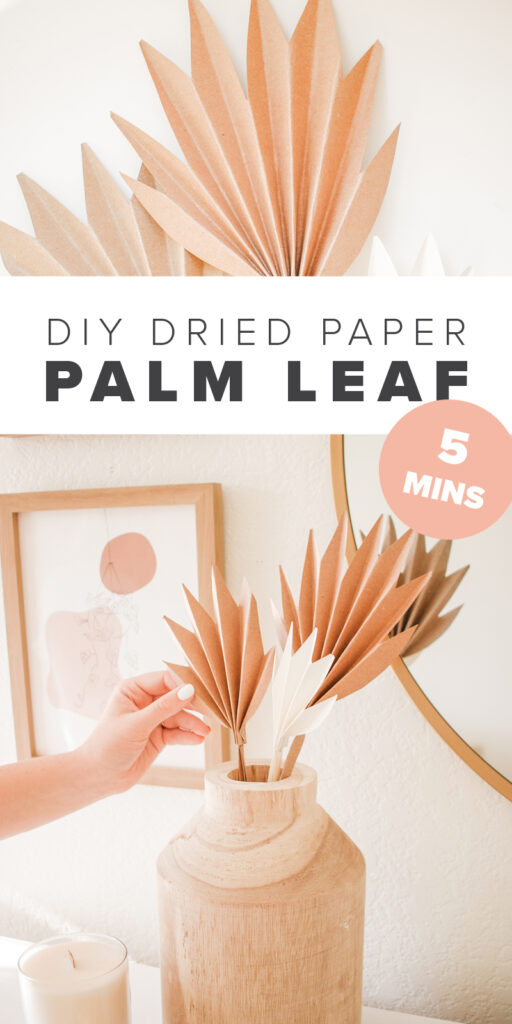
DIY Dried Paper Palm Leaf
Hey there! I have a really simple blog post that I originally made for an Instagram reel, but I loved it sooo much that I decided that it needed to live on my blog too! I came up with this little DIY because I had been seeing these dried palm leaves everywhereeeee, but from what I can tell, everyone is buying them online. Now, I love online shopping but paying for a dead leaf on the internet just seemed like a little much haha! So, I figured that there MUST be a way to make my own – and there is!!
I made these by trial and error, and it took a bit to figure out the easiest and best way to make them. I thought I’d just tell you how I made them so that you don’t have to go through the trial and error part and just skip to the “wow, these are insanely easy to make!” part – HA!
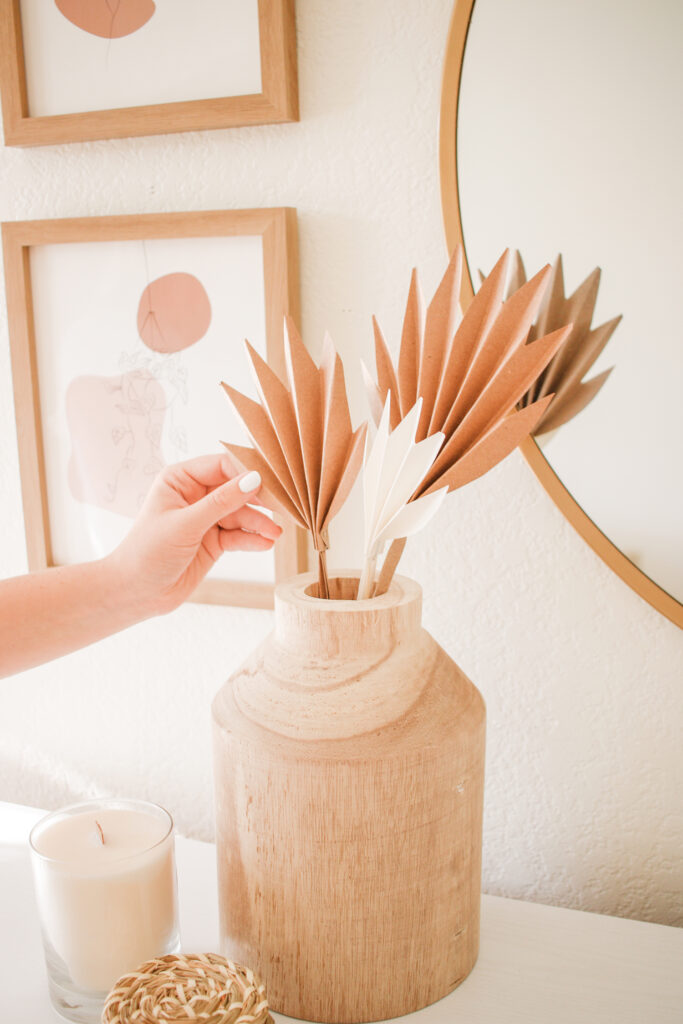
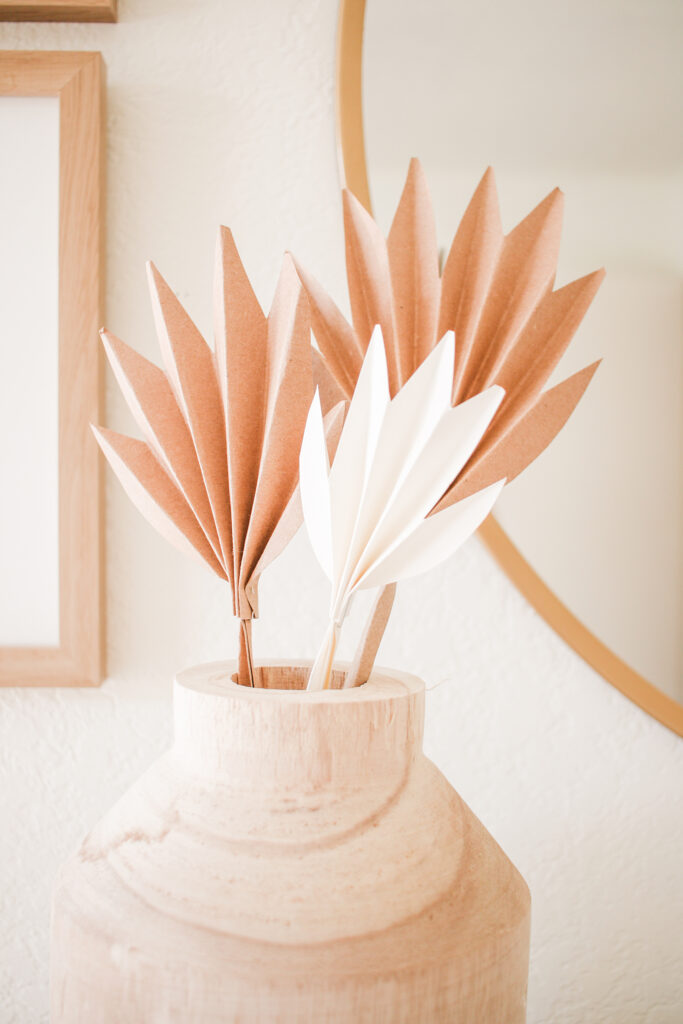
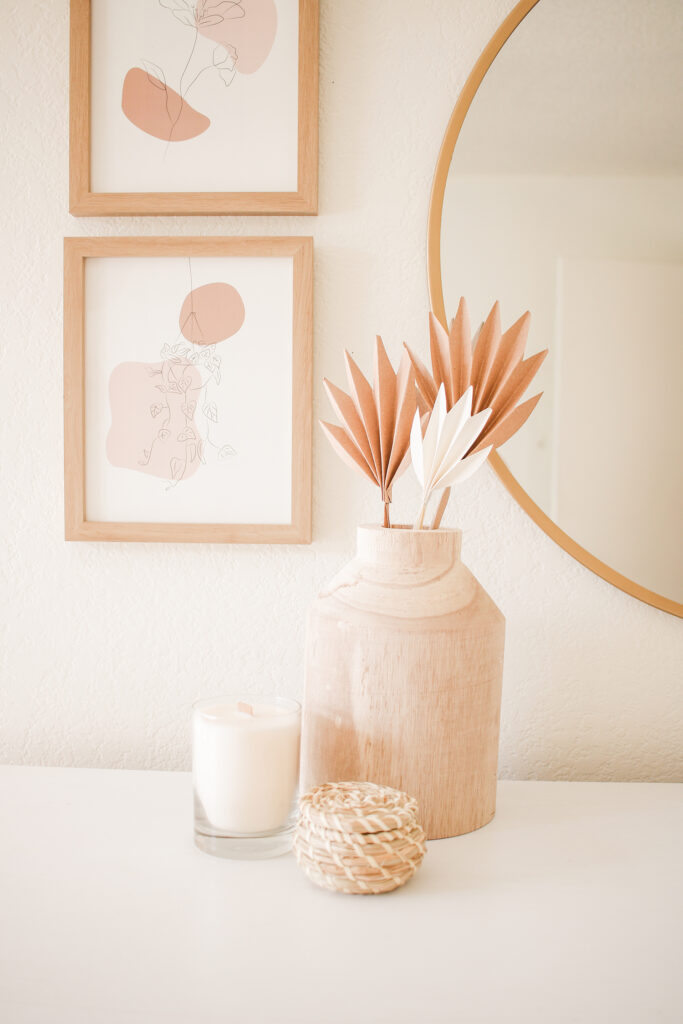
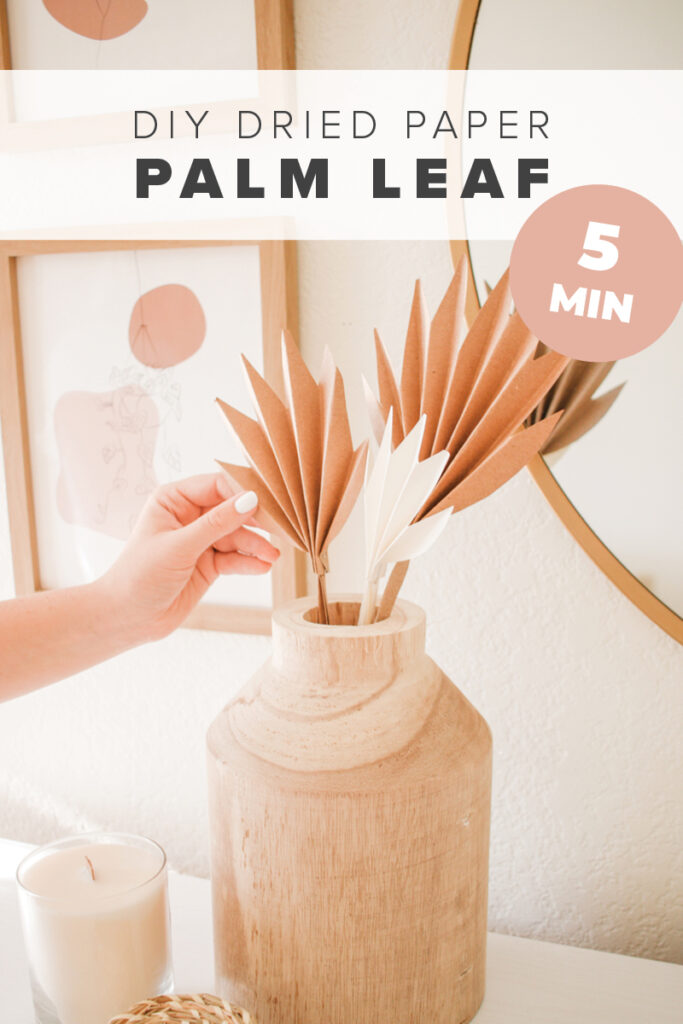
Since I made the ones that you see in the photo, I’ve made a bunch more because I love how boho they are and how they look with the rest of my home decor! I used to put real eucalyptus in all my vases, but I always had to switch it out. It’s nice to have something in my vases that just always looks good!
If you’re into easy home decor DIYs then you need to check out these napkin holders, mirror wallhangings, free printable wall art, and scrunchie holder!
Anyways, like I’ve already mentioned a million times, this DIY is hecka easy, soooo we should probably just get to it!
Supplies:
12″x12″ Card Stock Paper
– In any color you’d like but I prefer neutrals because it looks more realistic!
Stapler
Bowls
-In various sizes
Scissors
Pencil
DIRECTIONS:
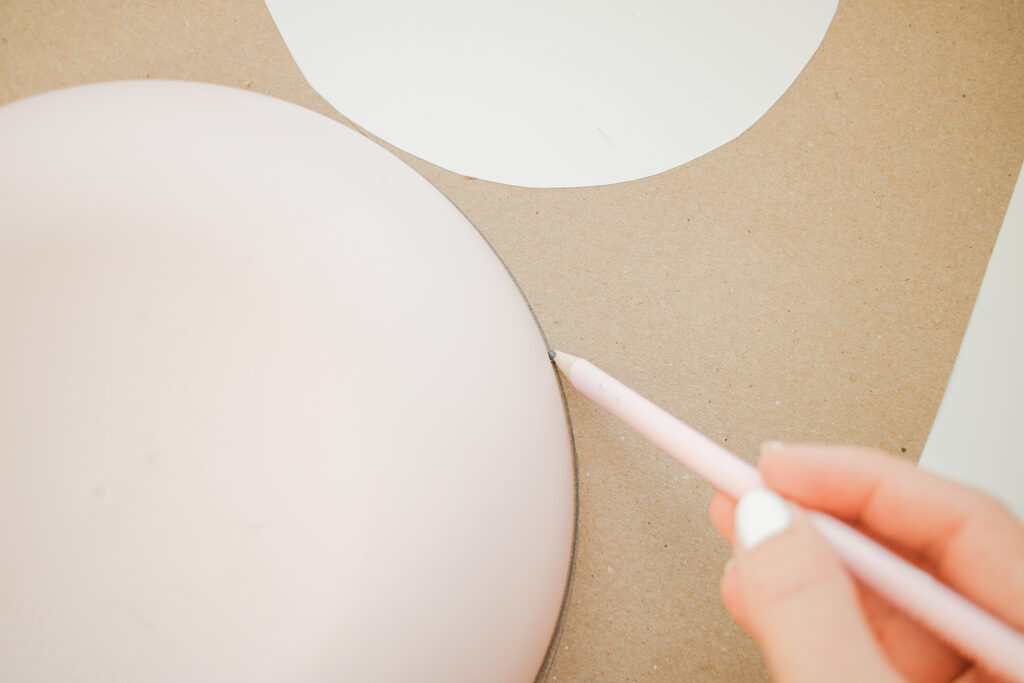


- Use a bowl to trace a circle onto card stock. Put the bowl off the edge of the paper so that the circle has a flat edge
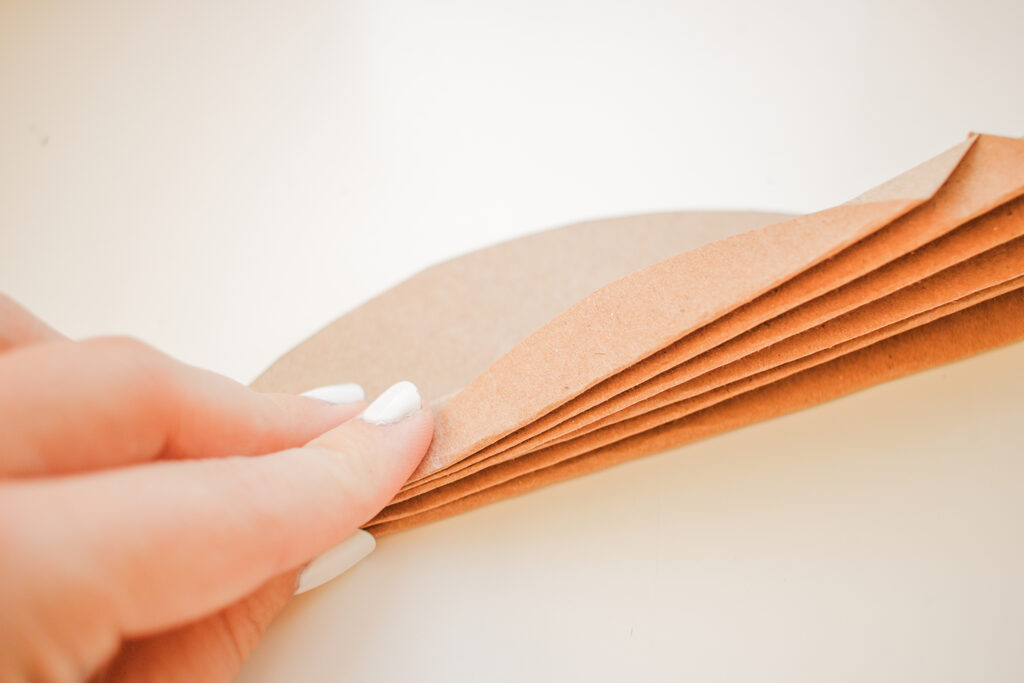
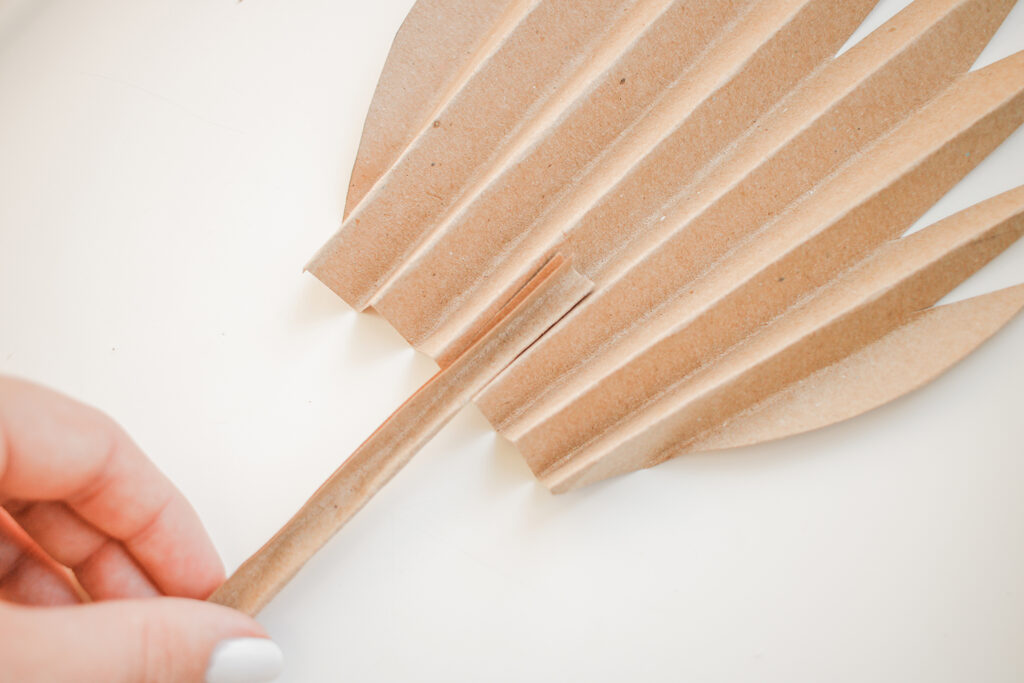
- Accordion fold the paper circle. Fold it so that the folds are perpendicular to the flat edge of the circle (see photo).
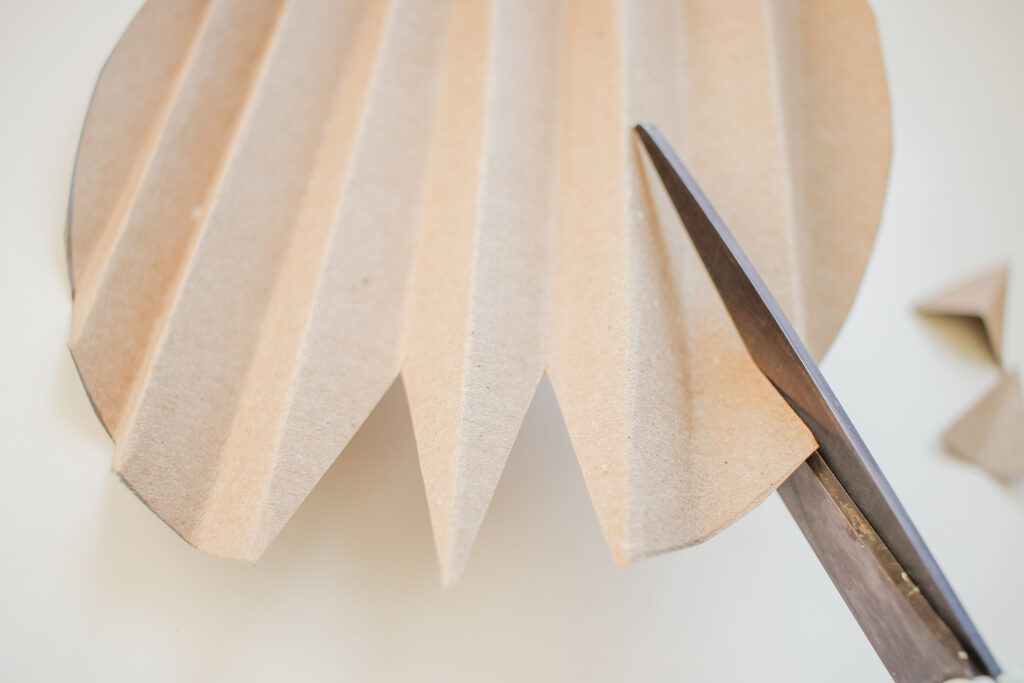
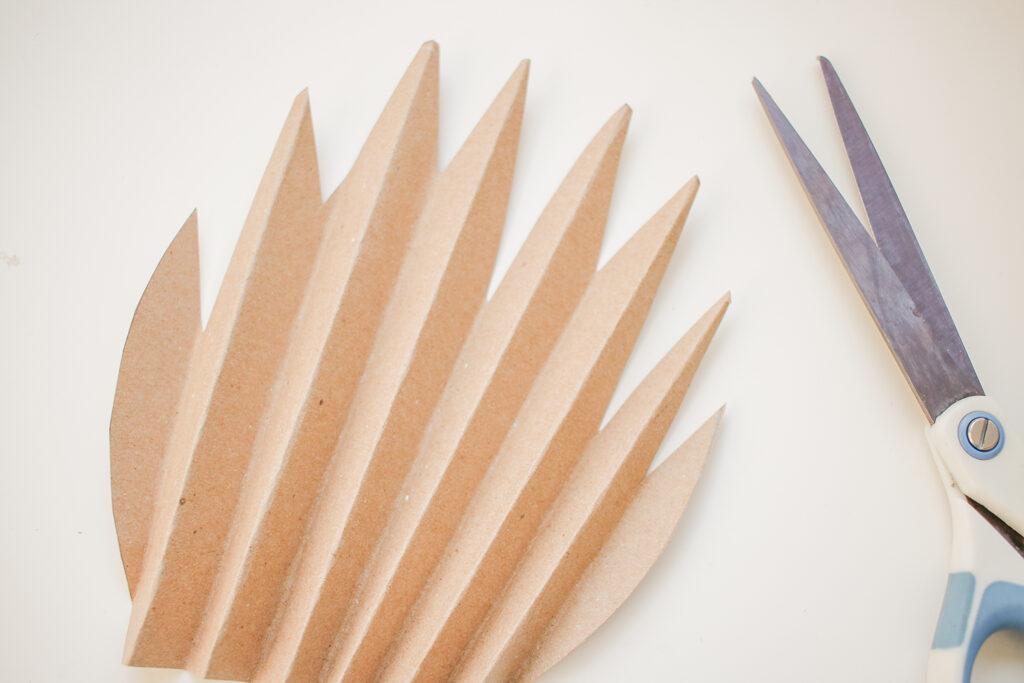
- Cut triangle shapes notches between the folds around the curved section of your paper. I made different sized notches to make it look more natural and less perfect.
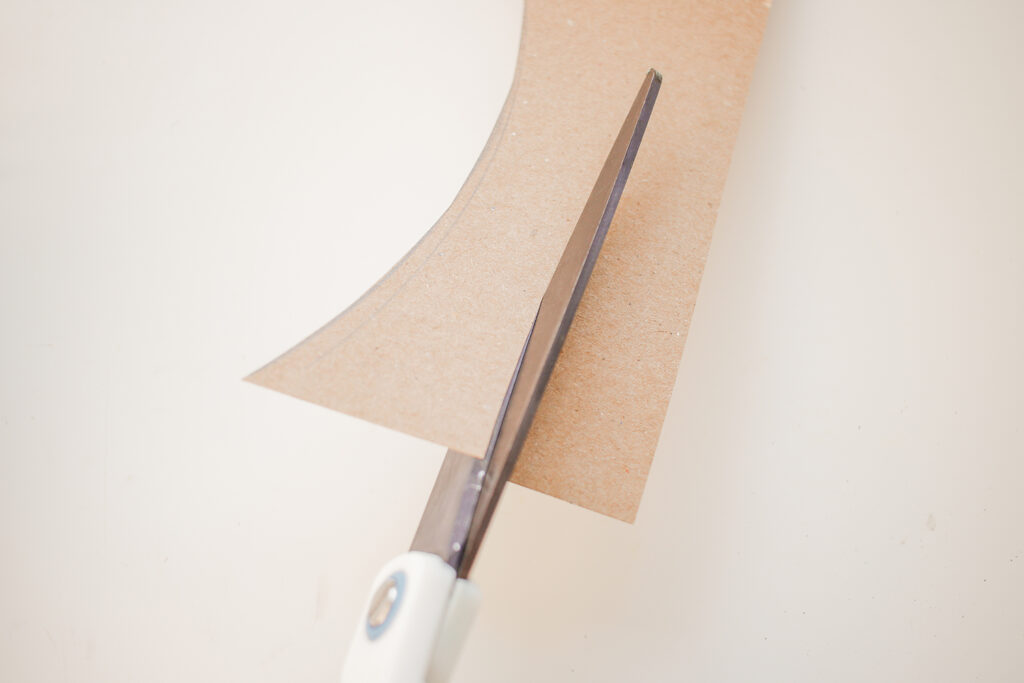
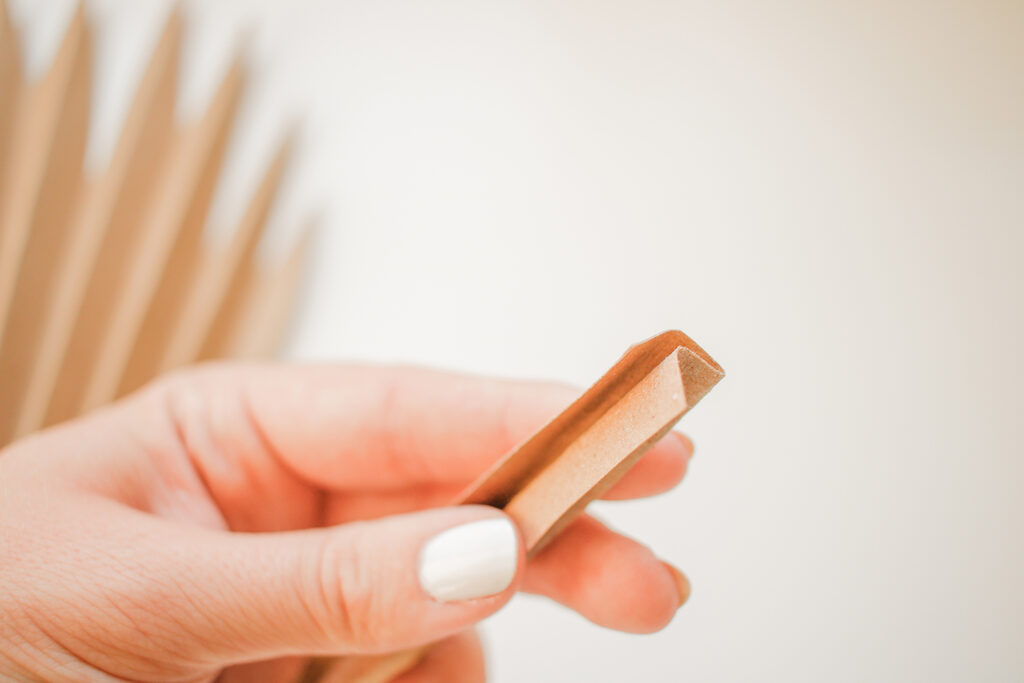
- Make the stem by cutting a two inch thick strip of paper, fold it in half and then in half again.
- Place the stem at the bottom of your paper circle and between the center folds.
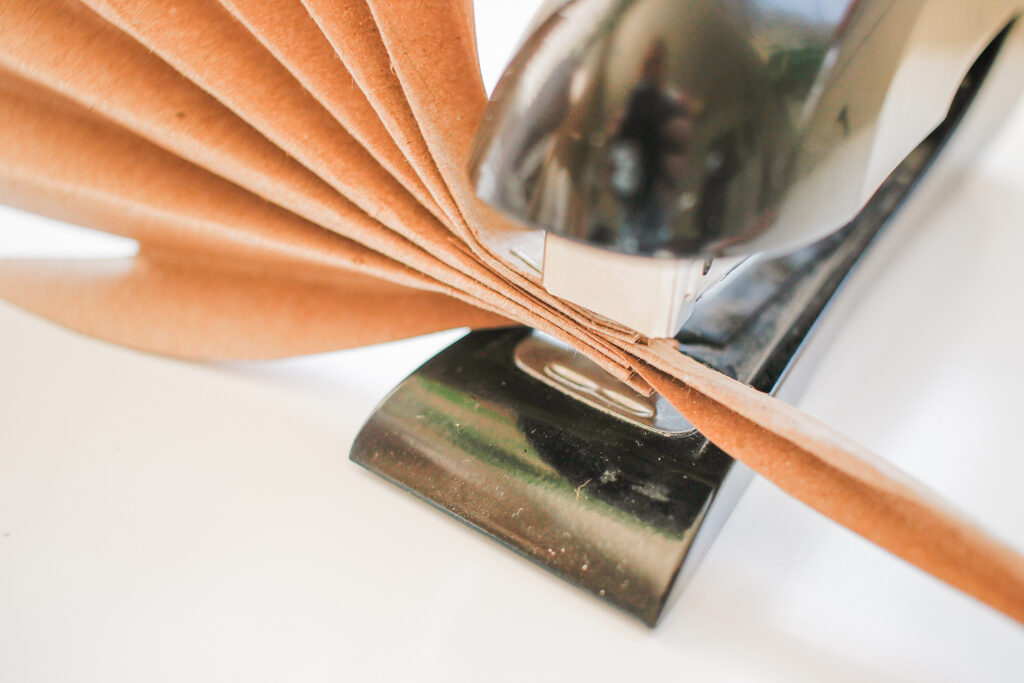
- Pinch the bottom (the flat end) of your folded paper circle. Make sure that the stem is trapped between the folds.
- Staple where your are pinching the circle.
- Add a few more staples to the stem so that it stays together.

I made a few different sizes of palm leaves by using different sized bowls when I traced my circles. I also used two different colors – make it your own!
That’s it for this simple DIY! I actually think that the directions make it seem more complicated than it really is. These palm leaves are so simple to make, but kind of addicting so beware 😉
If you make your own DIY dried paper palm leaf, pretty please tag or DM me @mikylacreates so that I can see!!!
1 comment on “DIY Dried Paper Palm Leaf”