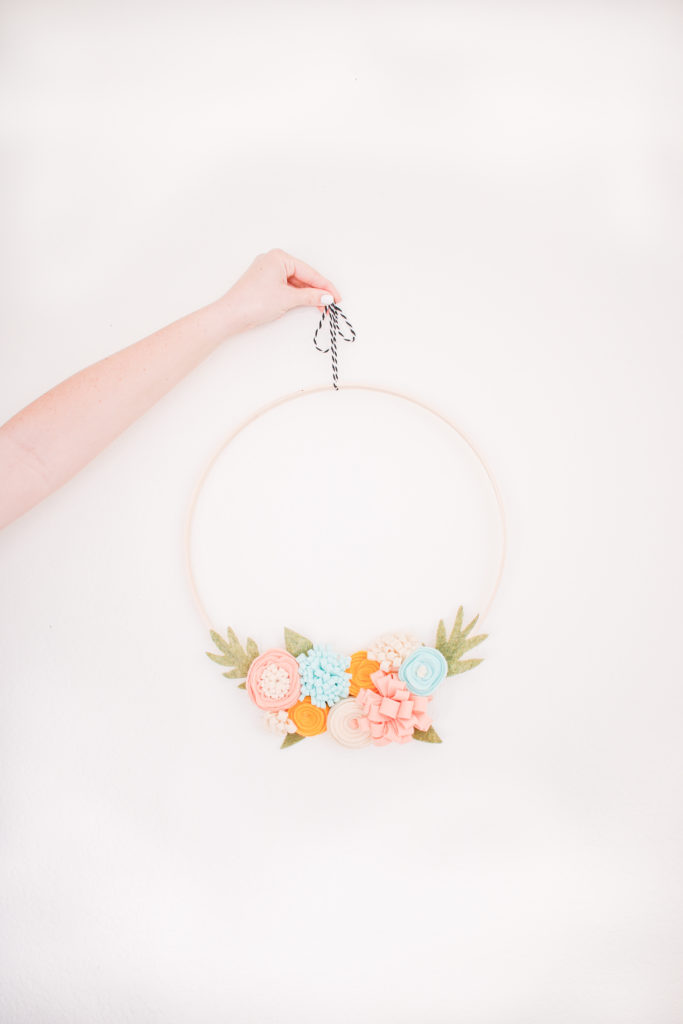
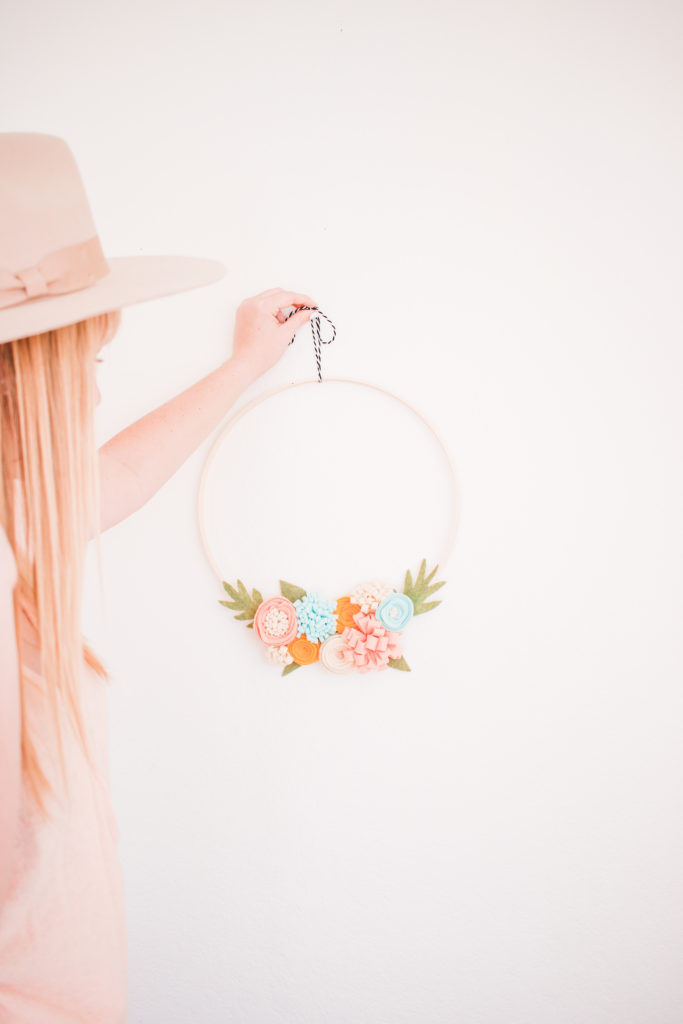
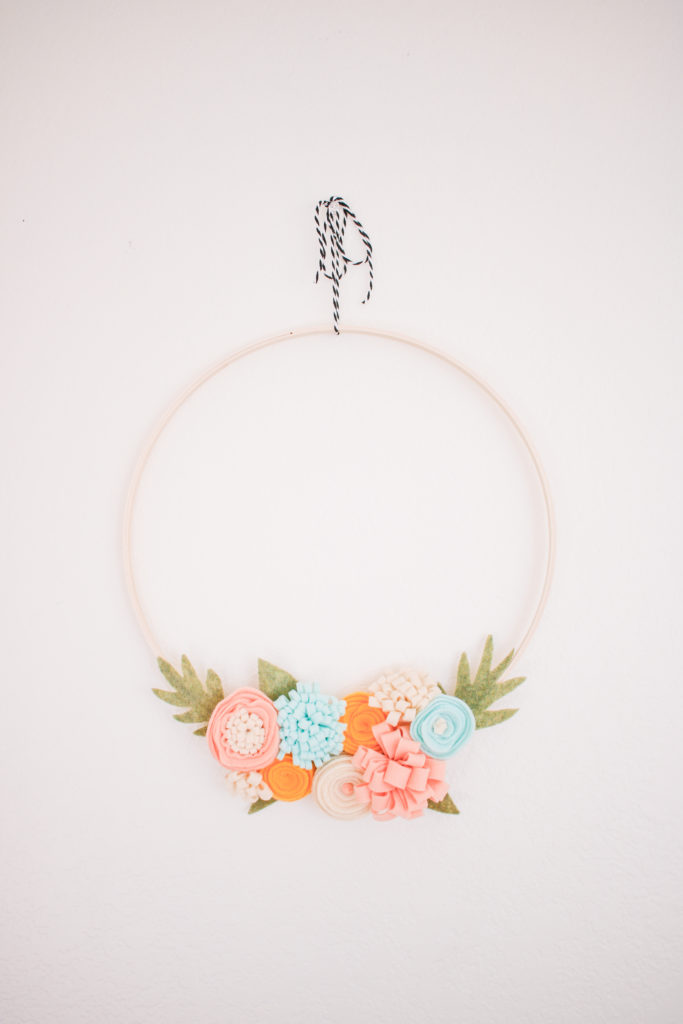
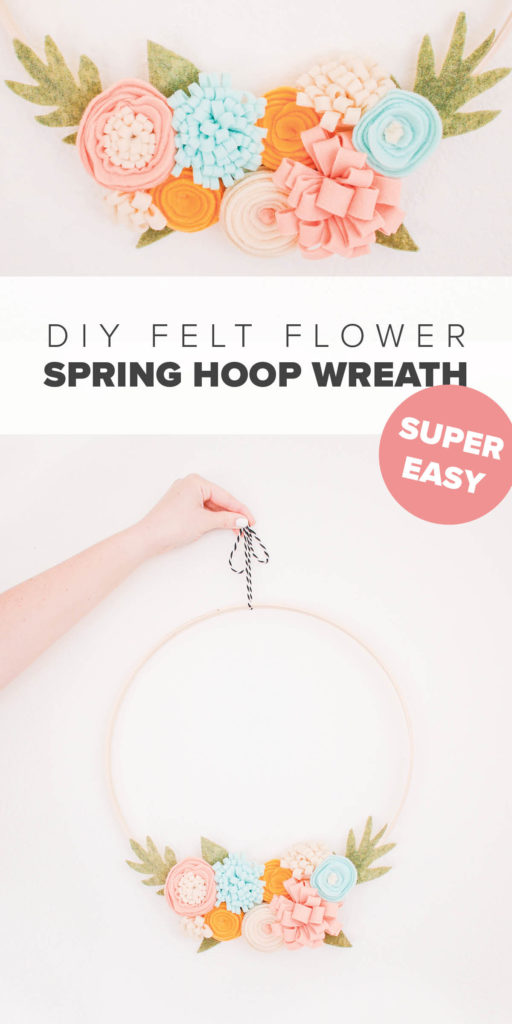
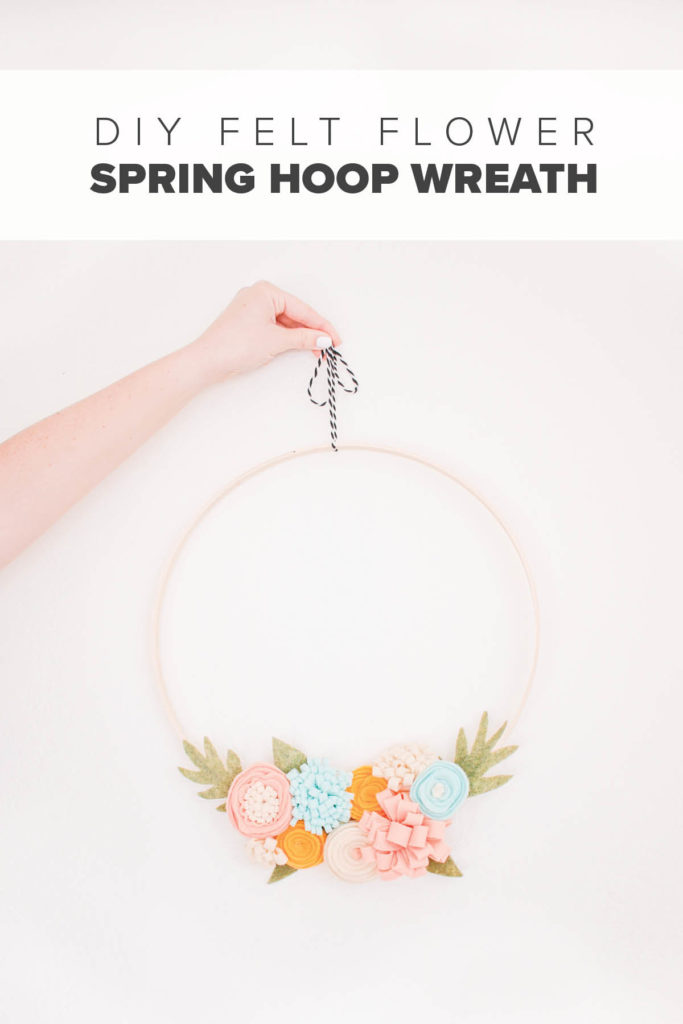
DIY Felt Flower Spring Wreath
Hello! Spring is officially upon us, Easter is almost here, and this DIY is for BOTH!! I wanted to make a wreath that was easter-y, but that you could also leave up all Spring! BUT AlSO! This is a greattt DIY to do in quarantine cause you don’t need many supplies – plus Michaels does curbside deliveries now! BOOM!
I’ve also discovered that wreaths are just my thing now – this is now my third wreath DIY and I ain’t mad about it! See my other two wreath DIYs HERE and HERE!
Okay, so honesty time – I put this DIY off for a long time because I thought that making the felt flowers would be hard… turns out it legit takes a minute to make! I will say that there are many types of flowers that ARE hard to make, however I chose ones that were easier because #priorities.
I’m now trying to think of other DIYs I can make with felt flowers because they really are SO fun and SO easy to make! If you have any ideas let me know! Anyways, we should get started on this springy DIY!
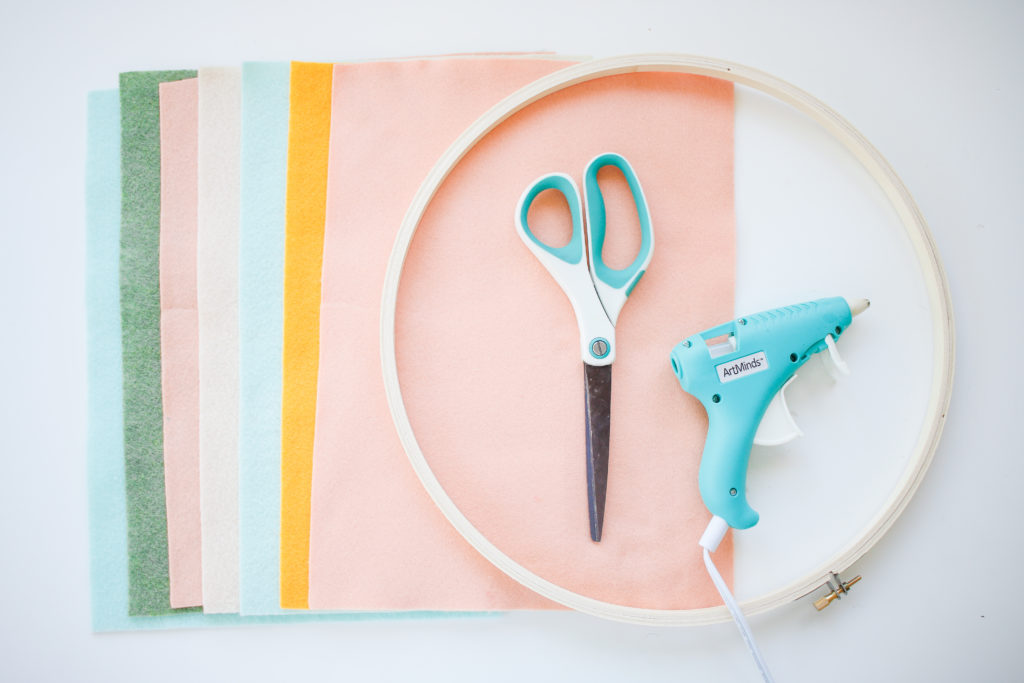
SUPPLIES
Embroidery Hoop
Felt (You only need one sheet of each color, I used 5 different colors)
Scissors
Hot Glue Gun
DIRECTIONS
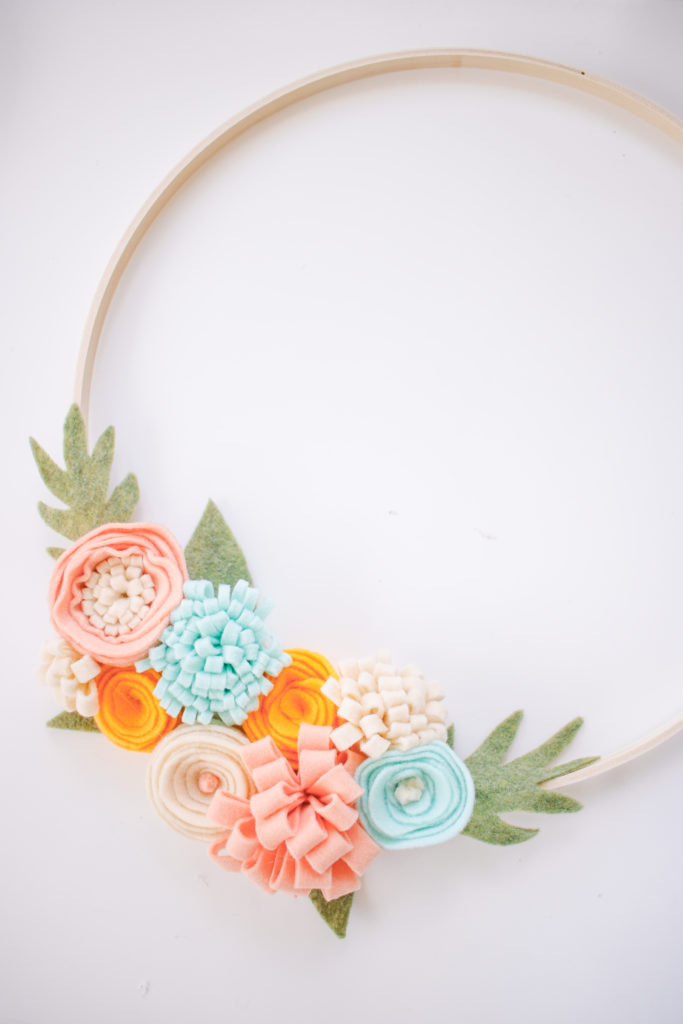
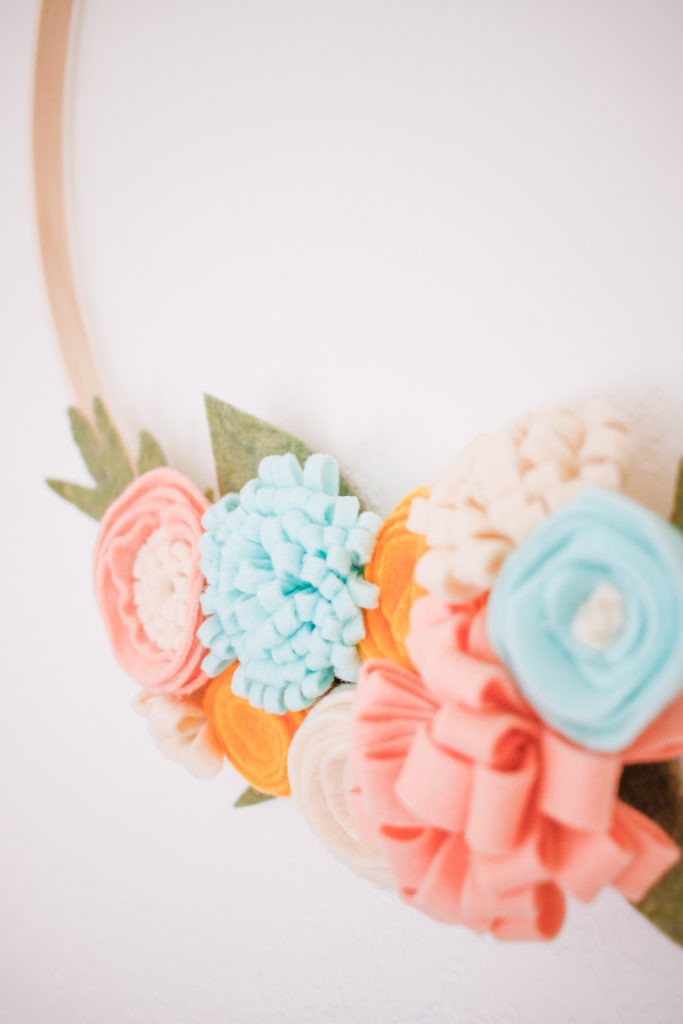
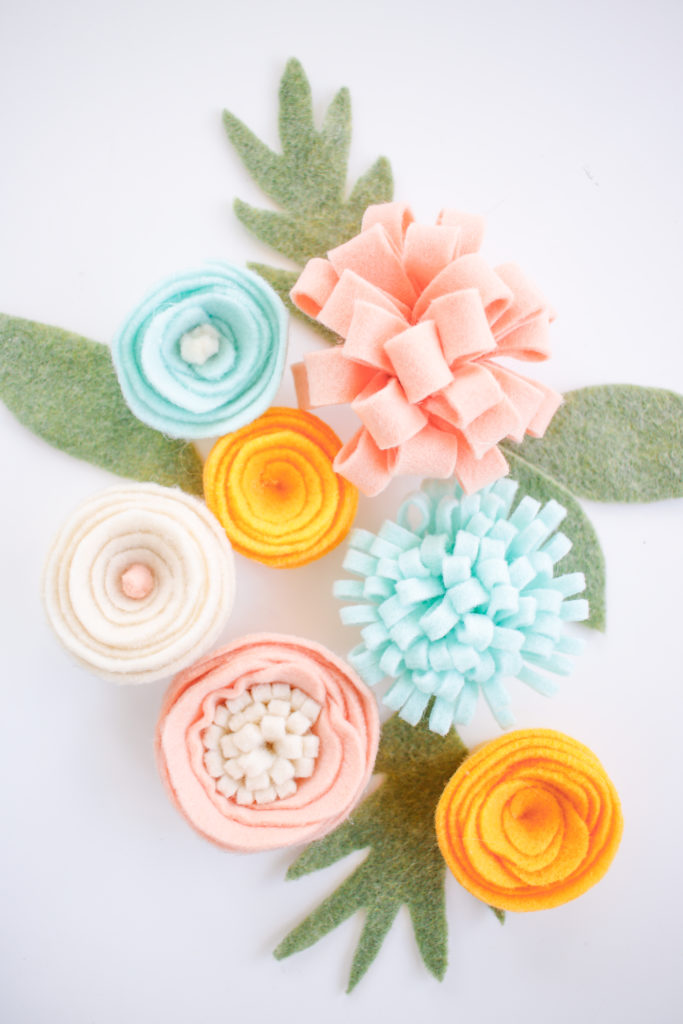
FOR THE MUM FLOWER:
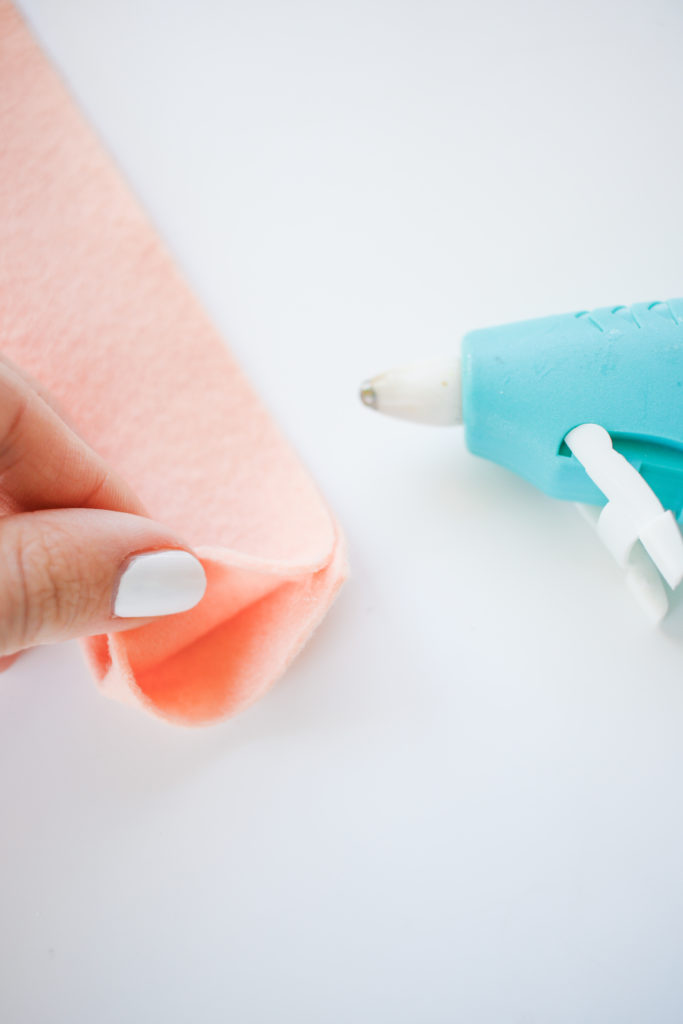
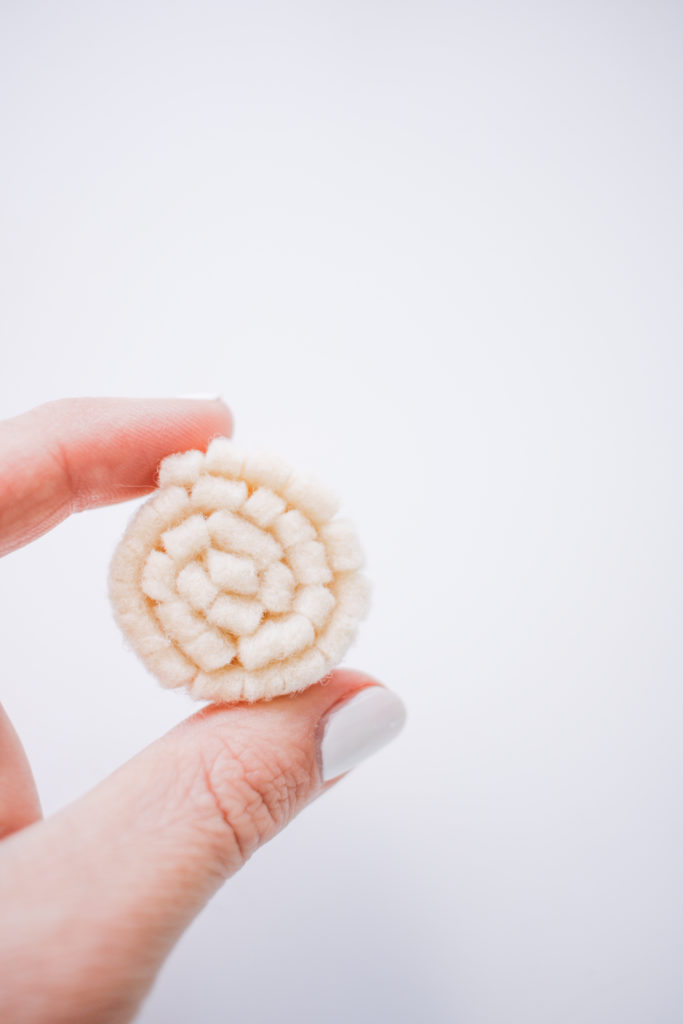
- Cut a strip of felt.
- Fold in half – lengthwise (or hotdog style like we used to say in elementary school -haha!)
- Glue edges together.
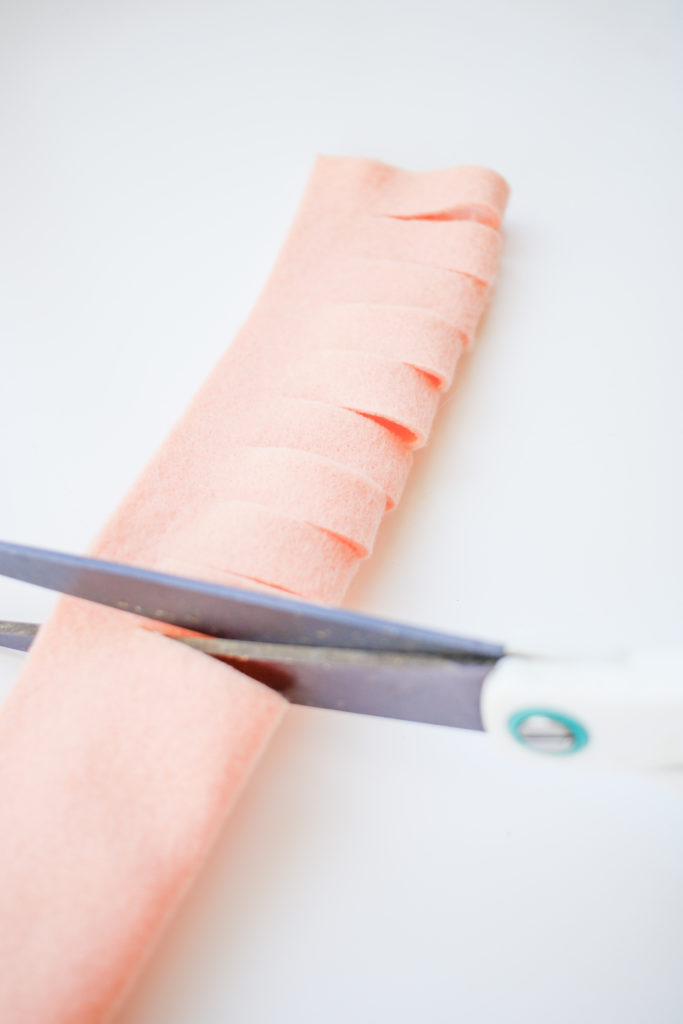
- Cut notches all the way down the folded side of the felt.
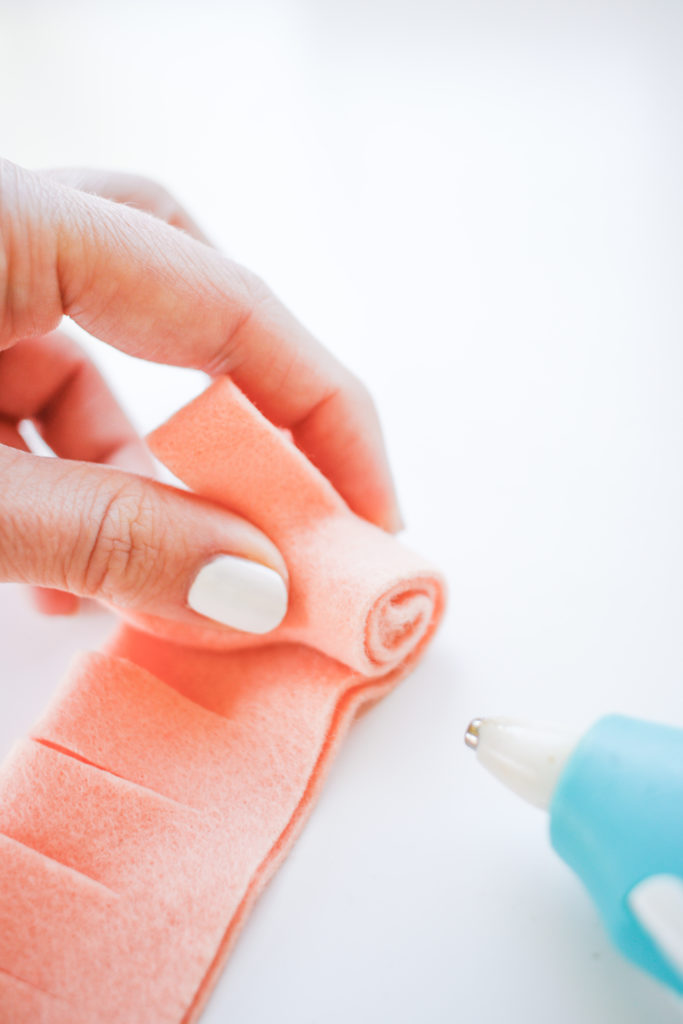
- Roll the felt up starting at on end, and working your way to the other, hot glueing as you go.
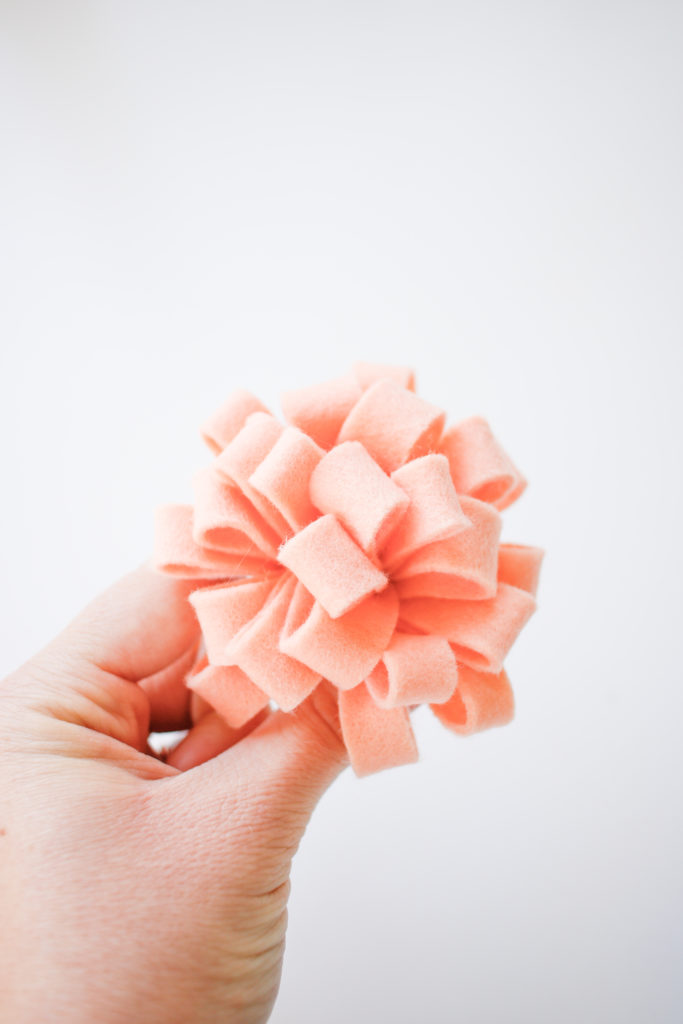
- You’ve got yourself a mum flower!
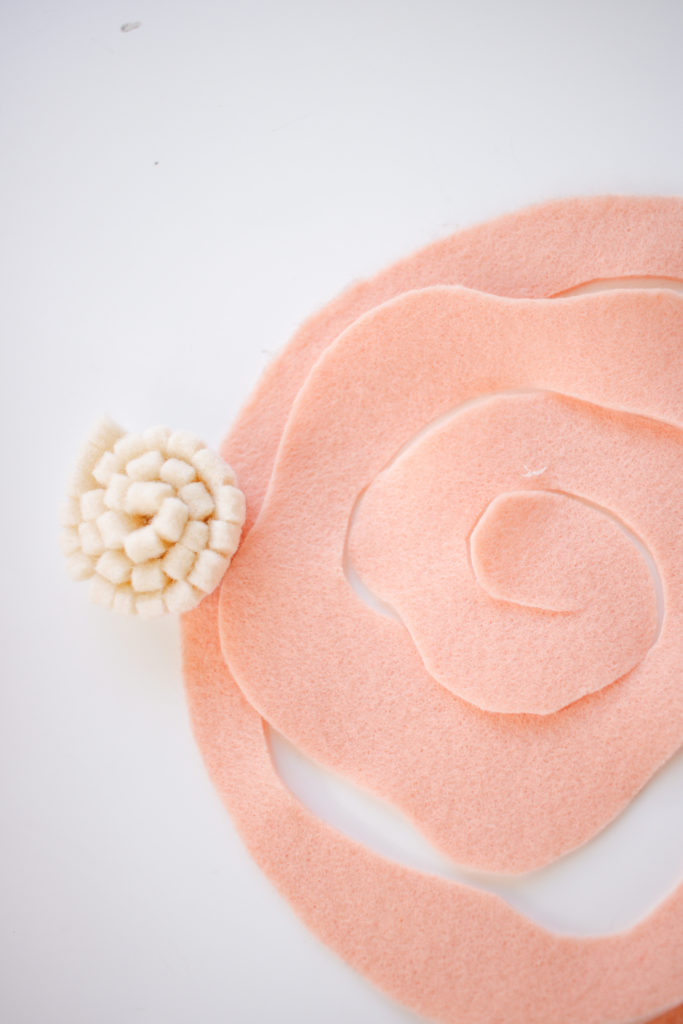
FOR THE RANUNCULUS FLOWER:
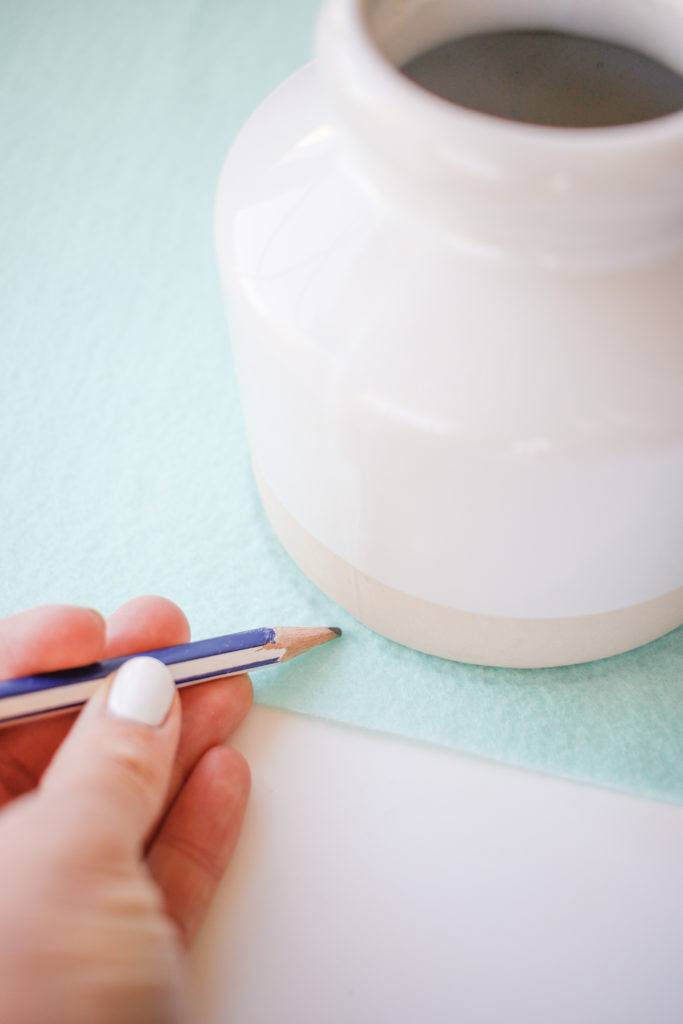
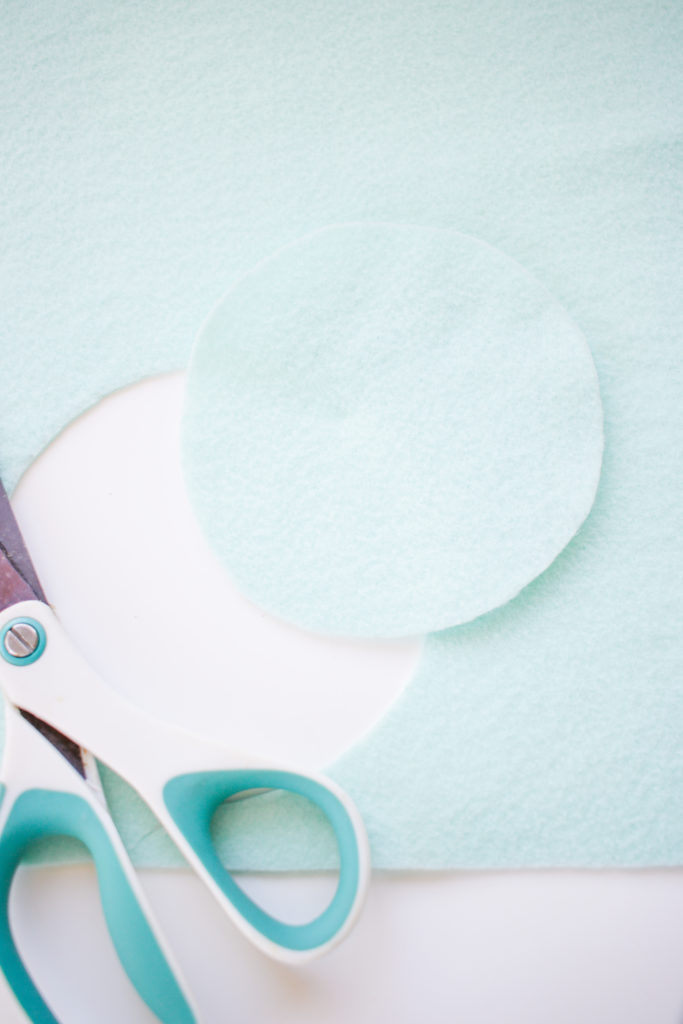
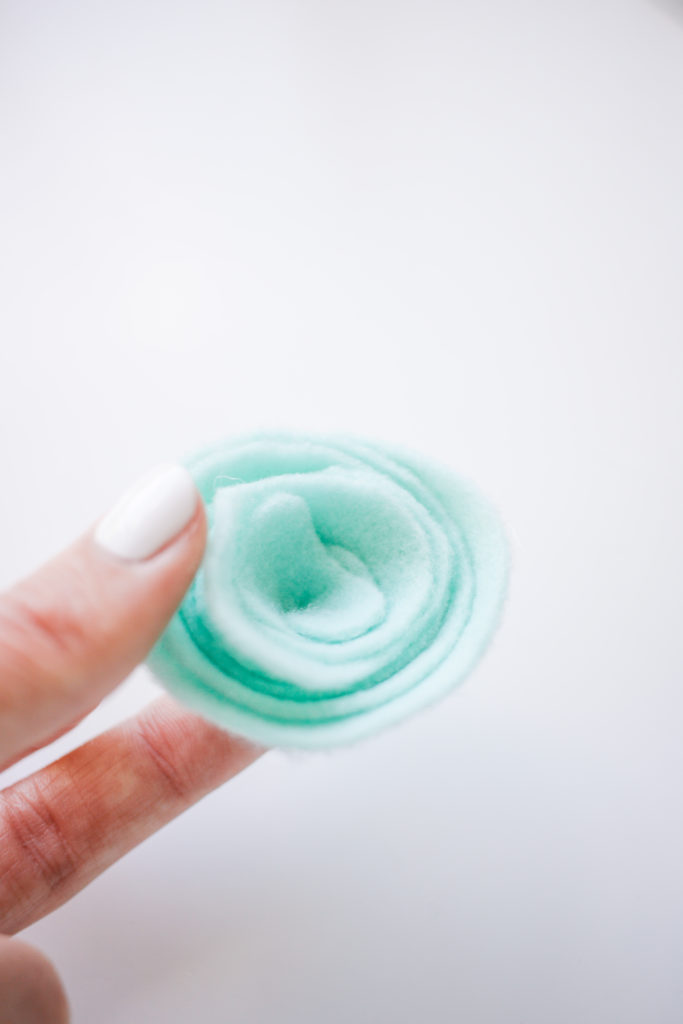
- Use a bowl to trace a circle onto your felt.
- Cut out the felt circle.
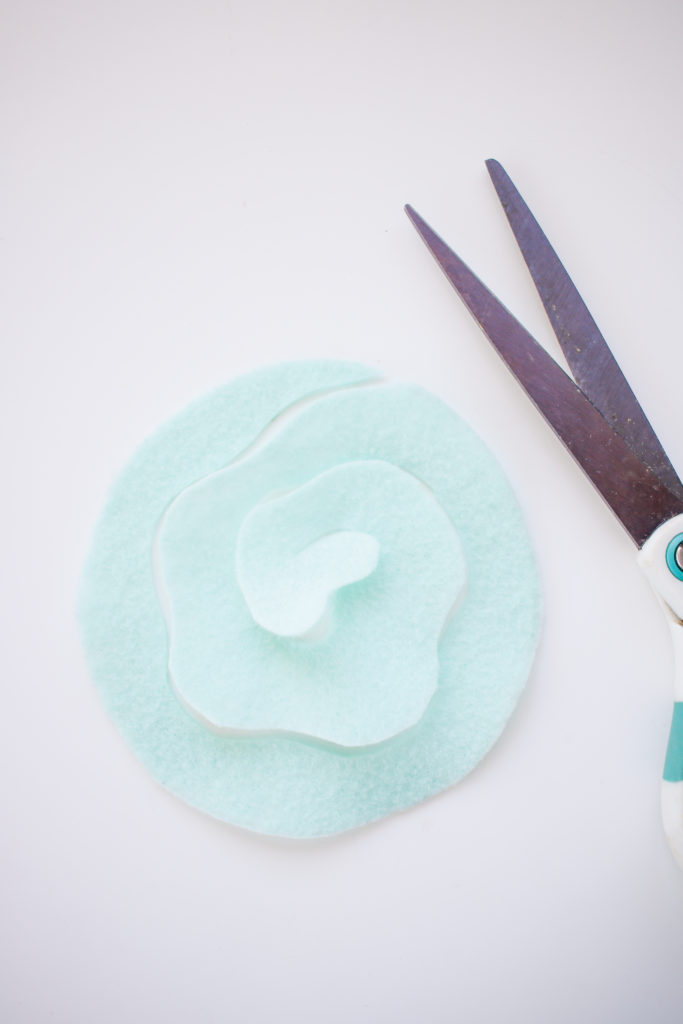
- Take your circle and cut it into a spiral. Sometimes I would make the spiral wavy, sometimes I wouldn’t – EACH produces a different look.
- Starting from the middle, start rolling up your flower, glueing as you go. I would roll it up without glueing first, so that you know how it’s going to look and you can adjust accordingly.
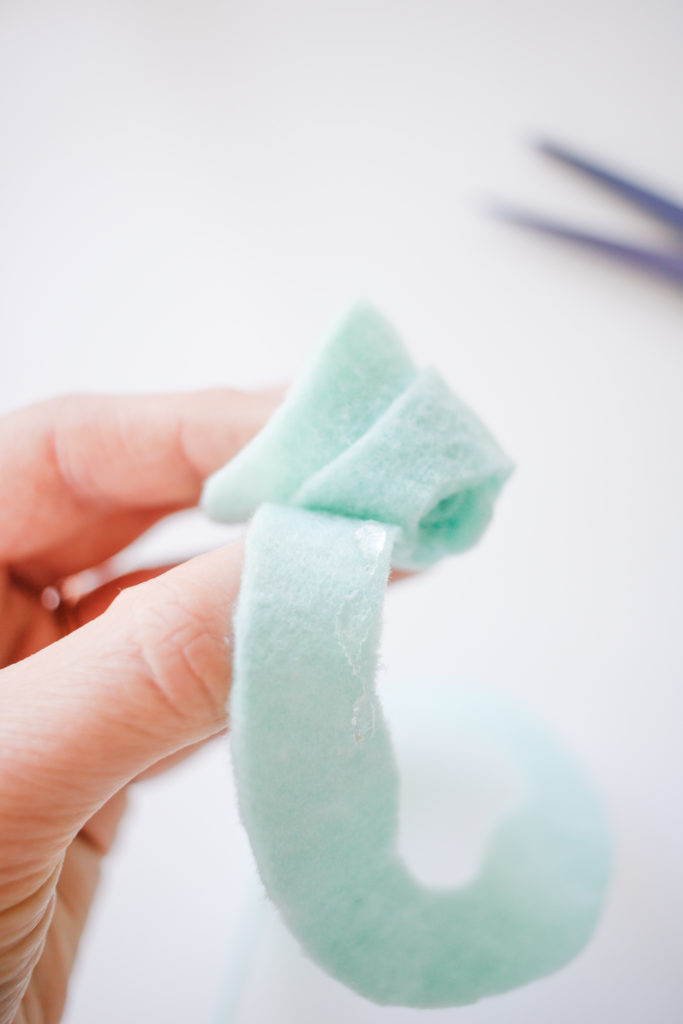
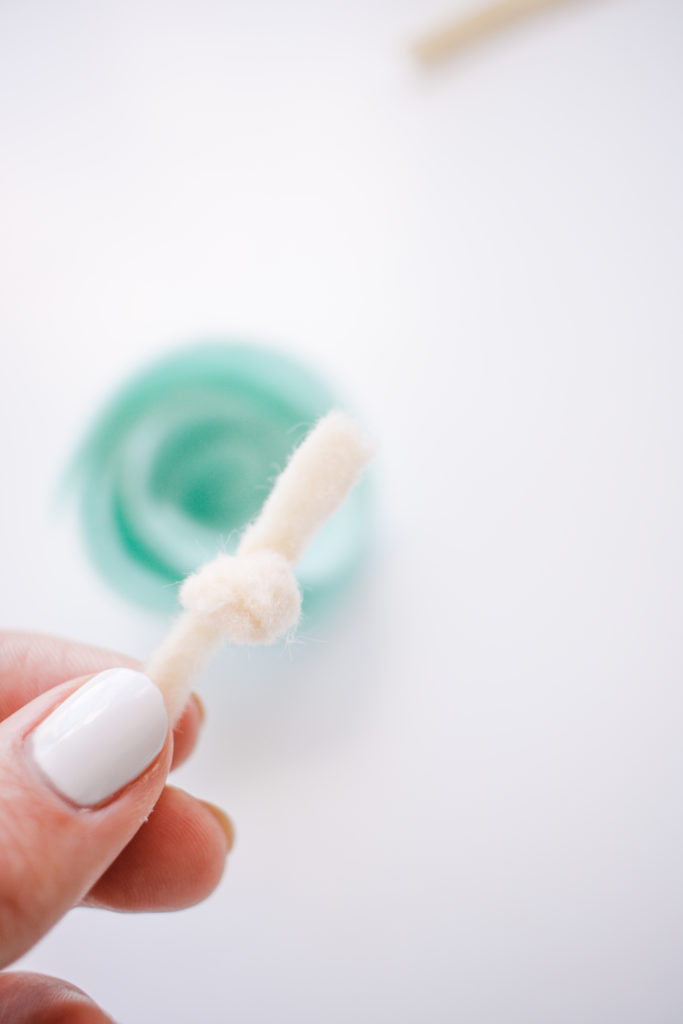
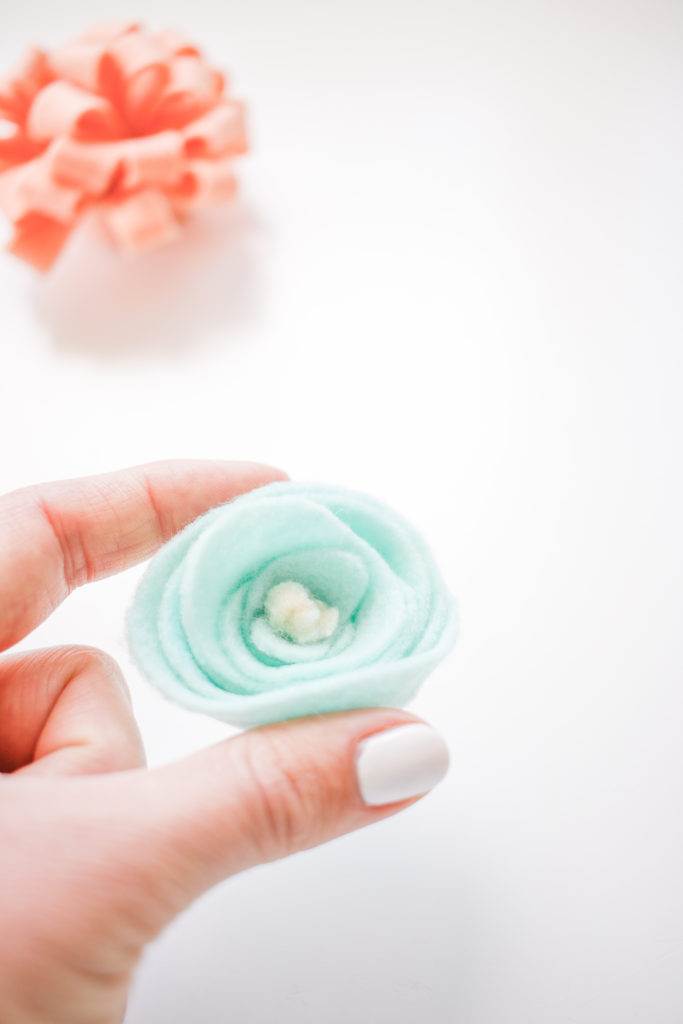
- *Optional* Double knot a tiny strip of felt and glue it in the middle of your flower.
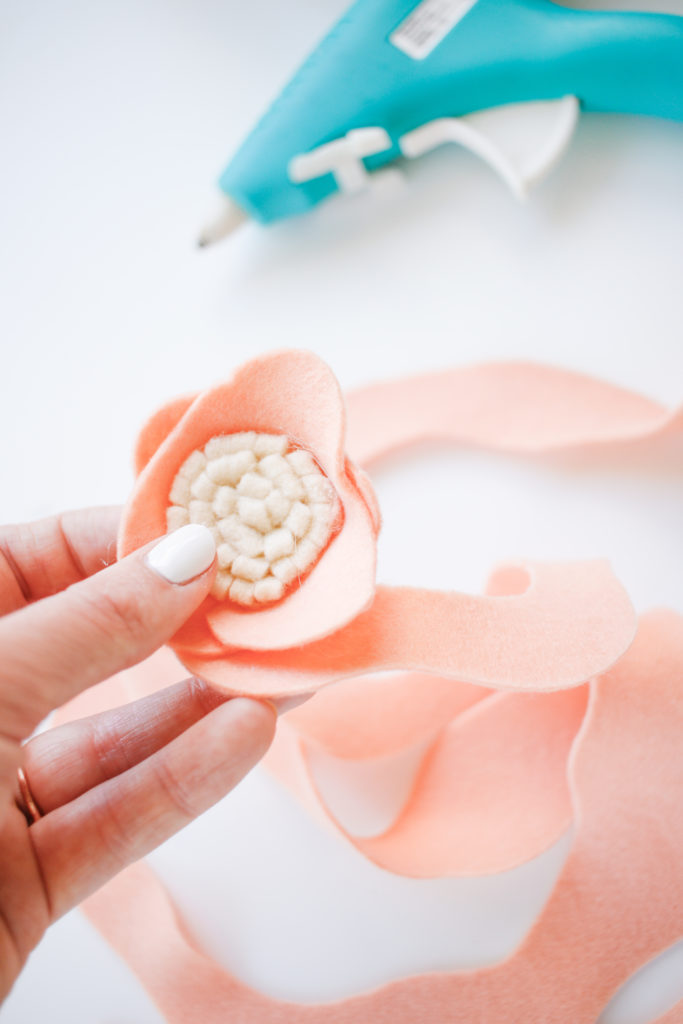
FOR THE RANUNCULUS & MUM COMBO FLOWER:
- Follow the mum steps to make the flowers center – just use a skinner and shorter strip of felt.
- Follow the ranunculus steps, but instead cut a larger circle, start by glueing the center of the swirl to the mini mum you just made. Then, continue with the same steps.
- You are basically just combining both flowers together -easy peasy!
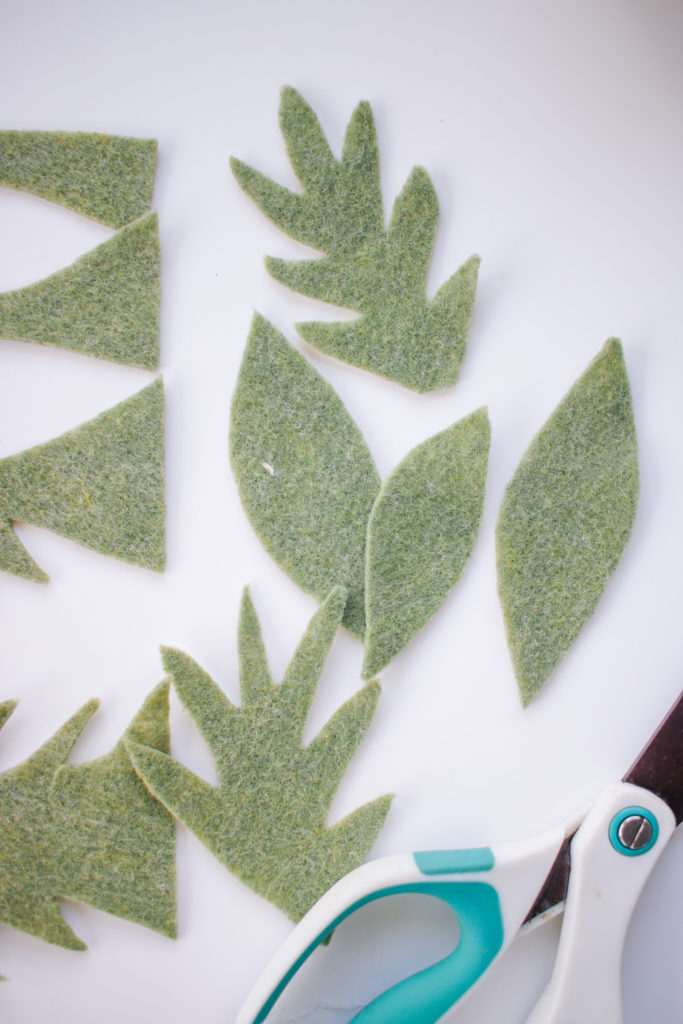
FOR THE LEAVES:
- I honestly just free handed these, I cut out a few basic leaf shapes, then two more branchy looking ones for either side of the wreath.
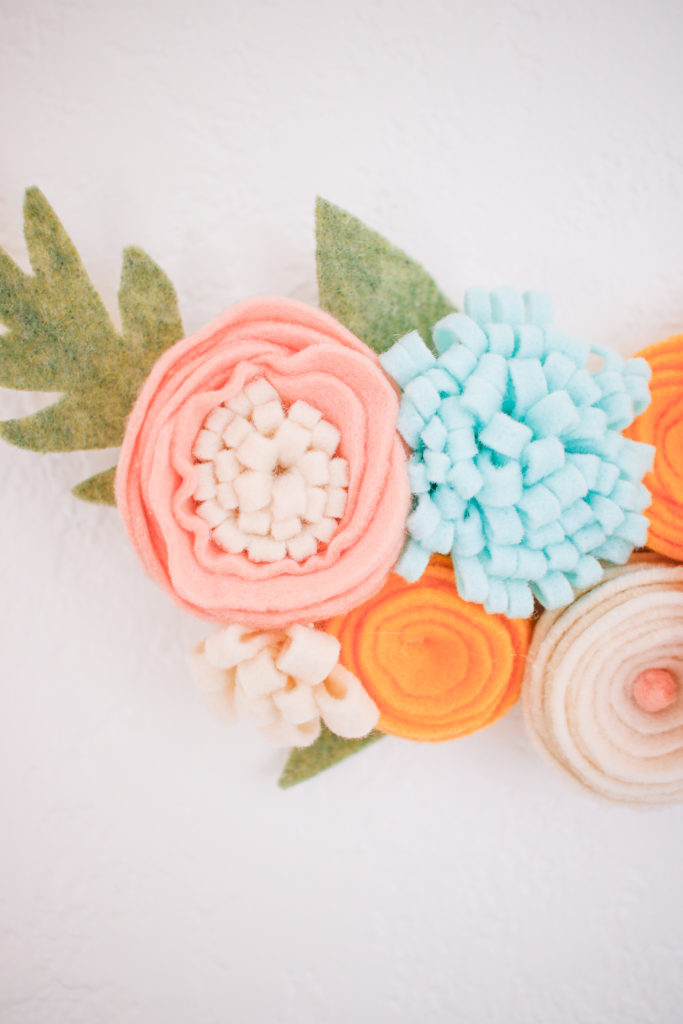
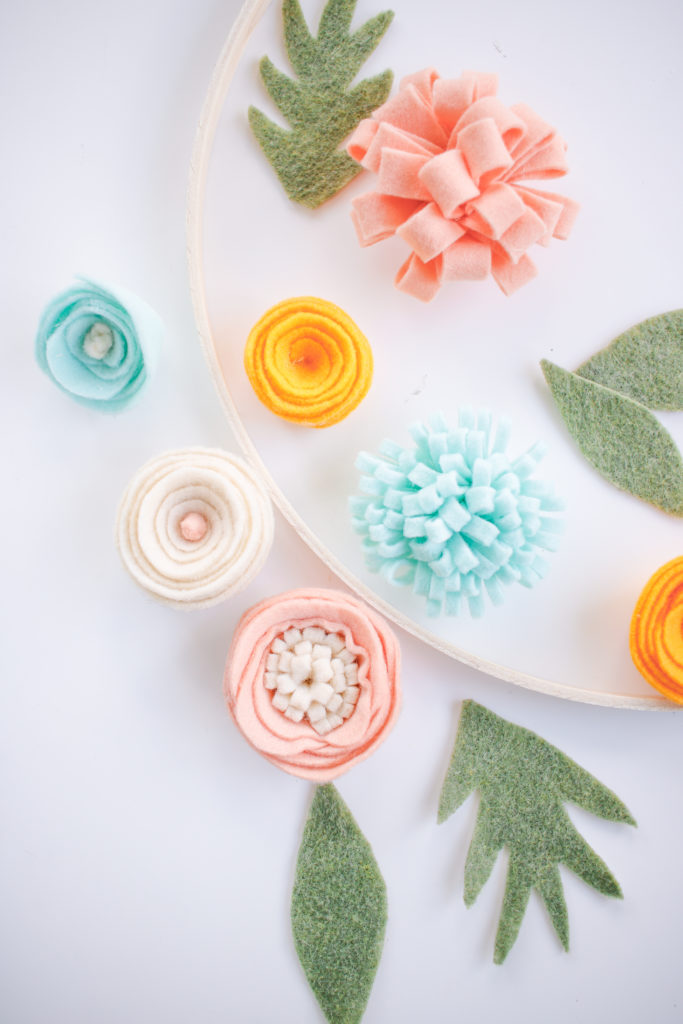
All you do now is arrange your flowers onto your wreath and start glueing – make sure to start with the leaves! Tie a string on your wreath to hang it and that’s it! SO dang fun, simple, and easy!

Sorry to keep talking about how easy this DIY Felt Flower Spring Wreath is, but I was just so pleasantly surprised and I’m so excited for you to make a cutie spring wreath! Pretty pleaseeee tag or DM me if you do @mikylacreates!!!
Very nice post. I just stumbled upon your weblog and wanted to say that I’ve
truly enjoyed browsing your blog posts. After all I’ll be
subscribing to your feed and I hope you write again soon!