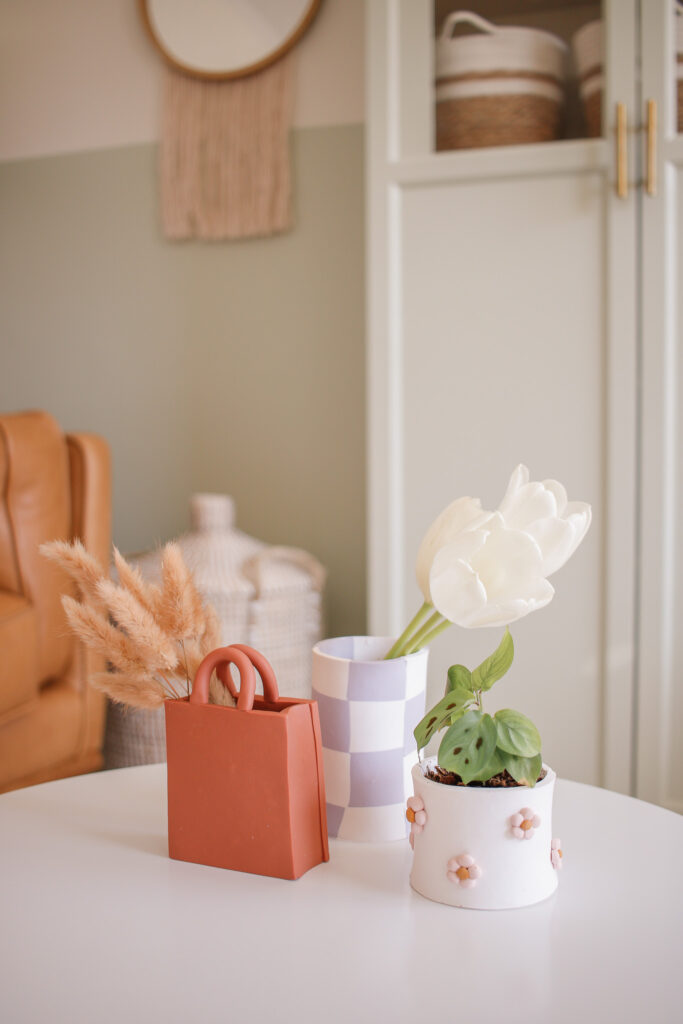
3 DIY Spring Planters
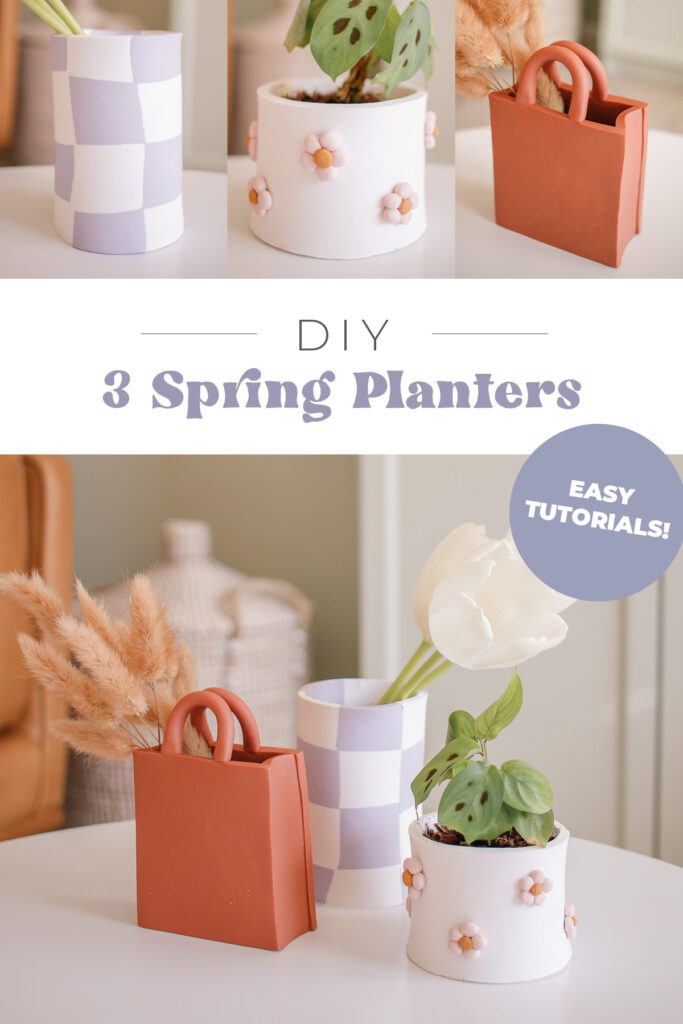
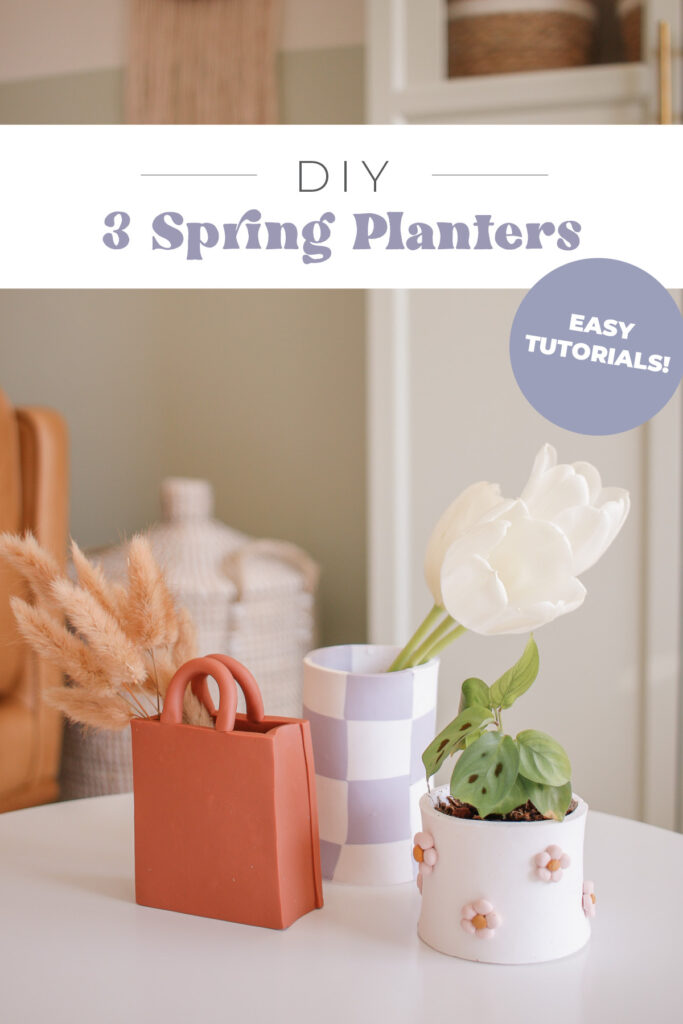
Sculpey sent me a few of their new colors to try out (I am still not over that lavender!!!) so I decided to make some spring planters/vases with these *perfect* colors! I made these in under 2 hours – they were so simple and fun to make! Plus I need to make a million more checkered things since that one turned out so so cute!!
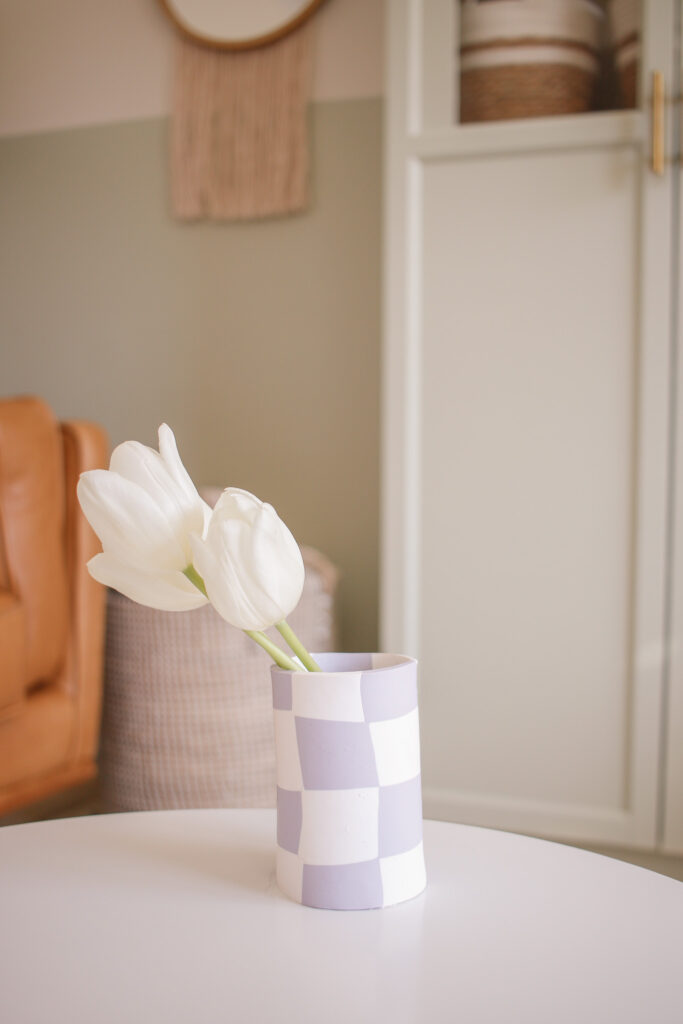
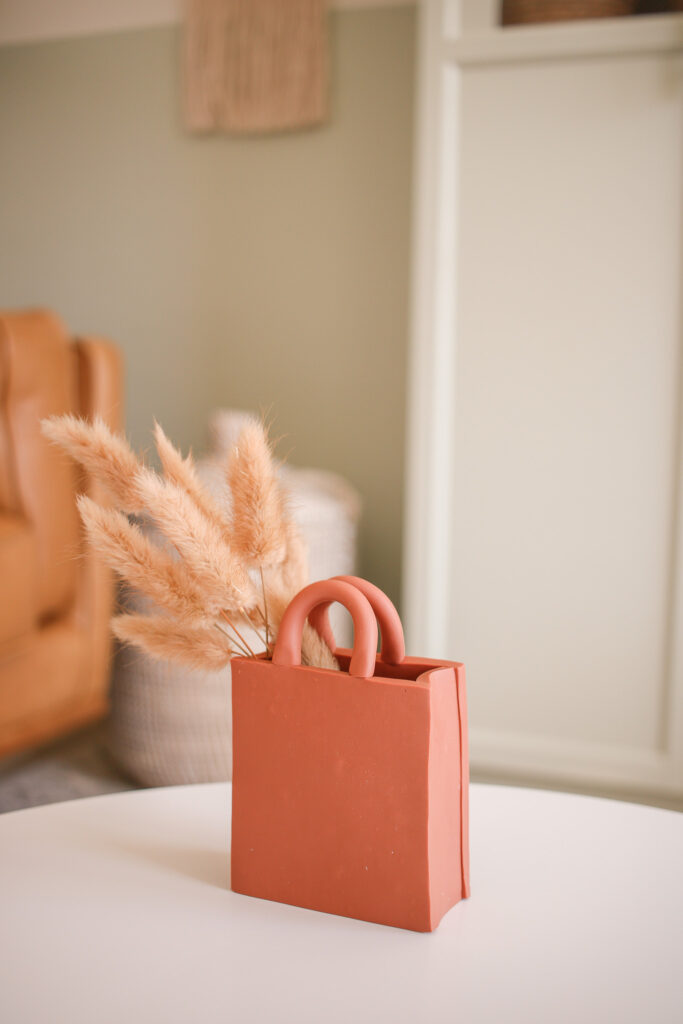
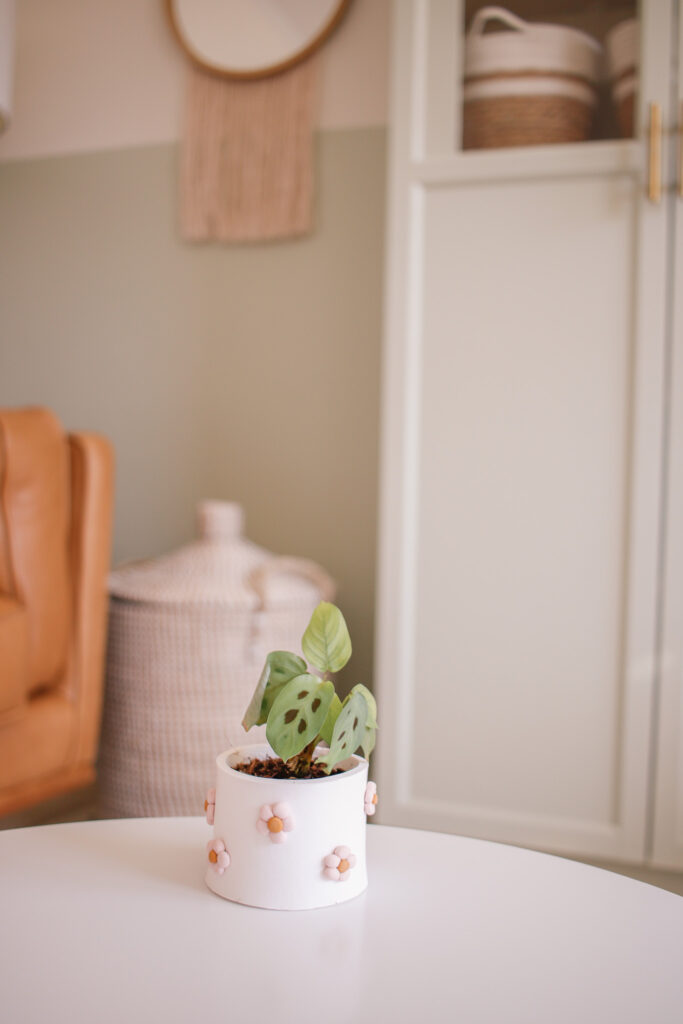
I am dyinggg to know which one is you fave – the purse vase, the checkered vase OR the flower planter!? I think my favorite is the lavender checkered vase, though the purse vase is displayed in my living room so I don’t know!!
If you love Sculpey projects like I do (probably my most used DIY product) then you’re in luck because I have a TON of Sculpey DIYs for you to try HERE!!
Making these really got me in the Spring mood (which I needed since there’s still snow on the ground here) So, let’s just get started!!
SUPPLIES:
Sculpey Premo in Colors:
Lavender, Terracotta, Light Pink, White & Mustard Yellow
Ruler
Cup
DIRECTIONS:
For Lavender Checkered Vase:
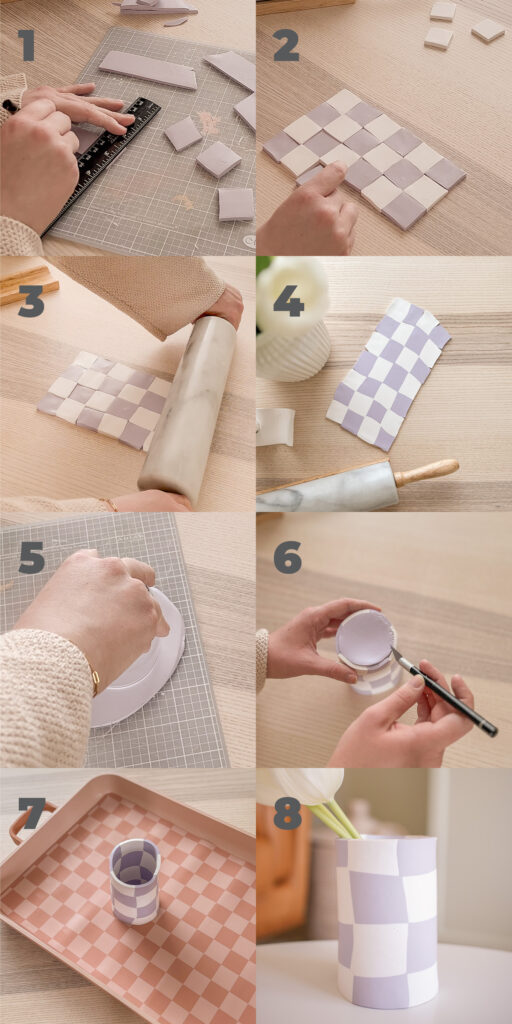
*I used Sculpey Premo in color White and Lavender for this one.
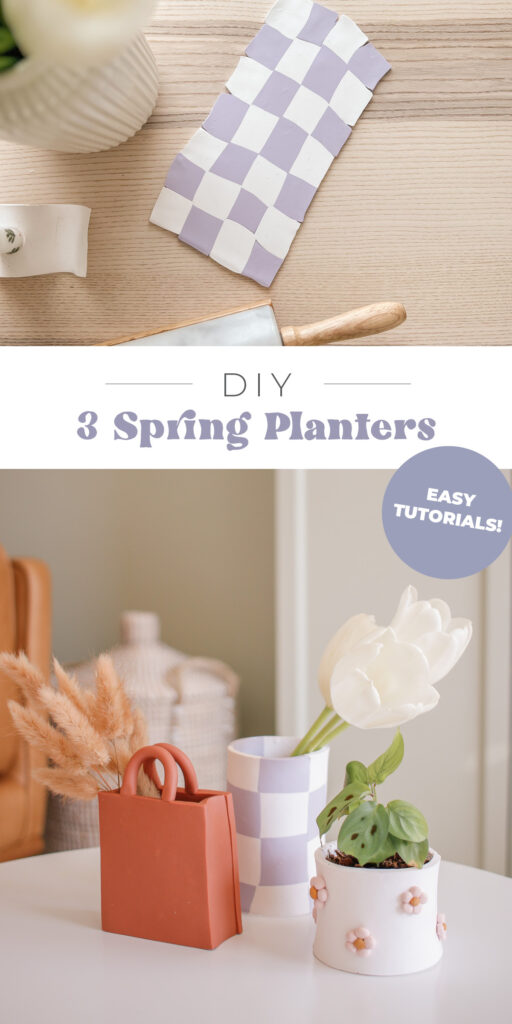
- Roll our Lavender & White Sculpey, then cut into squares. I used the width of the ruler as the width of the squares which made it easier.
- Arrange the lavender and white squares into a checkered pattern.
- Use a rolling pin to roll out the checkered pattern so that they meld together into one sheet.
- Then use your ruler and exacto knife to cut it into an even rectangle.
- Roll out more Lavender Sculpey and use a cup to cut out a circle.
- Roll your checkered clay into a cylinder and add the purple circle to the bottom to form a vase. Use your exacto knife and score the vase to attach.
- Place your vase on a baking sheet and bake according to package instructions.
- I sealed the bottom of my vase using modge podge so prevent leaking. Then add flowers and enjoy!!
For Purse Vase:
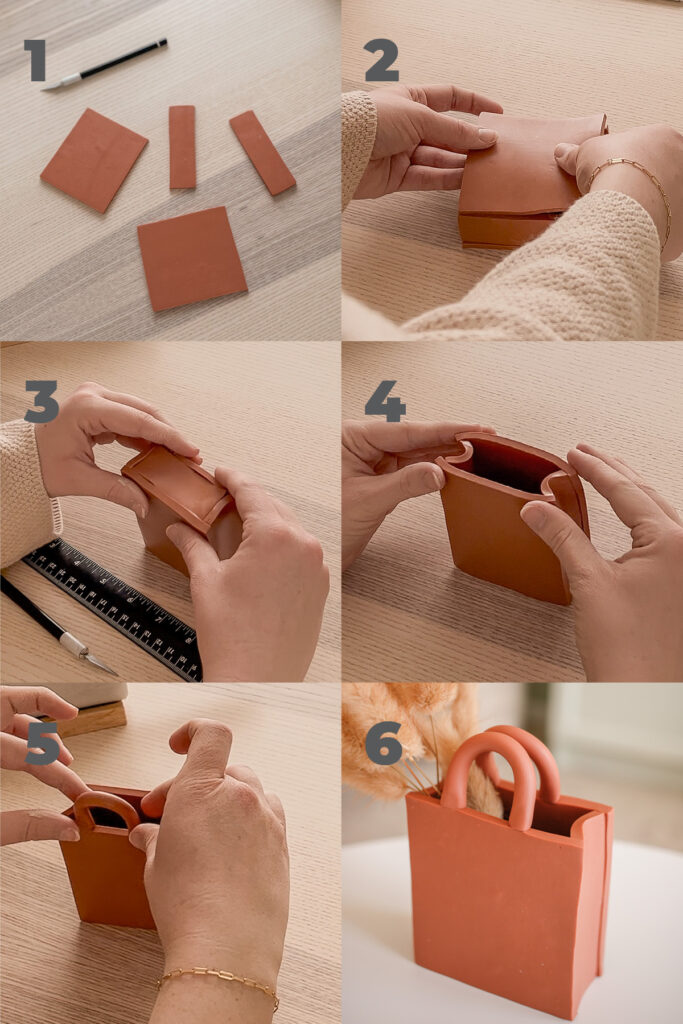
*I used Sculpey Premo in color Terra Cotta for this one.
- Cut out 2 large square pieces and two long rectangles with your exacto knife and ruler.
- Assemble the pieces together, smoothing the joints with your finger to bind the pieces together.
- Cut a long rectangle for the bottom of the purse, and bind it to the other clay by smoothing with your finger and scoring with your exacto knife.
- Pinch the tops of the purse to give it more of a bag look, and less boxy.
- Roll out clay for the straps, cup two the same length and secure to either side of the purse.
- Bake according to package directions then fill it with dried flowers like I did or anything you’d like!
For Flower Planter:
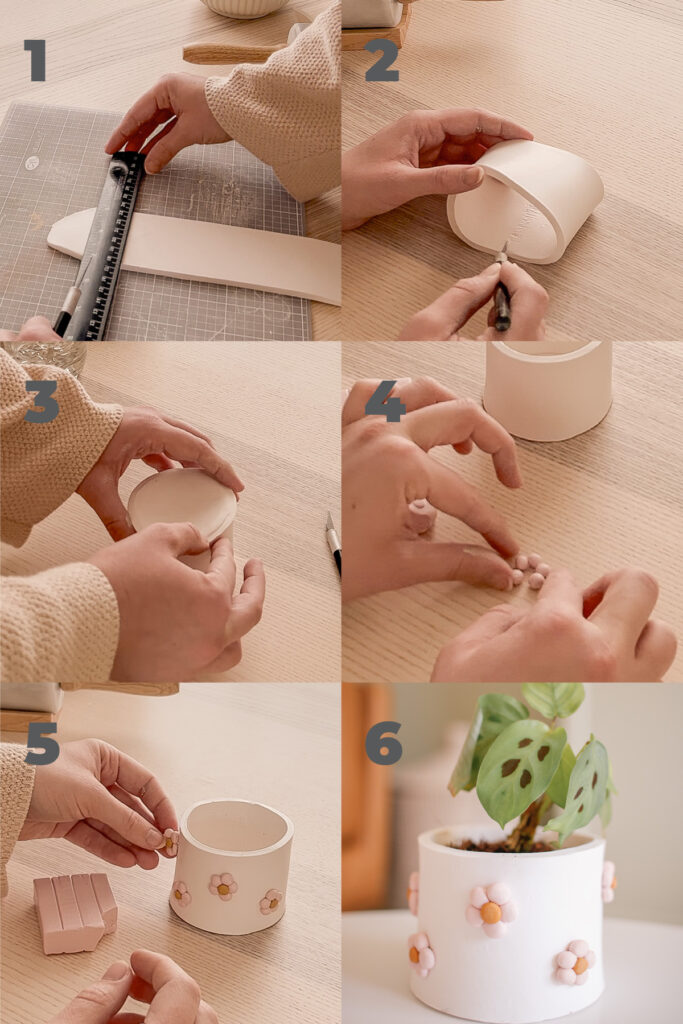
*I used Sculpey Premo in color White, Light Pink and Mustard Yellow for this one.
- Roll out clay and cut into a long rectangle using an exacto knife and ruler.
- Attach the ends of the rectangle together to form a cylinder, and use your exacto knife to score the edges together.
- Use a cup or circle cookie cutter to cut out a circle, and attach it to the bottom of your cylinder.
- Roll out tiny balls in the Light Pink color, and form 5 balls into a flower, add a mustard yellow ball to the center.
- Repeat this process and press the flowers into the side of the planter.
- Bake according to package directions, and add a plant to your cutie planter!
Making these spring planters SO quick and easy, and turned out adorably. Plus it gives you an excuse to buy yourself some flowers 😉 If you make any of these 3 DIY Spring Planters pretty please tag or DM me on Instagram @mikylacreates
