
DIY Floral Clay Paper Towel Holder
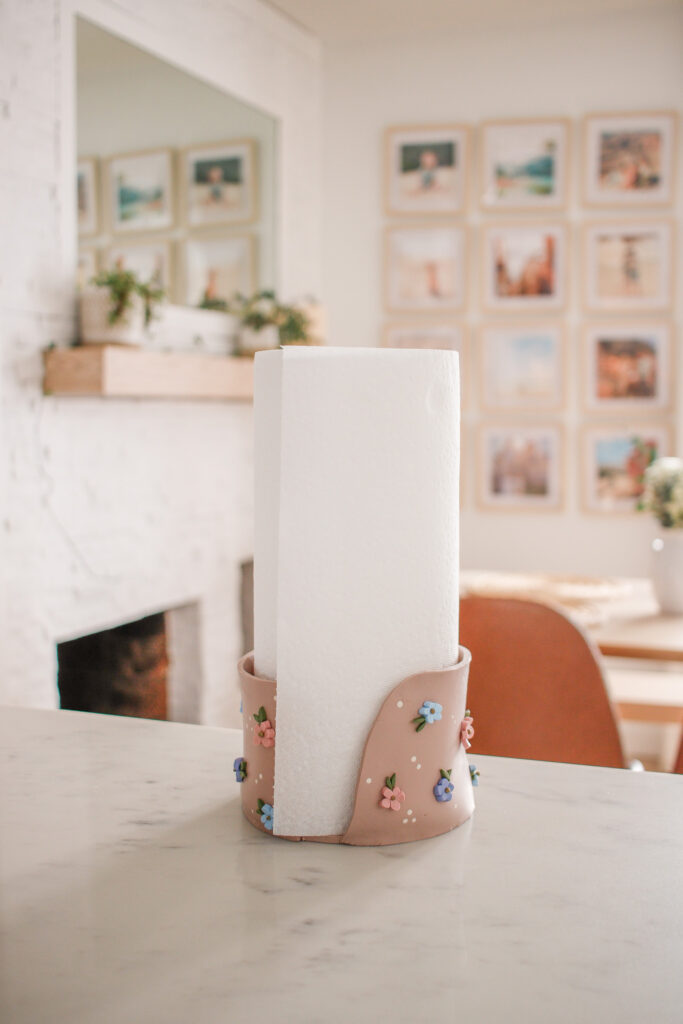
This is maybe the most random thing I’ve ever made out of Sculpey (& I’ve made A LOT – see a million projects HERE) but it is so cute AND useful! If something is going to sit on my counter and I have to see it all day, then I want it to at least look good! For this reason our paper towel has sat under our sink for as long as I can remember, but it’s not that convenient. Enter: the paper towel holder! I’ve never found one cute enough and this one IS!!
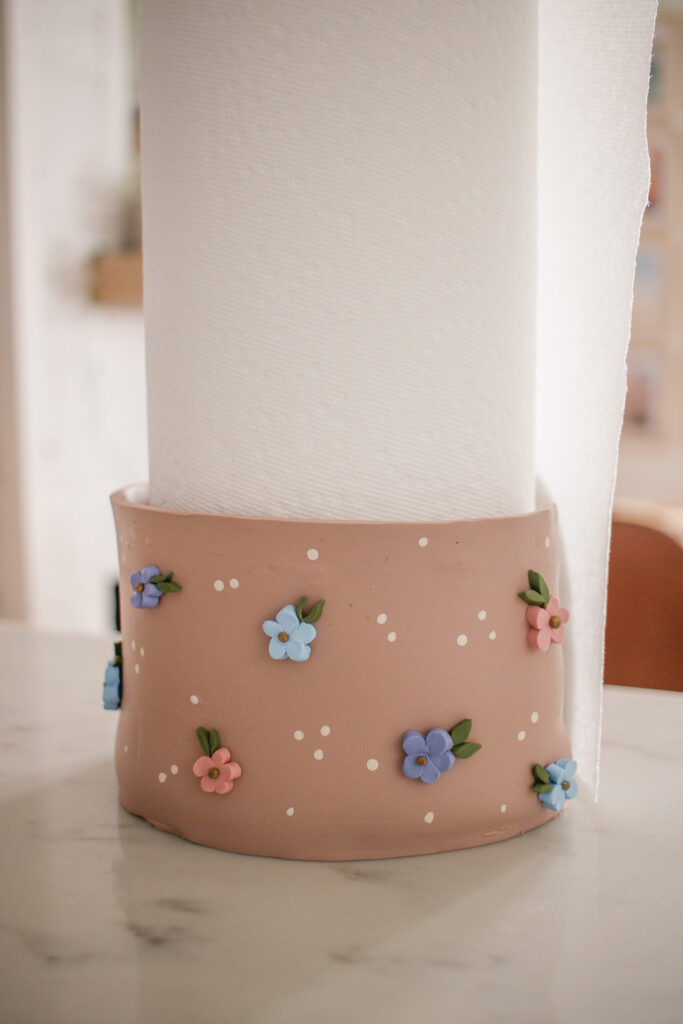
The good news is that it’s also pretty quick to make! I made it while my three year old also played with Sculpey (he made a cocoon for his toy caterpillar haha!) I also love that I could really persoalize it with whatever colors and designs I wanted. I naturally chose flowers because of course I did. I used some of Sculpey’s NEW clay colors which are honestly too good!!
The new colors are: French pink, Thistle (a periwinkle) & Almond rose (a pinky tan that I used for my base). I also used pale blue, antique gold and spanish olive from the Sculpey Premo collection! check out alllll of Sculpey’s clay colors HERE!
Well let’s get to this DIY!
SUPPLIES:
Sculpey Souffle in colors: French Pink, Thistle & Almond Rose.
Sculpey Premo in colors: Pale Blue, Antique Gold & Spanish Olive.
Rolling Pin – This marble one is my FAVE
Ruler
DIRECTIONS:
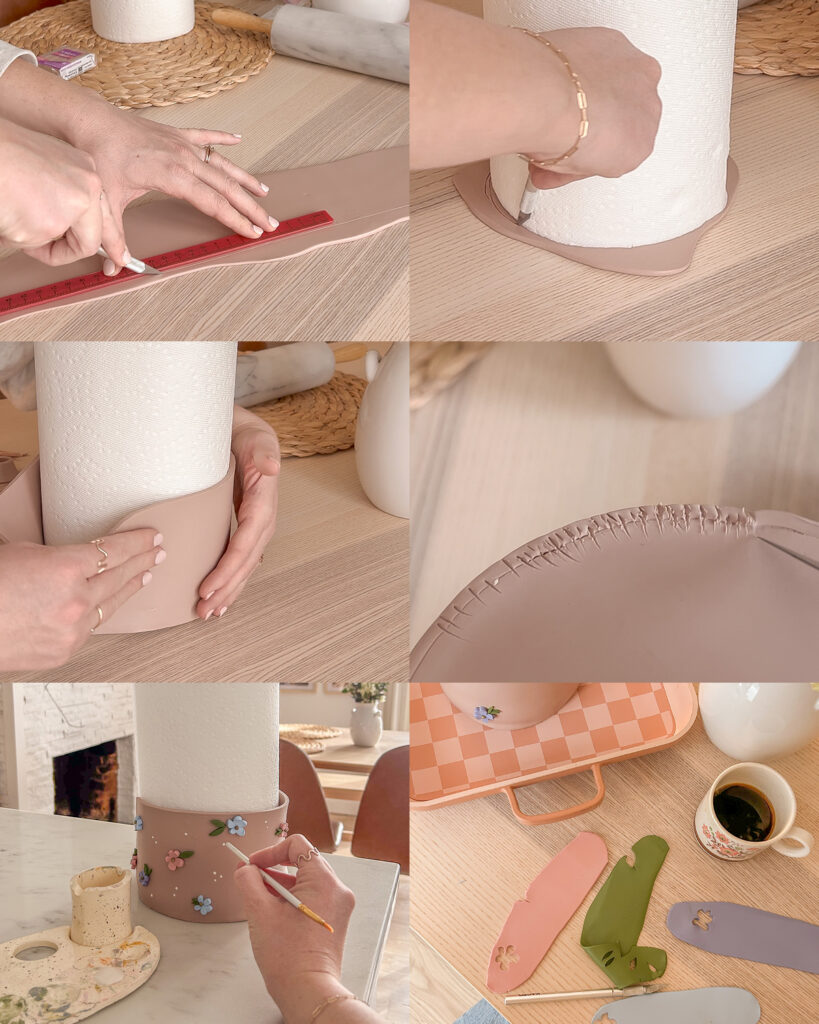
- Roll out your base colored clay ( I used Almond Rose) Roll it out thin and long.
- Roll Out another piece of clay for the bottom (should be roughly a circle)
- Use your paper towel roll to cut out the bottom piece into a circle.
- Use a ruler to cut out a long rectangle to wrap around the circle and form your paper towel holder.
- I wrapped my clay piece around my paper towel to make it easier. Then I used my exacto knife to cut out a rounded shape where the paper towel will come out (see photos).
- I smoothed the two clay pieces together as best I could and then flipped the paper towel holder upside-down and scored where they connected with my exacto knife.
- Now for the fun part! Roll out very thin pirces of all of your colors of clay. Then use your exacto knife to cut out leaves and flowers. I just freehanded this part. I made simple leaves and flower shapes. I also rolled tiny balls of gold clay for the center of the flowers.
- Attach your flowers to your paper towel holder by simply pressing them firmly onto the clay
- Remove your paper towel, and add glass cups or vases to hold the shape of the paper towel holder while it bakes. Bake it according to the package directions.
- Put your paper towel in and enjoy having something cute AND useful in your kitchen!
If you make your own pretty PLEASE tag or DM me @mikylamiller on Instagram so I can see!! After making the little clay flowers I want to make more things with little clay flowers on them – SO CUTE!! See you next time for another DIY!!
A big thank you to Sculpey for sponsoring this post!!